The Grinchiest Peppermint Christmas Cookies Recipe Ever
Whip up a batch of these delightful Christmas Grinch cookies with peppermint flavor that will steal hearts faster than the Grinch stole Christmas.
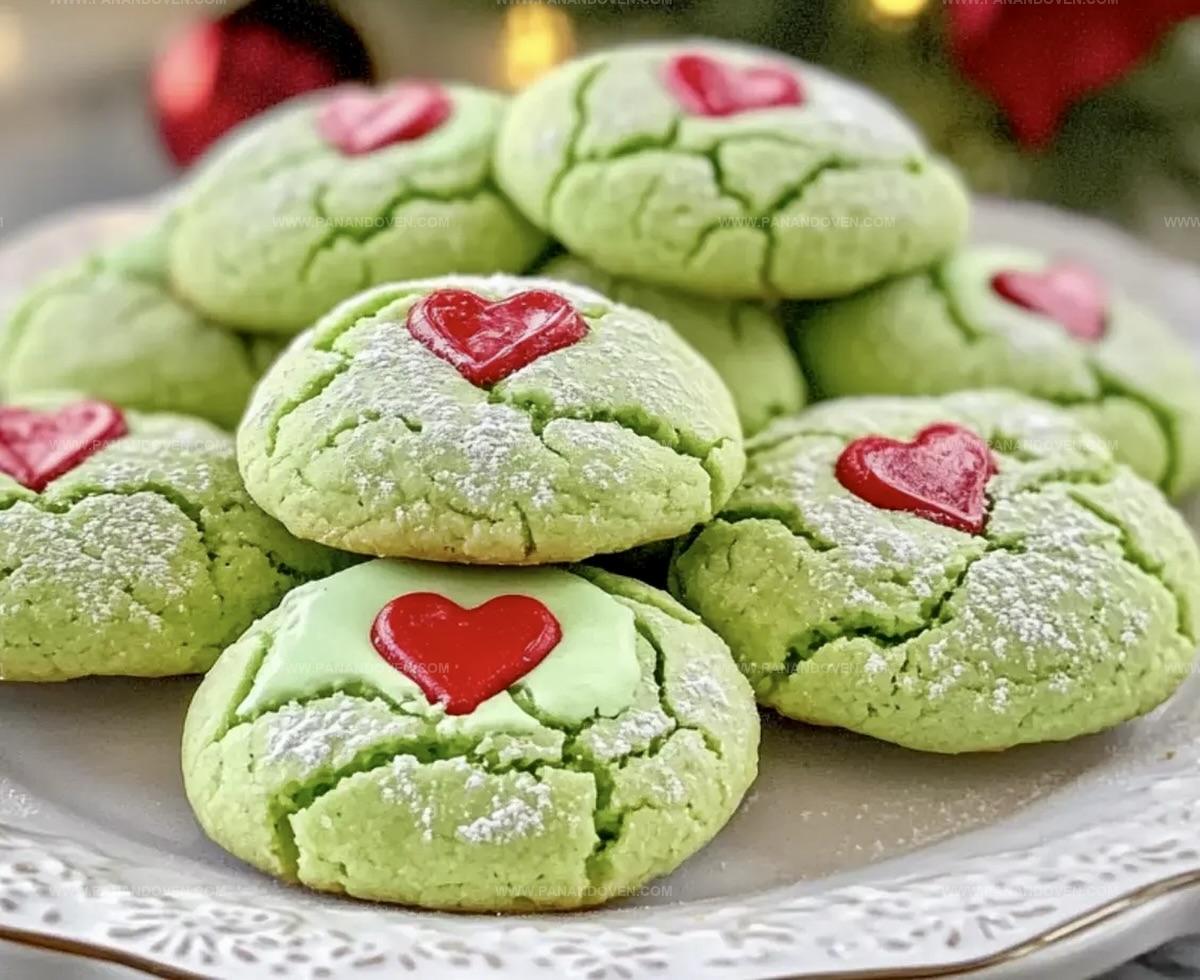
Soft, chewy, and bursting with festive green color, these treats capture the playful spirit of the holiday season.
The vibrant green hue and peppermint twist make them a showstopper at any holiday gathering.
Rich buttercream frosting and a sprinkle of candy cane pieces add a delicious crunch to each bite.
Kids and adults alike will fall in love with these whimsical cookies that bring a touch of Whoville magic to your dessert table.
Trust me, these cookies are so good, they’ll make even the grumpiest Grinch smile.
Bake a batch and watch the holiday cheer spread like wildfire.
Why Grinch Cookies Are So Festive
Ingredients for Peppermint Grinch Cookies
Main Ingredients:Flavor Enhancers:Coating and Decoration:What You’ll Need for Grinch Cookies
Steps to Make Grinch Cookie Magic
Step 1: Warm Up the Oven
Crank the oven to 375F and grab a baking sheet.
Line it with parchment paper so your cookies won’t stick.
Step 2: Mix the Base
Grab your mixing bowl and blend together:Whip these ingredients until they become a smooth, creamy mixture.
Step 3: Add Flavor and Color
Pour in your flavor boosters:Mix on low speed until everything looks perfectly green and smells delightful.
Step 4: Prepare Cookie Coating
In a separate bowl, whisk together powdered sugar and cornstarch.
This magical mixture will give your cookies that perfect snowy look.
Step 5: Shape the Cookies
Use a cookie scoop to create little dough balls.
Roll each one in the sugar mixture, making sure they’re completely covered.
Step 6: Bake to Perfection
Place cookies on the baking sheet, leaving space between each one.
Slide into the oven and bake for 10-12 minutes until edges look set and tops appear dry.
Step 7: Add Grinch Hearts
Right after pulling cookies from the oven, place a heart-shaped sprinkle on top of each cookie.
Gently press so they stick.
Step 8: Cool and Enjoy
Let cookies rest on the baking sheet for 5 minutes, then transfer to a wire rack.
Allow them to cool completely before devouring these festive treats.
Tips for Green Grinch Cookie Fun
Fun Grinch Cookie Twists to Try
Serving Up Grinch Cookie Smiles
Storing Your Grinch Cookies Easily
FAQs
Yes, the green food coloring transforms the cookie dough into a vibrant Grinch-inspired green color that’s fun and festive for Christmas.
While a mixer helps create a smoother batter, you can use a wooden spoon or spatula to mix the ingredients, though it might require more arm strength and take longer.
The combination of peppermint and vanilla extracts creates a refreshing, minty taste that perfectly complements the holiday theme of the Grinch cookies.
The small red heart sprinkles symbolize the Grinch’s heart growing, referencing the classic Christmas story and adding a cute, meaningful touch to the cookies.
Print
Festive Christmas Grinch Cookies with Peppermint Flavor Recipe
- Total Time: 27 minutes
- Yield: 24 1x
Description
Playful Christmas Grinch cookies blend whimsical green sugar cookies with peppermint zest. Cheerful holiday treats delight guests with festive colors and spirited seasonal cheer.
Ingredients
Main Ingredients:
- 15.25 ounces (432 g) white cake mix
- 2 large eggs, room temperature
- 8 tablespoons (113 g) unsalted butter, softened
Flavoring and Coloring:
- 2 teaspoons peppermint extract or mint extract
- 1/2 teaspoon vanilla extract
- Green gel food coloring
Coating and Decoration:
- 1/4 cup (32 g) powdered sugar
- 3 tablespoons cornstarch
- Red heart-shaped sprinkle or cinnamon
Instructions
- Warm the oven to 375°F and line a baking sheet with parchment paper, ensuring a non-stick surface for your festive treats.
- Combine cake mix, softened butter, and eggs in a mixing bowl, using an electric mixer to create a smooth, uniform batter.
- Incorporate peppermint and vanilla extracts, then add green food coloring to achieve a vibrant Grinch-like hue. Mix thoroughly until color is evenly distributed.
- Prepare a coating mixture by blending powdered sugar and cornstarch in a separate small bowl, creating a light dusting mixture.
- Utilize a cookie scoop to form uniform dough balls, then generously roll each one in the sugar-cornstarch mixture, ensuring complete coverage.
- Arrange cookie dough balls on the prepared baking sheet, spacing them approximately one inch apart to allow for spreading during baking.
- Bake for 10-12 minutes, watching for set edges and a dry surface that indicates perfect doneness.
- Immediately after removing from the oven, delicately press a heart-shaped sprinkle onto the center of each warm cookie, creating a whimsical Grinch-themed decoration.
- Allow cookies to rest on the baking sheet for 5 minutes, then transfer to a wire cooling rack to achieve complete cooling and optimal texture.
Notes
- Customize Color Intensity experiment with different shades of green food coloring to match your Grinch theme perfectly, ranging from pale mint to deep emerald.
- Enhance Peppermint Flavor boost the mint profile by adding an extra 1/4 teaspoon of peppermint extract or using crushed candy canes as a topping for more festive crunch.
- Gluten-Free Adaptation swap the regular cake mix with a gluten-free cake mix alternative to make these cookies accessible for those with wheat sensitivities.
- Storage Strategy store cookies in an airtight container at room temperature for up to 5 days, separating layers with parchment paper to prevent sticking and maintain their delicate texture.
- Prep Time: 15 minutes
- Cook Time: 12 minutes
- Category: Desserts, Snacks
- Method: Baking
- Cuisine: American
Nutrition
- Serving Size: 24
- Calories: 120
- Sugar: 4 g
- Sodium: 180 mg
- Fat: 5 g
- Saturated Fat: 3 g
- Unsaturated Fat: 2 g
- Trans Fat: 0 g
- Carbohydrates: 17 g
- Fiber: 0 g
- Protein: 1 g
- Cholesterol: 25 mg
Clara Thompson
Recipe Developer & Food Educator
Expertise
Plant-based and vegetarian recipe development, Nutritional analysis and meal planning, Culinary education and workshop facilitation, Content writing with a focus on healthy living
Education
Diploma in Culinary Arts, Mt. San Jacinto College, CA
Focus: Comprehensive culinary training with an emphasis on sustainable cooking practices.
Certificate in Nutrition and Healthy Living, Cornell University (Online Program)
Focus: Understanding the principles of nutrition to create balanced and health-conscious recipes.
Clara lives where fresh ideas and fresh ingredients meet. She pairs her culinary know-how with her passion for healthy, planet-friendly cooking.
For Clara, good food should taste great, nourish your body, and feel easy to make. Her recipes highlight whole foods, colorful produce, and a deep respect for seasonal eating.