Dreamy Eggless Pistachio Tiramisu Recipe for Sweet Bliss
Creamy, rich desserts often spark joy at the dinner table, and this easy pistachio tiramisu no eggs recipe delivers pure bliss.
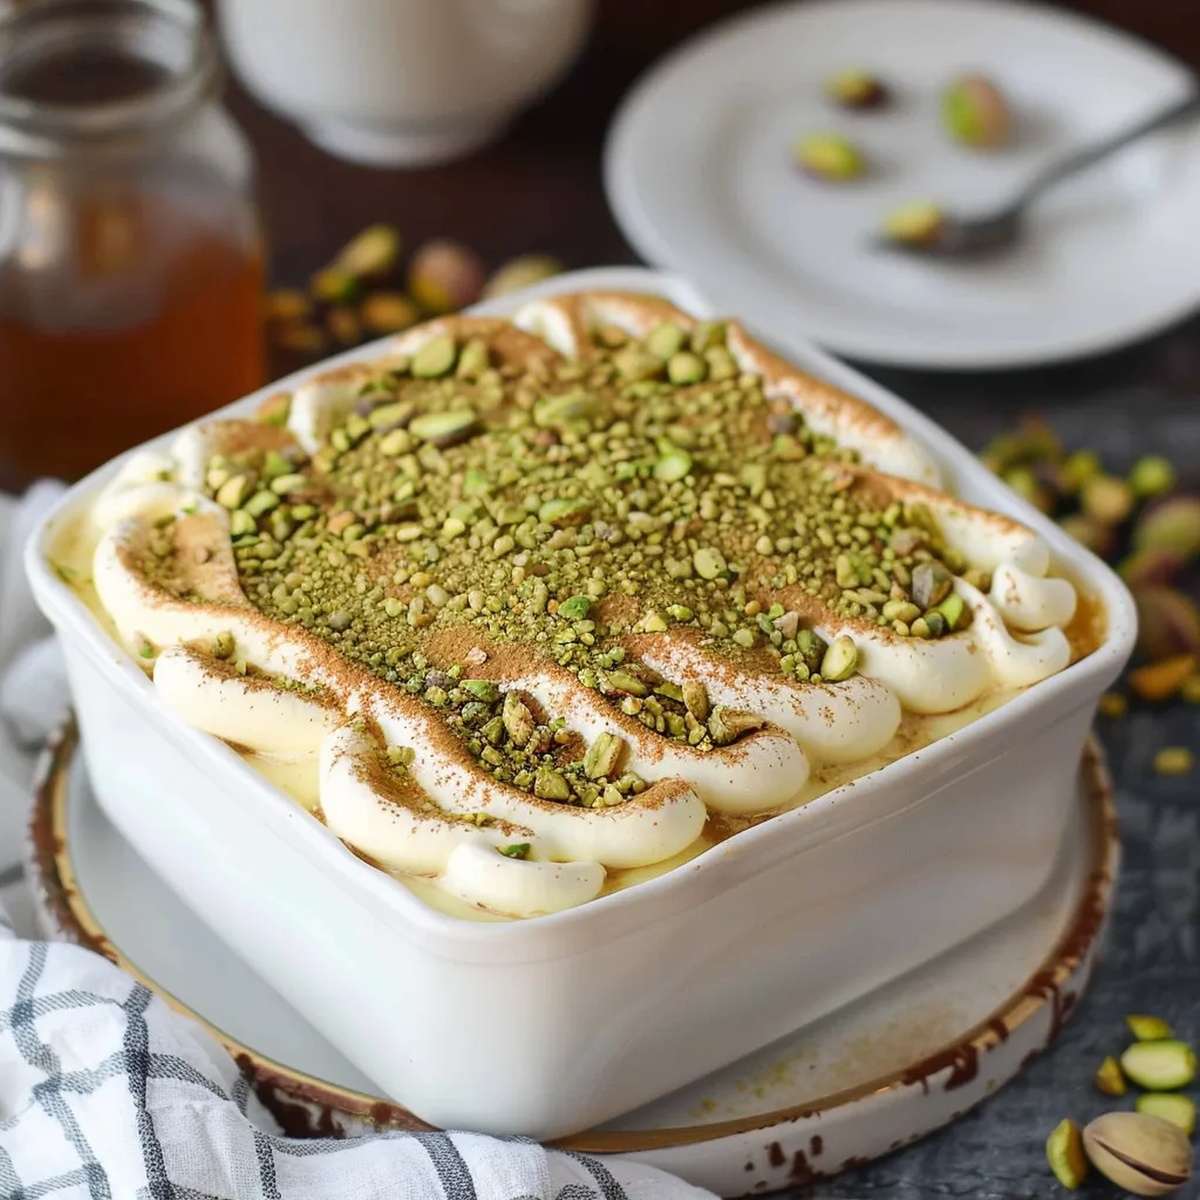
Delicate layers of mascarpone and pistachio create a sophisticated twist on the classic Italian treat.
The silky smooth texture melts in your mouth, promising an indulgent experience.
no traditional eggs means a simpler preparation that doesn’t compromise on flavor.
Nutty pistachio notes dance through each spoonful, adding depth and elegance to this beloved dessert.
Coffee-soaked ladyfingers provide the perfect foundation for this luscious creation.
Whip up this irresistible treat and watch your guests swoon with delight.
Easy Pistachio Tiramisu (No Eggs) – Why You’ll Love It
Ingredients Needed for Pistachio Tiramisu Bliss
Cream Base:Coffee and Flavor Enhancers:Dry and Binding Ingredients:Tools for Layering a Pistachio Tiramisu
Step-by-Step Instructions for Easy Pistachio Tiramisu
Step 1: Craft the Creamy Base
Grab a large mixing bowl and combine pistachio paste with heavy cream.
Use a hand mixer or whisk to blend until silky smooth.
Add mascarpone, vanilla, almond extract, and a pinch of salt.
Continue beating until the mixture looks perfectly blended and has no lumps.
Step 2: Whip Up Fluffy Cream
In a clean mixing bowl, pour the remaining heavy cream and sprinkle granulated sugar.
Use a stand mixer or electric beaters to whip the cream.
Keep beating until the cream forms stiff, elegant peaks that hold their shape.
Step 3: Merge Cream Mixtures
Gently fold the whipped cream into the mascarpone mixture using a rubber spatula.
Blend carefully to maintain the cream’s airy texture.
The goal is a light, creamy consistency without deflating the whipped cream.
Step 4: Prepare Coffee Soak
In a shallow dish, whisk together:Create a rich, aromatic liquid for soaking ladyfingers.
Step 5: Build First Tiramisu Layer
Quickly dip each ladyfinger into the coffee mixture.
Place them in a single layer across the bottom of a 9×9-inch pan.
Spread half the cream mixture evenly over the ladyfingers, reaching all corners.
Step 6: Create Second Tiramisu Layer
Repeat the dipping process with remaining ladyfingers.
Arrange them carefully over the first cream layer.
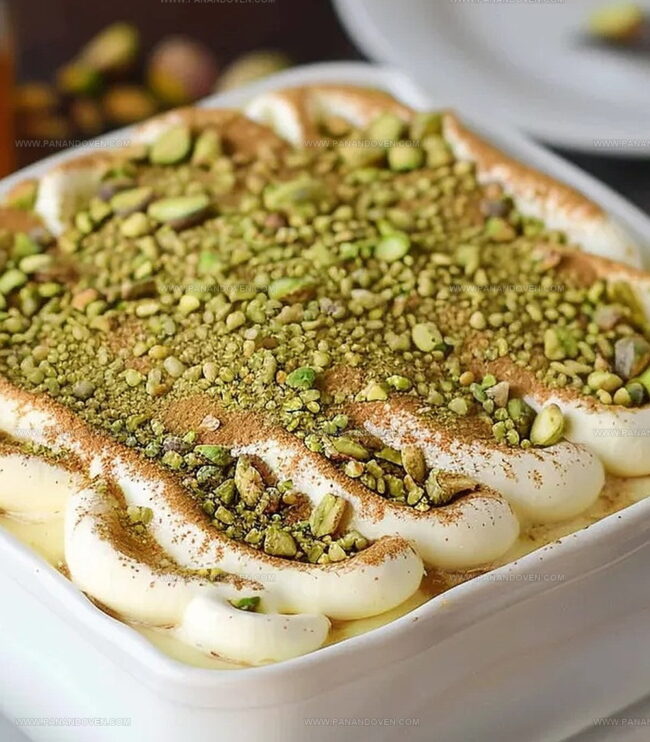
Top with the remaining cream mixture, smoothing the surface for a clean, professional look.
Step 7: Decorate and Chill
Sprinkle the top with:Refrigerate for at least 2 hours or overnight to let flavors meld and texture set.
Serve chilled for a delightful dessert experience.
Top Tips for the Creamiest Egg-Free Tiramisu

Fun Variations for Pistachio Tiramisu Fans
Creative Ways to Serve Pistachio Tiramisu
How to Store Your Pistachio Tiramisu
FAQs
Pistachio paste is a smooth, creamy spread made from ground pistachios. You can find it in specialty food stores, gourmet markets, or online retailers like Amazon. Some baking supply stores and Middle Eastern grocery stores also carry it.
Yes, absolutely! Simply omit the alcohol from the coffee soak. The recipe will still taste delicious, and the coffee mixture will work perfectly without it. If you want to add depth of flavor, you can use coffee extract or additional pistachio flavoring.
Mascarpone is crucial for the authentic, creamy texture of tiramisu. If you can’t find mascarpone, you can substitute it with cream cheese, though the texture and taste will be slightly different.
Print
Easy Pistachio Tiramisu No Eggs Recipe
- Total Time: 30 minutes
- Yield: 8 1x
Description
Indulgent pistachio tiramisu without eggs captures Italian dessert magic for modern kitchens. Creamy mascarpone layers with pistachio cream create a luxurious treat you’ll savor with pure delight.
Ingredients
Main Ingredients:
- 2/3 cup pistachio paste (173g), store bought or homemade
- 1 cup mascarpone cheese (8 ounces), softened
- 45 ladyfingers (two 3.5 ounces boxes)
- 2 cups strong brewed coffee
Cream and Sweeteners:
- 1 1/4 cups heavy whipping cream (290g), chilled
- 1/3 cup granulated sugar (73g)
- 1 teaspoon vanilla extract
- 1/2 teaspoon almond extract
- 1 tablespoon amaretto or other liquor (optional)
Seasonings and Garnish:
- 1/4 teaspoon kosher salt
- 1/4 teaspoon pistachio flavoring
- Pistachio paste (thinned with a little water if needed)
- Chopped pistachios
Instructions
- Craft a velvety pistachio base by blending pistachio paste with a portion of heavy cream until silky smooth. Incorporate mascarpone, vanilla, almond extract, and salt, whisking until completely integrated.
- Whip the remaining heavy cream with granulated sugar using a stand mixer or hand beaters, continuing until stiff, voluminous peaks emerge.
- Gently fold the whipped cream into the mascarpone mixture, creating a light, airy cream using a rubber spatula. Set aside the luxurious mixture.
- Prepare a coffee soak by whisking together coffee, optional alcohol, and pistachio flavoring in a shallow container.
- Swiftly dip half the ladyfingers into the coffee mixture, ensuring quick saturation. Arrange them in a single, snug layer across the bottom of a 9×9-inch pan.
- Spread exactly half of the cream mixture over the ladyfingers, using a spatula to create an even, smooth surface that reaches all edges.
- Repeat the dipping process with remaining ladyfingers, creating a second layer in the pan. Top with the final cream mixture, smoothing carefully to create a pristine surface.
- Embellish the tiramisu with pistachio paste (thinned with water if needed) and sprinkle chopped pistachios across the top.
- Refrigerate for minimum 2 hours or overnight, allowing flavors to meld and texture to set perfectly before serving.
Notes
- Adjust Coffee Strength wisely, as the intensity impacts the overall flavor profile of this delicate dessert.
- Use Room Temperature mascarpone and cream for smoother, more uniform mixing and better texture integration.
- Consider Gluten-Free Alternatives by substituting traditional ladyfingers with gluten-free versions or almond sponge cake for those with dietary restrictions.
- Experiment with Non-Alcoholic Options by replacing liqueur with extra coffee or pistachio syrup to maintain depth of flavor while keeping the dessert alcohol-free.
- Prep Time: 30 minutes
- Cook Time: 0 minutes
- Category: Desserts
- Method: None
- Cuisine: Italian
Nutrition
- Serving Size: 8
- Calories: 352
- Sugar: 9.1 g
- Sodium: 120 mg
- Fat: 24 g
- Saturated Fat: 12 g
- Unsaturated Fat: 8 g
- Trans Fat: 0 g
- Carbohydrates: 28 g
- Fiber: 1.2 g
- Protein: 6.7 g
- Cholesterol: 50 mg
Clara Thompson
Recipe Developer & Food Educator
Expertise
Plant-based and vegetarian recipe development, Nutritional analysis and meal planning, Culinary education and workshop facilitation, Content writing with a focus on healthy living
Education
Diploma in Culinary Arts, Mt. San Jacinto College, CA
Focus: Comprehensive culinary training with an emphasis on sustainable cooking practices.
Certificate in Nutrition and Healthy Living, Cornell University (Online Program)
Focus: Understanding the principles of nutrition to create balanced and health-conscious recipes.
Clara lives where fresh ideas and fresh ingredients meet. She pairs her culinary know-how with her passion for healthy, planet-friendly cooking.
For Clara, good food should taste great, nourish your body, and feel easy to make. Her recipes highlight whole foods, colorful produce, and a deep respect for seasonal eating.