Easy Cheesy Manicotti Recipe That Everyone Will Love
Pasta nights just got a delicious upgrade with this mouthwatering cheesy manicotti recipe that promises pure comfort.
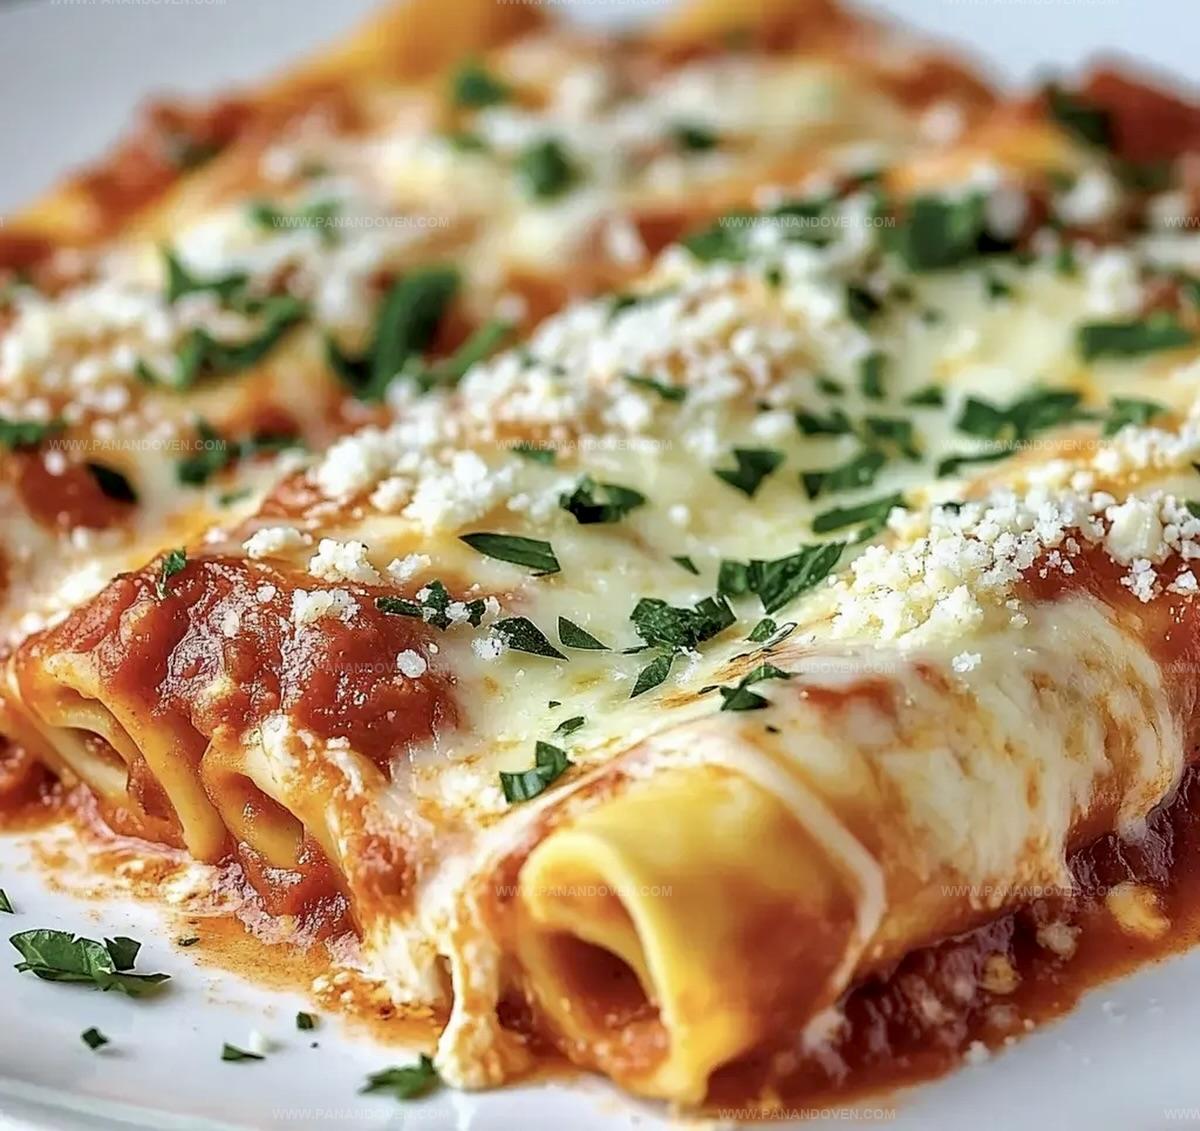
These tender pasta tubes stuffed with creamy cheese blend perfectly with rich marinara sauce.
Every bite delivers a symphony of flavors that dance across your palate.
Classic Italian ingredients come together in a simple yet elegant dish that feels like a warm culinary hug.
Layers of ricotta, mozzarella, and parmesan create a luxurious filling that melts beautifully inside delicate pasta shells.
The combination of herbs and cheese makes this manicotti a crowd-pleasing meal that transforms an ordinary dinner into a special occasion.
Prepare to fall in love with this irresistible pasta masterpiece that will have everyone asking for seconds.
Why Easy Cheesy Manicotti Always Delivers Comfort
Every Ingredient for Cheesy Manicotti Success
Pasta:Cheese Mixture:Seasoning and Herbs:Sauce and Preparation:Garnish:Tools You Need to Roll and Fill Manicotti
Manicotti Prep Steps for Creamy Pasta Nights
Step 1: Boil Pasta
Cook manicotti in salted water according to package directions.
Once cooked, carefully drain the pasta and spread them out on parchment paper to cool and prevent sticking.
Step 2: Prepare Baking Dish
Warm up the oven to 350°F.
Grab a 9×13 baking dish and give it a light spray with cooking oil.
Pour a thin layer of marinara sauce across the bottom of the dish to create a delicious base.
Step 3: Create Cheese Filling
In a spacious mixing bowl, combine the following ingredients:Blend everything together until you have a smooth, creamy mixture.
Step 4: Stuff Pasta Shells
Get creative with filling the manicotti!
Use a spoon, your fingers, or a pastry bag to gently stuff the cheese mixture into the cooled pasta tubes.
Pro tip: start filling from one end, pack it full, then flip and fill the other side to ensure each shell is completely loaded with cheesy goodness.
Step 5: Arrange in Baking Dish
Carefully place the filled manicotti in a single layer on top of the sauce in the prepared baking dish.
Make sure they’re nestled comfortably.
Once all shells are in place, generously cover them with the remaining marinara sauce.
Step 6: Initial Baking
Cover the dish completely with aluminum foil.
Slide the covered dish into the preheated oven and bake for 40 minutes, allowing the flavors to meld together beautifully.
Step 7: Final Cheese Topping
Remove the foil and sprinkle an extra layer of mozzarella cheese on top if desired.
Return the uncovered dish to the oven and bake for an additional 5-10 minutes until the cheese melts into a golden, bubbly topping.
Step 8: Serve and Enjoy
Pull the manicotti out of the oven and let it rest for a moment.
Garnish with fresh parsley and serve immediately while the cheese is still gooey and warm.
Tips for Cheesy, Perfect Manicotti Every Time
Manicotti Recipe Variations for Pasta Lovers
Creative Ways to Plate Cheesy Manicotti
Storing Leftover Manicotti for Weeknights
FAQs
Yes, you can substitute ricotta with cottage cheese or use a blend of cheeses like provolone and fontina for a unique flavor profile.
Carefully cook the pasta al dente and handle gently. If the noodles are fragile, try using no-boil manicotti shells or large pasta shells as an alternative.
Use a piping bag or a ziplock bag with the corner cut off for precise filling. Alternatively, use your fingers to gently push the cheese mixture into both ends of the pasta.
Print
Easy Cheesy Manicotti Recipe
- Total Time: 1 hour 20 minutes
- Yield: 4 1x
Description
Creamy Italian classic manicotti delivers a comforting pasta experience packed with ricotta and mozzarella. Melted cheese and hearty marinara sauce create a delightful meal you’ll savor with each delicious bite.
Ingredients
Pasta:
- 8 pieces manicotti
Cheese Mixture:
- 15 ounces (425 grams) ricotta cheese
- 2 cups (226 grams) shredded mozzarella cheese, plus more for topping
- 1/2 cup (50 grams) grated Parmesan cheese
- 2 large eggs
- 2 tablespoons fresh chopped parsley, plus more for garnish
- 1/2 teaspoon salt, to taste
- 1/4 teaspoon black pepper, to taste
Sauce:
- 24 ounces (680 grams) marinara sauce, or spaghetti sauce, any flavor, divided
Instructions
- Prepare manicotti noodles according to package directions, ensuring they are fully cooked. Drain thoroughly and arrange on parchment paper to cool and prevent sticking.
- Heat oven to 350°F. Coat a 9×13 baking dish with cooking spray, then spread a thin marinara sauce layer across the bottom for preventing sticking.
- Create cheese mixture by combining ricotta, mozzarella, Parmesan, eggs, parsley, salt, and pepper in a large mixing bowl. Blend until smooth and uniform in texture.
- Carefully stuff cooled manicotti tubes with prepared cheese mixture. Use a spoon or pastry bag for precision. Fill from both ends to ensure complete coverage.
- Arrange stuffed manicotti in a single layer within the prepared baking dish, positioning them carefully over the sauce base.
- Pour remaining marinara sauce evenly over the filled manicotti, completely covering the pasta tubes.
- Cover the baking dish with aluminum foil and bake for 40 minutes at 350°F, ensuring even heat distribution.
- Remove foil and sprinkle additional mozzarella cheese on top. Return to oven and bake uncovered for 5-10 minutes until cheese melts and becomes golden.
- Garnish with fresh parsley and serve immediately while hot and cheese is melted.
Notes
- Keep pasta slightly undercooked to prevent mushiness during baking, ensuring perfect texture when fully prepared.
- Use a piping bag or zip-lock bag with corner snipped for easier, cleaner cheese filling without tearing delicate pasta tubes.
- Substitute ricotta with cottage cheese for lower-fat version or use plant-based cheese alternatives for vegan dietary needs.
- Allow manicotti to rest 5-10 minutes after baking to help cheese set and make serving cleaner and more structured.
- Prep Time: 30 minutes
- Cook Time: 50 minutes
- Category: Dinner, Appetizer
- Method: Baking
- Cuisine: Italian
Nutrition
- Serving Size: 4
- Calories: 450
- Sugar: 6 g
- Sodium: 800 mg
- Fat: 22 g
- Saturated Fat: 12 g
- Unsaturated Fat: 8 g
- Trans Fat: 0 g
- Carbohydrates: 40 g
- Fiber: 2 g
- Protein: 23 g
- Cholesterol: 90 mg
Marcus Reed
Founder & Food Content Creator
Expertise
Single-recipe development, Seasonal and local ingredient utilization, Food photography and styling, Culinary writing and content creation
Education
Culinary Arts Certificate, Blue Ridge Community and Technical College, WV
Focus: Fundamentals of culinary techniques, emphasizing hands-on experience in small-scale kitchen settings.
Marcus’s story begins in Asheville, where good food and family kitchens shaped his earliest memories. After hands-on culinary training and a lot of trial (and a little error), he realized that real cooking isn’t about perfection, it’s about connection.
At Pan and Oven, Marcus crafts recipes that are easy to follow, packed with flavor, and built for real kitchens.