The Sweetest Easter Egg Krispies Nests Recipe for Spring Joy
Springtime calls for sweet and whimsical Easter egg krispies nests that burst with colorful charm and nostalgic delight.
These charming treats capture childhood memories in every delectable bite.
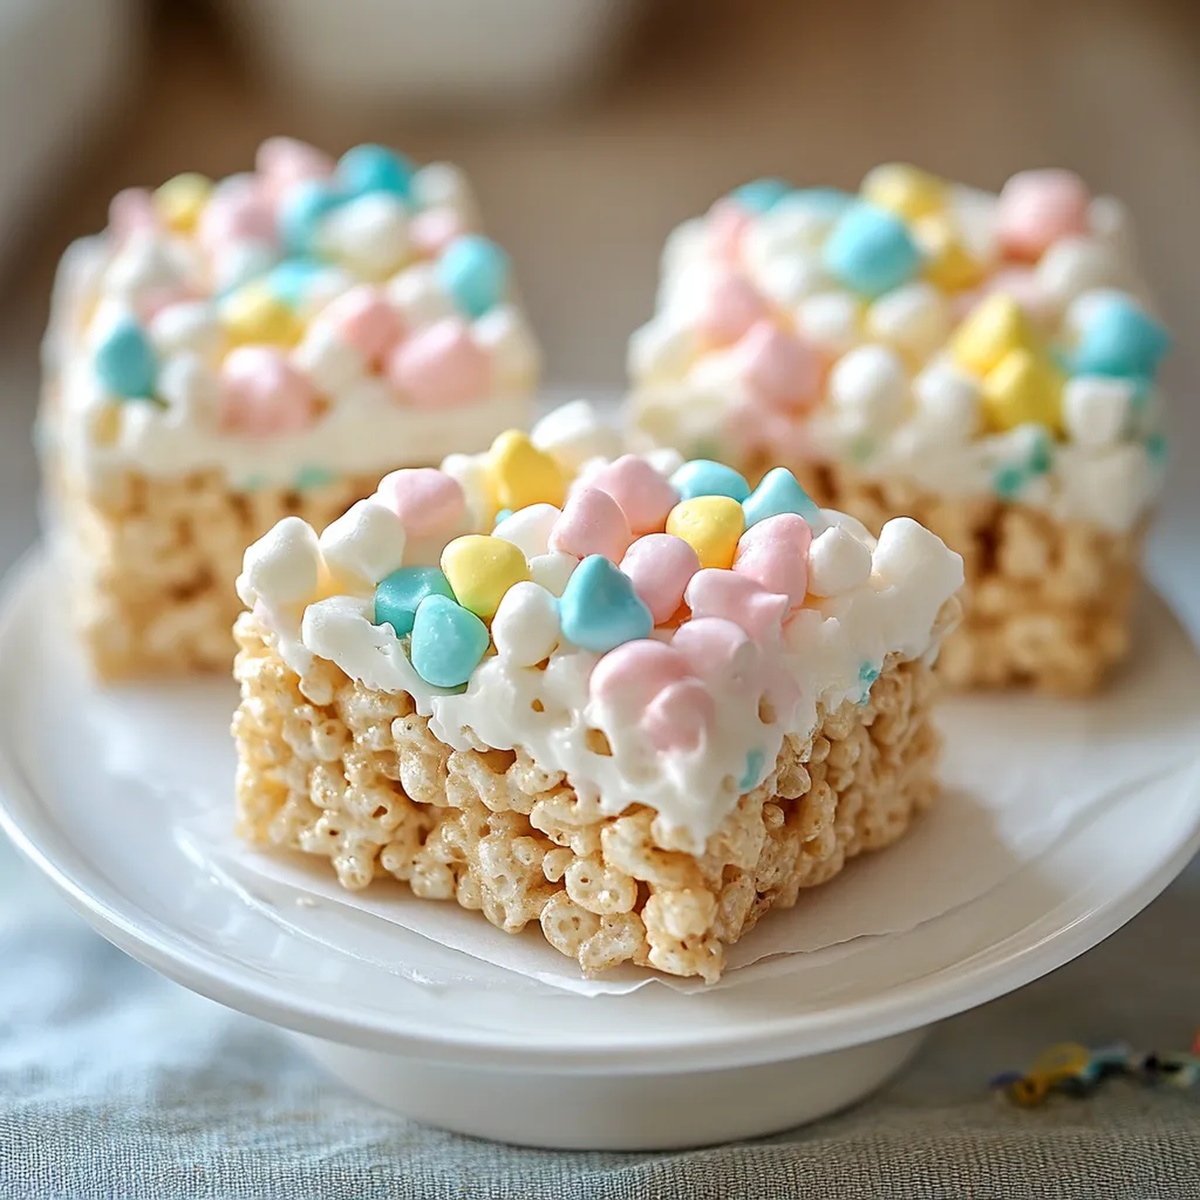
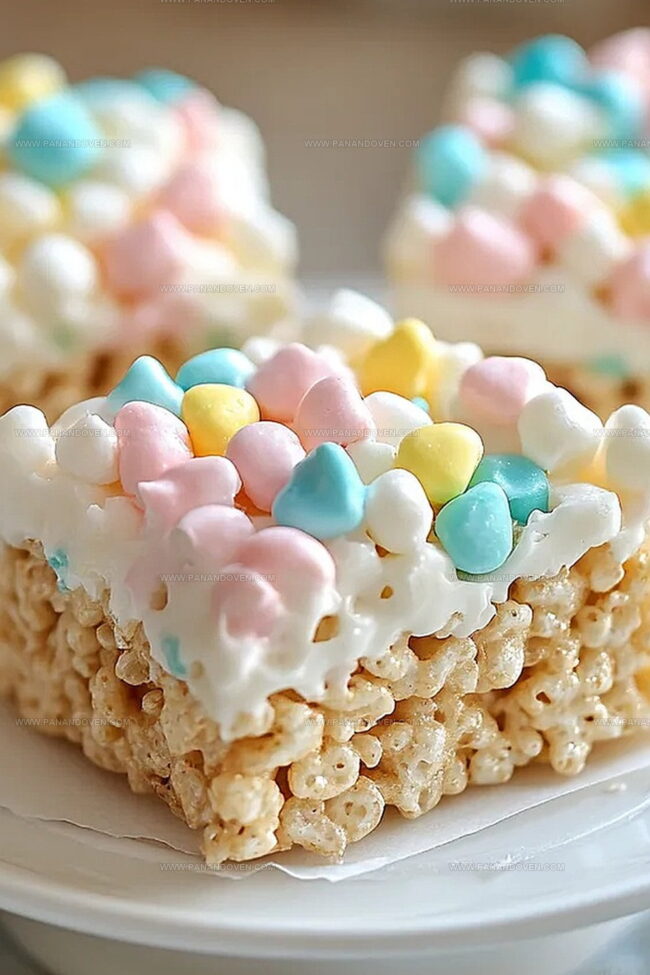
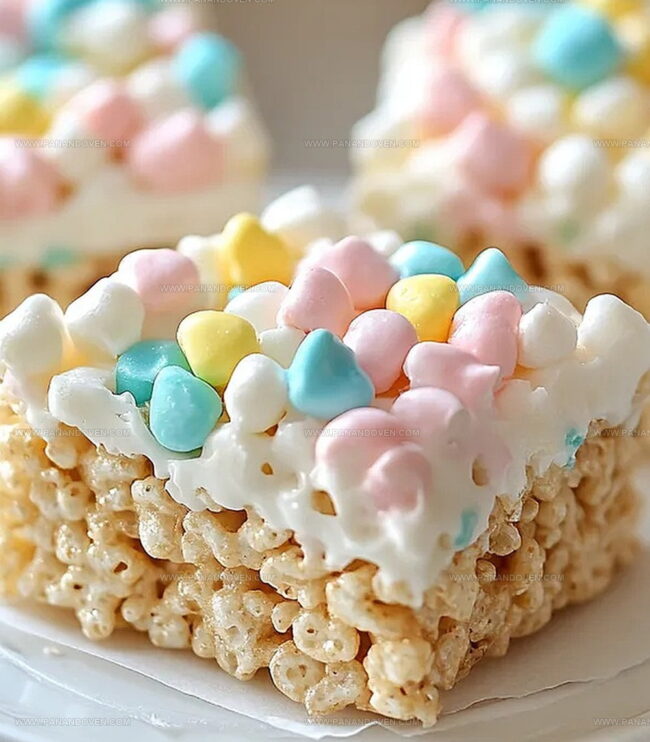
Crispy, marshmallow-coated rice cereal forms delicate nests perfect for nestling chocolate eggs.
Pastel-hued candies add a playful touch to these adorable desserts.
Kids and adults alike will adore the simple yet magical combination of textures and flavors.
Crafted in minutes, these delightful nests promise to become your new seasonal favorite.
Gather your ingredients and let the Easter baking magic begin!
What Makes Easter Egg Krispies Nests So Fun
Ingredients for Easter Egg Krispies Nests
Base Ingredients:Frosting Ingredients:Decorative Ingredients:Tools for Crafting Krispies Nests at Home
Steps for Building Easter Egg Krispies Nests
Step 1: Prepare Cupcake Pans
Grab your standard cupcake pan and give it a generous coating of cooking spray or butter.
Make sure to reach every nook and cranny, especially those tricky corners where sticky treats love to cling.
Step 2: Melt Marshmallow Magic
Toss marshmallows and butter into a microwave-safe bowl.
Zap them in short 30-second bursts, stirring between each interval.
Keep going until the mixture transforms into a smooth, glossy pool of sweetness.
Step 3: Mix Cereal Goodness
Pour the melted marshmallow mixture over the Rice Krispies.
Grab a buttered spatula and mix with enthusiasm, ensuring every single crisp gets a perfect marshmallow hug.
Step 4: Craft Nest Shapes
Scoop the mixture into the greased cupcake pan.
Gently press down in the center of each cavity, creating adorable little nest shapes.
Pro tip: Use wax paper or grease your hands to prevent sticky situations.
Step 5: Let Nests Set
Allow the nests to chill at room temperature for about 30 minutes.
They’ll firm up and become perfectly structured.
Step 6: Whip Up Grass Frosting
In a mixing bowl, cream the butter until silky smooth.
Then add:Beat the mixture for 5 minutes until it’s creamy and dreamy.
Stir in some green food coloring to create that perfect grassy look.
Step 7: Decorate with Flair
Fill a piping bag with the green frosting and a grass tip.
Start piping from the outer edge of each nest, working your way inward to create a lush, grassy effect.
Crown each nest with 2-3 colorful Easter egg candies for the ultimate spring treat.
Tips for Colorful, Crunchy Krispies Nests
Ideas for Changing Up Easter Egg Krispies Nests
Ways to Present and Serve Krispies Nests
Storing Easter Egg Krispies Nests
FAQs
Cupcake pans help create uniform, perfectly shaped nests with crisp edges. They ensure each krispie nest is consistent in size and provides a neat, professional look for Easter treats.
While Rice Krispies are traditional, you can substitute with similar crispy rice cereals. Just ensure the cereal is similar in texture to maintain the classic nest structure and crunch.
Always use buttered hands or wear food-safe gloves when shaping the nests. The butter creates a protective barrier that prevents the sticky marshmallow mixture from clinging to your hands.
Print
Easter Egg Krispies Nests Recipe
- Total Time: 20 minutes
- Yield: 12 1x
Description
Delightful Easter egg krispies nests combine marshmallow-coated rice cereal with colorful chocolate eggs. Sweet treats bring springtime cheer to family celebrations and festive dessert tables.
Ingredients
Main Ingredients:
- 16 ounces (454 grams) marshmallows, jumbo or mini
- 7 cups Rice Krispies
- 2 tablespoons (30 milliliters) unsalted butter
- 12 cup (113 grams) unsalted butter
Frosting Ingredients:
- 3–4 cups (360–480 grams) powdered sugar
- 14 cup (60 milliliters) milk
- 1 teaspoon (5 milliliters) vanilla extract
Decorative Ingredients:
- Easter egg candies
- Green food coloring
Instructions
- Prep the cupcake pan by generously coating each cavity with cooking spray or butter, ensuring complete coverage to prevent sticking.
- Melt marshmallows and butter in a microwave-safe bowl, heating in 30-second increments and stirring until completely smooth and integrated.
- Fold the melted marshmallow mixture into Rice Krispies cereal using a buttered spatula, ensuring every piece is evenly coated.
- Distribute the cereal mixture into cupcake pan cavities, using greased hands or wax paper to press and shape into nest-like formations with gentle indentations in the center.
- Allow the nests to set and solidify at room temperature for approximately 30 minutes.
- Create frosting by whipping butter until creamy, then gradually incorporate powdered sugar, milk, and vanilla extract. Beat thoroughly until smooth, adjusting consistency with additional sugar and adding green food coloring for a pastel hue.
- Transfer frosting to a piping bag with a grass tip, carefully pipe green frosting around the nest edges and interior, creating a textured grass-like effect.
- Garnish each nest with 2-3 small Easter egg candies, nestling them into the frosted center for a festive finish.
Notes
- Grease Generously Make sure to coat the cupcake pan thoroughly with cooking spray or butter, focusing on corners to prevent sticking and ensure easy removal of delicate nests.
- Work Quickly When mixing marshmallows and cereal, move fast to prevent the mixture from cooling and becoming hard to manipulate, which can make shaping difficult.
- Control Moisture Use a buttered spatula when mixing to help ingredients combine smoothly without adding extra liquid that could make the nests soggy.
- Customize Creatively Experiment with different colored frostings or swap chocolate eggs with jelly beans for unique variations that suit different preferences or dietary needs.
- Prep Time: 20 minutes
- Cook Time: 0 minutes
- Category: Snacks, Desserts
- Method: None
- Cuisine: American
Nutrition
- Serving Size: 12
- Calories: 200
- Sugar: 10 g
- Sodium: 100 mg
- Fat: 5 g
- Saturated Fat: 3 g
- Unsaturated Fat: 1 g
- Trans Fat: 0 g
- Carbohydrates: 34 g
- Fiber: 0 g
- Protein: 1 g
- Cholesterol: 15 mg
Clara Thompson
Recipe Developer & Food Educator
Expertise
Plant-based and vegetarian recipe development, Nutritional analysis and meal planning, Culinary education and workshop facilitation, Content writing with a focus on healthy living
Education
Diploma in Culinary Arts, Mt. San Jacinto College, CA
Focus: Comprehensive culinary training with an emphasis on sustainable cooking practices.
Certificate in Nutrition and Healthy Living, Cornell University (Online Program)
Focus: Understanding the principles of nutrition to create balanced and health-conscious recipes.
Clara lives where fresh ideas and fresh ingredients meet. She pairs her culinary know-how with her passion for healthy, planet-friendly cooking.
For Clara, good food should taste great, nourish your body, and feel easy to make. Her recipes highlight whole foods, colorful produce, and a deep respect for seasonal eating.