
Quick & Festive Easter Dirt Pudding Jars Recipe Kids Will Love
Chocolate lovers rejoice when they encounter this Easter dirt pudding jars recipe that delivers pure dessert magic.
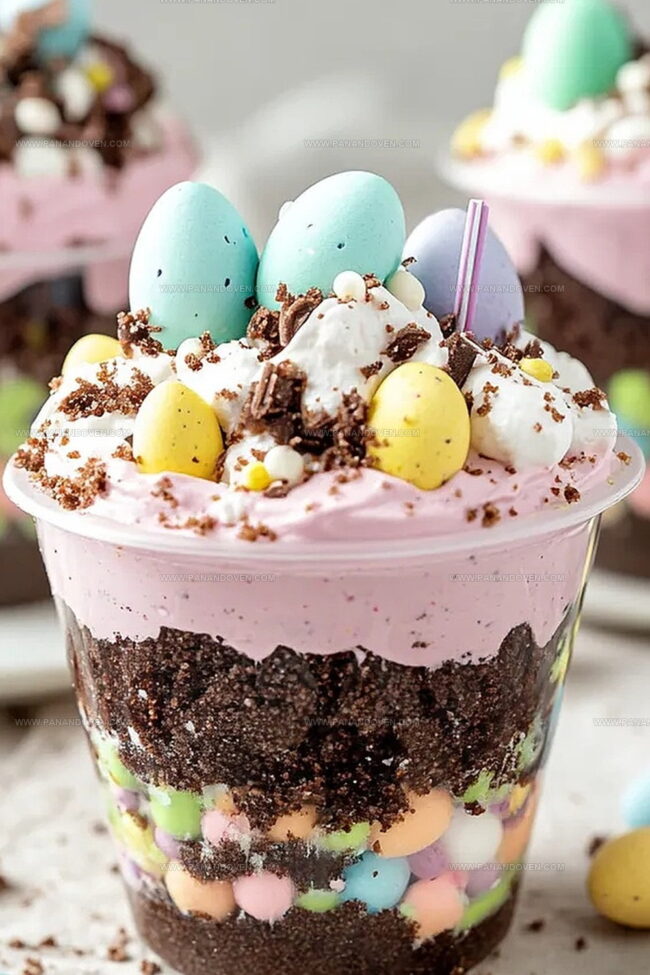
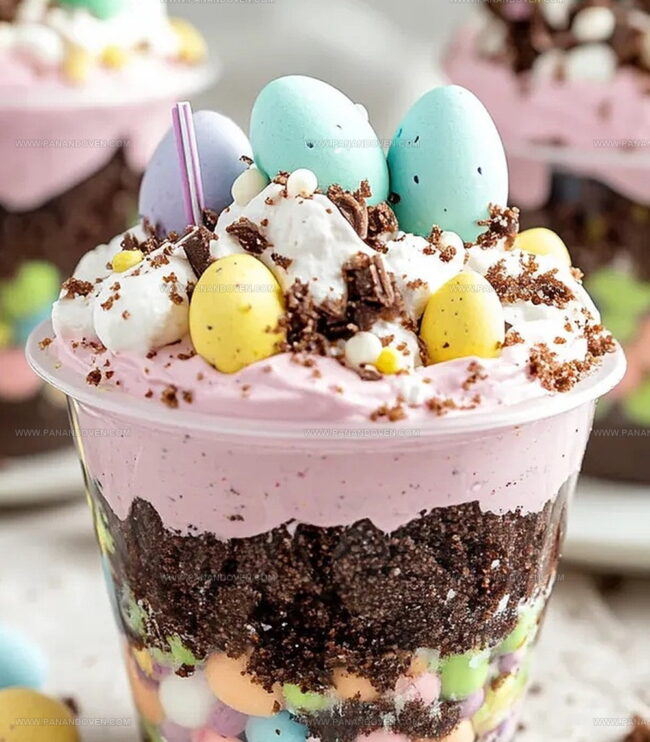
Layers of creamy pudding and crumbly cookie crumbs create a whimsical treat perfect for spring celebrations.
Crushed chocolate cookies mimic rich soil while pastel candies peek through like hidden treasures.
Marshmallow chicks and chocolate eggs nestled on top add playful charm to this nostalgic dessert.
Each spoonful promises a delightful journey through textures and sweet memories.
These adorable jars will delight children and adults alike with their irresistible charm and delectable taste.
Prepare to be the star of any Easter gathering with this simple yet stunning dessert.
Why Easter Dirt Pudding Jars Are Fun for Everyone
Everything Needed for Easter Dirt Pudding Jars
Main Ingredients:
Pudding Base:Cookie Layer:Decorative Ingredients:Coloring and Accent Ingredients:Optional Additions:Tools and Jars for Easter Dirt Pudding Creations
Building Easter Dirt Pudding Jars Step by Step
Step 1: Whisk Pudding Base
In a medium bowl, whisk vanilla pudding mix with cold milk for two full minutes until completely smooth.
Allow the mixture to rest and thicken for approximately five minutes.
Step 2: Create Vibrant Colors
Separate pudding mixture into two bowls.
Add different food coloring to each bowl – experiment with spring-inspired shades like lavender, soft pink, or pastel blue.
Step 3: Fold in Whipped Topping
Gently incorporate Cool Whip into each colored pudding mixture.
Stir carefully to maintain a light, airy texture that resembles a delicate mousse.
Step 4: Prepare Cookie Base
Crush Oreo cookies into fine crumbs.
Sprinkle a tablespoon of cookie crumbs at the bottom of each mason jar to create a rich, chocolatey foundation.
Step 5: Layer Pudding and Cookies
Build alternating layers in the jars:Repeat the layering process until jars are filled, ensuring the top layer is cookie crumbs.
Step 6: Chill and Set
Refrigerate the assembled jars for at least one hour.
This cooling period allows layers to firm up and flavors to meld together beautifully.
Step 7: Create Coconut Grass
Place shredded coconut in a sealed container.
Add green food coloring and a tiny splash of water.
Shake vigorously until coconut transforms into a vibrant green “grass” color.
Step 8: Decorate Easter Scene
Sprinkle green coconut “grass” over the top of each jar.
Artfully place mini chocolate eggs and a cute Peep on top to complete the festive Easter garden presentation.
Tips for Making the Best Easter Dirt Pudding Jars
Different Twists on Classic Easter Dirt Pudding Jars
Ways to Present and Serve Easter Dirt Pudding Jars
Storing Easter Dirt Pudding Jars for Best Results
FAQs
Yes, you can prepare these Easter Dirt Pudding Jars up to 2 days in advance. Keep them refrigerated and add the coconut “grass” and decorative eggs just before serving to maintain freshness.
You can substitute Cool Whip with homemade whipped cream, use different cookie types instead of Oreos, and swap pudding mix flavors to customize the dessert to your liking.
Absolutely! Kids will love helping with mixing colors, layering pudding, and adding decorative toppings. It’s a fun, interactive recipe that encourages creativity in the kitchen.
Print
Easter Dirt Pudding Jars Recipe
- Total Time: 1 hour 15 minutes
- Yield: 8 1x
Description
Chocolate Easter dirt pudding jars combine childhood nostalgia with festive spring flavors. Layers of creamy pudding, crushed cookies, and pastel candy create a delightful dessert you can easily enjoy at family gatherings.
Ingredients
Main Ingredients:
- 1 package (3.9 ounces/110 grams) vanilla instant pudding mix
- 2 cups (480 milliliters) cold milk
- 1 package Oreo cookies
- 1 container (8 ounces/227 grams) Cool Whip, thawed
Coconut Decoration:
- Shredded coconut
- Food coloring for coconut
Garnish:
- Mini chocolate eggs
- Marshmallow Peeps
- Food coloring of your choice
Instructions
- Prepare the pudding base by whisking vanilla pudding mix with cold milk for 2 minutes until smooth. Allow mixture to thicken for 5 minutes at room temperature.
- Separate pudding into two bowls, then incorporate different food coloring to create spring-inspired pastel hues like purple and light pink.
- Gently fold Cool Whip into each colored pudding mixture, creating a light, airy mousse-like texture that enhances the dessert’s creamy consistency.
- Create a cookie foundation by sprinkling crushed Oreo cookies at the bottom of each mason jar, establishing the classic “dirt” aesthetic.
- Construct alternating layers by adding colored pudding and cookie crumbs, ensuring each jar receives equal amounts of colorful mixture and crunchy texture.
- Refrigerate assembled jars for minimum 1 hour, allowing layers to set and flavors to meld together perfectly.
- Prepare coconut “grass” by combining shredded coconut with green food coloring in a sealed container. Shake vigorously until coconut transforms into a vibrant green hue.
- Complete the Easter garden scene by generously sprinkling green coconut on top, then artfully arranging mini chocolate eggs and Peep marshmallow characters for a whimsical presentation.
Notes
- Pudding Perfection: Whisk the pudding mix and milk thoroughly to prevent lumps and ensure a smooth, creamy texture that’s the foundation of your dessert.
- Color Play: Experiment with different pastel food coloring to match seasonal themes or personal preferences, making each batch unique and visually appealing.
- Texture Trick: Folding Cool Whip into the pudding creates a lighter, mousse-like consistency that elevates the dessert from simple to spectacular.
- Make-Ahead Magic: Prepare the jars a day in advance and store in the refrigerator to allow flavors to meld and save time on serving day.
- Prep Time: 15 minutes
- Cook Time: 1 hour
- Category: Desserts, Snacks
- Method: Chilling
- Cuisine: American
Nutrition
- Serving Size: 8
- Calories: 320
- Sugar: 24 g
- Sodium: 200 mg
- Fat: 14 g
- Saturated Fat: 8 g
- Unsaturated Fat: 4 g
- Trans Fat: 0 g
- Carbohydrates: 43 g
- Fiber: 1 g
- Protein: 3 g
- Cholesterol: 20 mg
Clara Thompson
Recipe Developer & Food Educator
Expertise
Plant-based and vegetarian recipe development, Nutritional analysis and meal planning, Culinary education and workshop facilitation, Content writing with a focus on healthy living
Education
Diploma in Culinary Arts, Mt. San Jacinto College, CA
Focus: Comprehensive culinary training with an emphasis on sustainable cooking practices.
Certificate in Nutrition and Healthy Living, Cornell University (Online Program)
Focus: Understanding the principles of nutrition to create balanced and health-conscious recipes.
Clara lives where fresh ideas and fresh ingredients meet. She pairs her culinary know-how with her passion for healthy, planet-friendly cooking.
For Clara, good food should taste great, nourish your body, and feel easy to make. Her recipes highlight whole foods, colorful produce, and a deep respect for seasonal eating.