
The Cutest Easter Dirt Cake Dessert Recipe for Spring Joy
Creamy, dreamy layers of chocolate delight dance through this Easter dirt cake that will steal the show at any springtime gathering.
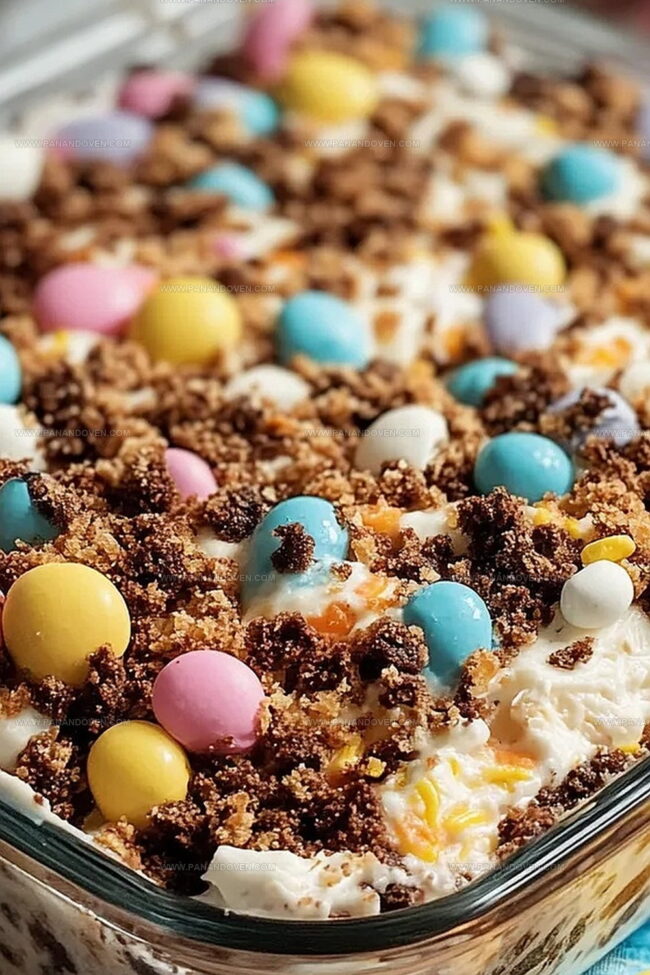
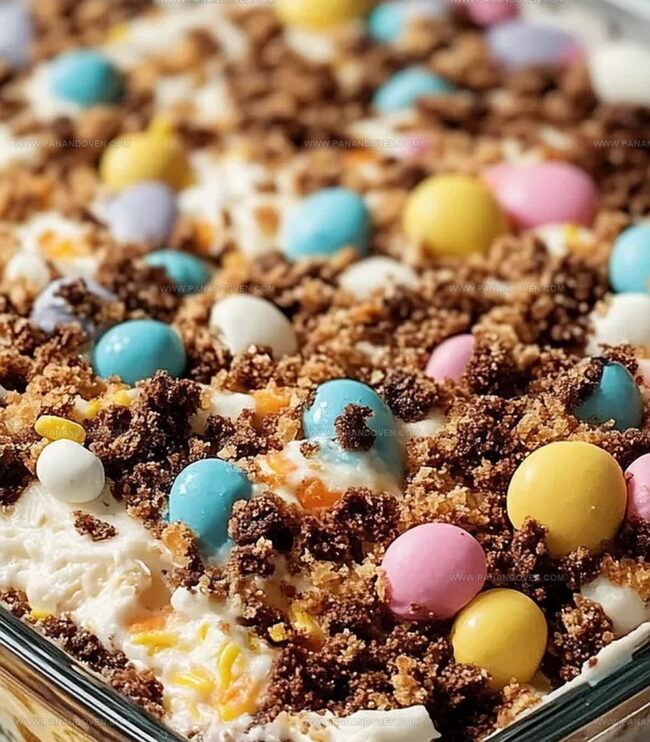
Crushed Oreo cookies create a convincing “dirt” texture that delights both kids and adults.
Soft pudding and cream cheese blend seamlessly into a rich, velvety base.
Cool whip adds a light, airy touch to this playful dessert.
Decorated with adorable candy eggs and chocolate bunnies, this treat brings whimsy to your Easter table.
Each spoonful promises a perfect mix of sweet, crunchy, and smooth textures.
You’ll fall in love with this simple yet spectacular dessert that transforms an ordinary moment into a celebration.
Why Easter Dirt Cake Dessert Is a Party Classic
All About Ingredients for Easter Dirt Cake Dessert
Main Ingredients:
Cream Cheese Base:Pudding and Topping:Cookie and Decorative Elements:Bowls and Tools for Making Dirt Cake Dessert
Instructions for Assembling Easter Dirt Cake Dessert
Step 1: Whip the Cream Mixture
In a large mixing bowl, combine softened cream cheese, butter, and powdered sugar.
Beat these ingredients until they transform into a silky, smooth, and fluffy base.
The key is to mix thoroughly, eliminating any potential lumps for a perfect texture.
Step 2: Prepare the Pudding
Grab another bowl and whisk the vanilla pudding mix with cold milk.
Stir vigorously for about two minutes until the mixture thickens and becomes creamy.
You’re aiming for a soft, set consistency that’s not runny.
Step 3: Blend the Mixtures
Gently fold the prepared pudding into the cream cheese mixture.
Once well combined, carefully incorporate the whipped topping.
Mix until everything is evenly distributed while maintaining a light, airy texture.
Be careful not to overmix, which could deflate the delicate mixture.
Step 4: Create Cookie Dirt
Transform chocolate sandwich cookies into fine crumbs using one of two methods:Step 5: Build the Layers
In a 9×13-inch dish, create alternating layers:Step 6: Craft Green Grass
Prepare the coconut ‘grass’:Step 7: Decorate with Easter Treats
Unleash your creativity by arranging:Step 8: Chill and Serve
Refrigerate the dessert for at least two hours, or ideally overnight.
Chilling helps the layers set and enhances the overall flavor.
When ready, serve and watch everyone’s eyes light up with delight!
Tips for Perfectly Layered Easter Dirt Cake Dessert
Fun Ideas for Easter Dirt Cake Dessert Variations
Ways to Serve Easter Dirt Cake Dessert Creatively
Keeping Easter Dirt Cake Dessert Fresh Longer
FAQs
Yes, Easter dirt cake is perfect for preparing in advance. You can assemble it up to 24 hours before serving and keep it refrigerated, which actually helps the flavors meld together and makes the dessert even more delicious.
Absolutely! Kids will love helping crush the cookies, mixing colors, and decorating with candies. It’s a fun, interactive recipe that allows children to get creative and enjoy the process of making a festive dessert.
No worries! Simply place cookies in a sturdy zip-top bag and crush them with a rolling pin or the bottom of a heavy pan. This method works just as well and gives you the same fine crumb texture needed for the ‘dirt’ layer.
Print
Easter Dirt Cake Dessert Recipe
- Total Time: 20 minutes
- Yield: 12 1x
Description
Creamy Easter dirt cake brings layers of chocolatey delight to family gatherings. Rich pudding, crushed cookies, and playful gummy worms create a whimsical treat you’ll savor with pure joy.
Ingredients
Main Ingredients:
- 2 packages (3.4 ounces / 96 grams) instant vanilla pudding mix
- 3 cups cold milk
- 1 package (14 ounces / 397 grams) chocolate sandwich cookies (e.g., Oreos), crushed
- 1 container (8 ounces / 226 grams) whipped topping (e.g., Cool Whip), thawed
Creamy Base Ingredients:
- 1 package (8 ounces / 226 grams) cream cheese, softened
- 1/2 cup unsalted butter, softened
- 1 cup powdered sugar
Decoration Ingredients:
- 1 cup shredded coconut
- Green food coloring
- Easter candies (e.g., chocolate eggs, jellybeans, Peeps)
- Miniature chocolate bunnies (optional)
Instructions
- Prepare the creamy foundation by whipping softened cream cheese, butter, and powdered sugar until silky smooth and lump-free, approximately 3-4 minutes using an electric mixer.
- Create pudding mixture by whisking vanilla pudding mix with cold milk for 2 minutes until it reaches a thick, consistent texture that holds its shape.
- Delicately incorporate the prepared pudding into the cream cheese base, gently folding to maintain a light, airy consistency. Carefully blend in whipped topping until fully integrated.
- Transform chocolate sandwich cookies into fine crumbs using a food processor or by crushing within a sealed plastic bag with a rolling pin, creating a texture resembling loose soil.
- Construct dessert layers by spreading a generous pudding mixture across the bottom of a 9×13-inch dish, followed by an even sprinkle of cookie crumbs. Repeat layering process, ensuring the top layer is completely covered with cookie “dirt”.
- Craft edible “grass” by mixing shredded coconut with green food coloring until uniformly tinted, then strategically scatter across the cookie surface.
- Embellish the dessert with festive Easter decorations – arrange chocolate eggs, marshmallow Peeps, and chocolate bunnies to create a whimsical springtime landscape.
- Refrigerate the completed dessert for minimum 2 hours or overnight, allowing flavors to meld and texture to set. Serve chilled for optimal taste and presentation.
Notes
- Customize for Dietary Needs Swap regular cream cheese and butter with dairy-free alternatives like coconut cream cheese and vegan butter to make this dessert gluten-free and suitable for those with lactose intolerance.
- Reduce Sugar Options Use sugar-free pudding mix and replace powdered sugar with stevia or monk fruit sweetener for a lower-calorie version that still tastes deliciously creamy.
- Cookie Crumb Variations Experiment with different cookie types like chocolate graham crackers or gluten-free sandwich cookies to create unique texture and flavor variations in your dirt cake.
- Make-Ahead Magic Prepare this dessert up to 48 hours in advance, keeping it tightly covered in the refrigerator to maintain freshness and allow flavors to meld beautifully.
- Prep Time: 20 minutes
- Cook Time: 0 minutes
- Category: Desserts
- Method: None
- Cuisine: American
Nutrition
- Serving Size: 12
- Calories: 303
- Sugar: 25 g
- Sodium: 200 mg
- Fat: 18 g
- Saturated Fat: 10 g
- Unsaturated Fat: 8 g
- Trans Fat: 0 g
- Carbohydrates: 35 g
- Fiber: 1 g
- Protein: 3 g
- Cholesterol: 32 mg
Clara Thompson
Recipe Developer & Food Educator
Expertise
Plant-based and vegetarian recipe development, Nutritional analysis and meal planning, Culinary education and workshop facilitation, Content writing with a focus on healthy living
Education
Diploma in Culinary Arts, Mt. San Jacinto College, CA
Focus: Comprehensive culinary training with an emphasis on sustainable cooking practices.
Certificate in Nutrition and Healthy Living, Cornell University (Online Program)
Focus: Understanding the principles of nutrition to create balanced and health-conscious recipes.
Clara lives where fresh ideas and fresh ingredients meet. She pairs her culinary know-how with her passion for healthy, planet-friendly cooking.
For Clara, good food should taste great, nourish your body, and feel easy to make. Her recipes highlight whole foods, colorful produce, and a deep respect for seasonal eating.