Fluffy Easter Bunny Buns Recipe: Fun Holiday Baking Magic
Soft, pillowy dough meets adorable Easter bunny buns that will melt hearts at your holiday table.
These charming little rolls bounce with sweetness and playful design.
Bakers of all skill levels can create these delightful treats with simple ingredients and easy techniques.
Each bunny-shaped bun carries a touch of whimsy and childhood nostalgia.
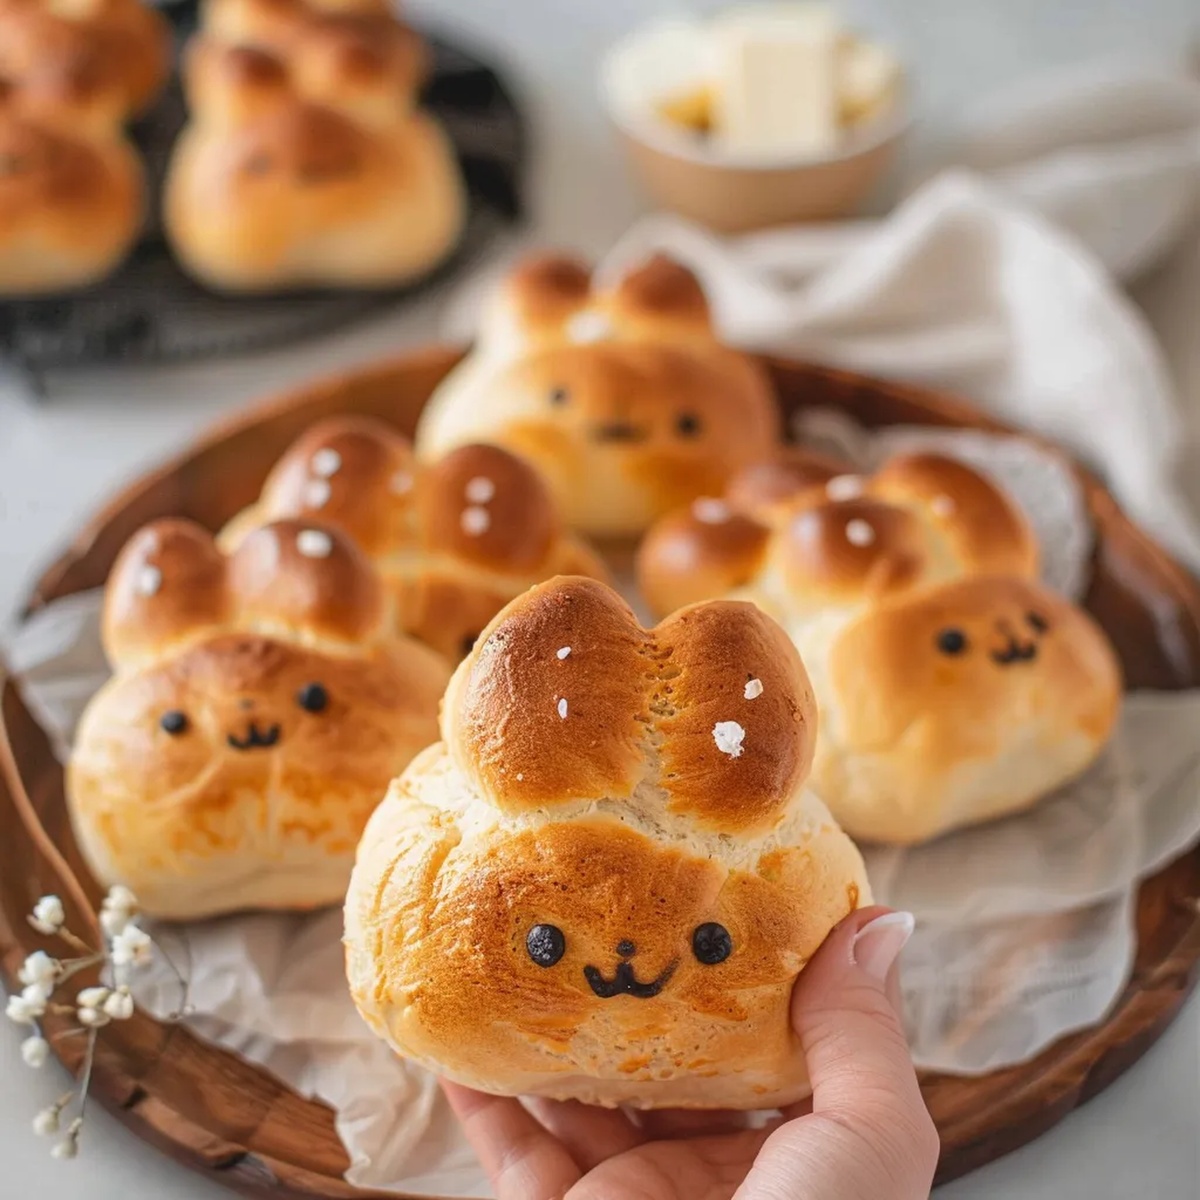
Their golden-brown ears and cute faces will spark joy around the breakfast or brunch spread.
Delicate and light, these buns promise to become a cherished family tradition.
You’ll love how these little bread bunnies bring smiles to everyone gathered around the table.
Easter Bunny Buns: Whimsical Qualities
Easter Bunny Buns: Ingredient Checklist
Base Ingredients:Shaping Ingredients:Finishing Ingredients:Tools for Baking Bunny Buns
Making Easter Bunny Buns Stepwise
Step 1: Whip Up Fluffy Dough
Grab a mixing bowl and combine yogurt, self-raising flour, and a pinch of salt.
Stir everything together until a soft, pliable dough forms.
If the mixture seems too sticky, sprinkle in an extra dash of flour to achieve the perfect consistency.
Step 2: Create Bunny Shapes
Divide the dough into six equal portions.
For each bunny, craft one larger round ball for the face and two smaller elongated pieces for the ears.
Gently roll the ear pieces into cute little sausage-like shapes that will give your bread its adorable bunny character.
Step 3: Prepare Baking Surface
Generously coat a large ovenproof dish with butter to prevent sticking.
Carefully place the six face balls evenly across the dish.
Delicately position the ear-shaped dough pieces next to each face, allowing them to touch and create the bunny head design.
Step 4: Bake and Beautify
Warm up your oven to 180°C (360°F).
For an extra golden touch, brush the bunny breads with melted butter before sliding them into the oven.
Bake for approximately 20 minutes until they turn a beautiful golden brown.
Once done, let them cool slightly and optionally add cute facial details using an edible marker for extra charm.
Top Tips for Fluffy Bunny Buns
Creative Easter Bunny Bun Variations
How to Present Easter Bunny Buns
Best Practices for Storing Easter Bunny Buns
FAQs
You’ll need self-raising flour, yoghurt, salt, and butter. Simple pantry staples that come together quickly for a cute bread treat.
It’s beginner-friendly and easy to make. Even novice bakers can shape the dough into adorable bunny faces and ears with basic rolling techniques.
Yes, you can prepare the dough and shape the bunnies in advance. Cover and refrigerate for a few hours before baking, which helps maintain the shape and makes preparation more convenient.
Add an extra tablespoon of flour to adjust the consistency. The dough should be soft but not sticky, allowing you to easily shape the bunny forms without falling apart.
Print
Easter Bunny Buns Recipe
- Total Time: 40 minutes
- Yield: 2 1x
Description
Delightful Easter Bunny Buns bring springtime cheer from German bakery traditions. Fluffy dough shaped like adorable rabbits creates a festive breakfast treat you can enjoy with family and friends.
Ingredients
Main Ingredients:
- 1 cup (270 grams / 9.5 ounces) plain yogurt
- 1 cup (150 grams / 5.3 ounces) self-raising flour
- 1/4 teaspoon salt
Greasing and Brushing:
- Butter for greasing
- Melted butter for brushing
Decoration:
- Edible marker for drawing faces
Instructions
- Mix yoghurt, self-raising flour, and salt in a mixing bowl, kneading until a smooth, cohesive dough forms. If mixture appears overly sticky, incorporate an additional tablespoon of flour to achieve ideal consistency.
- Partition the dough into six equal portions, approximately 70g each. From each segment, craft a substantial spherical shape (45g) representing the bunny’s face, then create two smaller elongated shapes (12g each) mimicking ears.
- Thoroughly coat a large ovenproof dish with butter to prevent sticking. Strategically position the six face-shaped dough balls across the dish’s surface, ensuring uniform spacing.
- Delicately position the ear-shaped dough sections adjacent to each facial sphere, allowing them to gently touch and create a cohesive bunny silhouette.
- Optional: Gently brush the dough surfaces with melted butter to enhance golden coloration and sheen.
- Transfer the prepared dish into a preheated oven at 180°C (360F). Bake for precisely 20 minutes until the buns acquire a rich, golden-brown complexion.
- Once baked, remove from oven and allow minimal cooling. For playful presentation, consider embellishing bunny faces using an edible decorative marker.
Notes
- Choose soft, creamy yoghurt for a tender, moist bunny bun texture that melts in your mouth.
- Adjust flour slightly based on yoghurt consistency to achieve perfect dough elasticity and prevent stickiness.
- Work with cold hands or lightly flour surfaces to shape delicate bunny ear pieces without breaking the dough.
- Consider using natural food coloring or cocoa powder to create different bunny variations for added visual appeal.
- Prep Time: 20 minutes
- Cook Time: 20 minutes
- Category: Breakfast, Snacks, Desserts
- Method: Baking
- Cuisine: American
Nutrition
- Serving Size: 2
- Calories: 215
- Sugar: 6g
- Sodium: 150mg
- Fat: 4g
- Saturated Fat: 2g
- Unsaturated Fat: 2g
- Trans Fat: 0g
- Carbohydrates: 36g
- Fiber: 1g
- Protein: 7g
- Cholesterol: 10mg
Clara Thompson
Recipe Developer & Food Educator
Expertise
Plant-based and vegetarian recipe development, Nutritional analysis and meal planning, Culinary education and workshop facilitation, Content writing with a focus on healthy living
Education
Diploma in Culinary Arts, Mt. San Jacinto College, CA
Focus: Comprehensive culinary training with an emphasis on sustainable cooking practices.
Certificate in Nutrition and Healthy Living, Cornell University (Online Program)
Focus: Understanding the principles of nutrition to create balanced and health-conscious recipes.
Clara lives where fresh ideas and fresh ingredients meet. She pairs her culinary know-how with her passion for healthy, planet-friendly cooking.
For Clara, good food should taste great, nourish your body, and feel easy to make. Her recipes highlight whole foods, colorful produce, and a deep respect for seasonal eating.