Playful Dirt Cake Recipe: Whip Up Garden-Inspired Sweetness
Childhood memories flood back with this delightful dirt cake that combines nostalgic flavors and playful presentation.
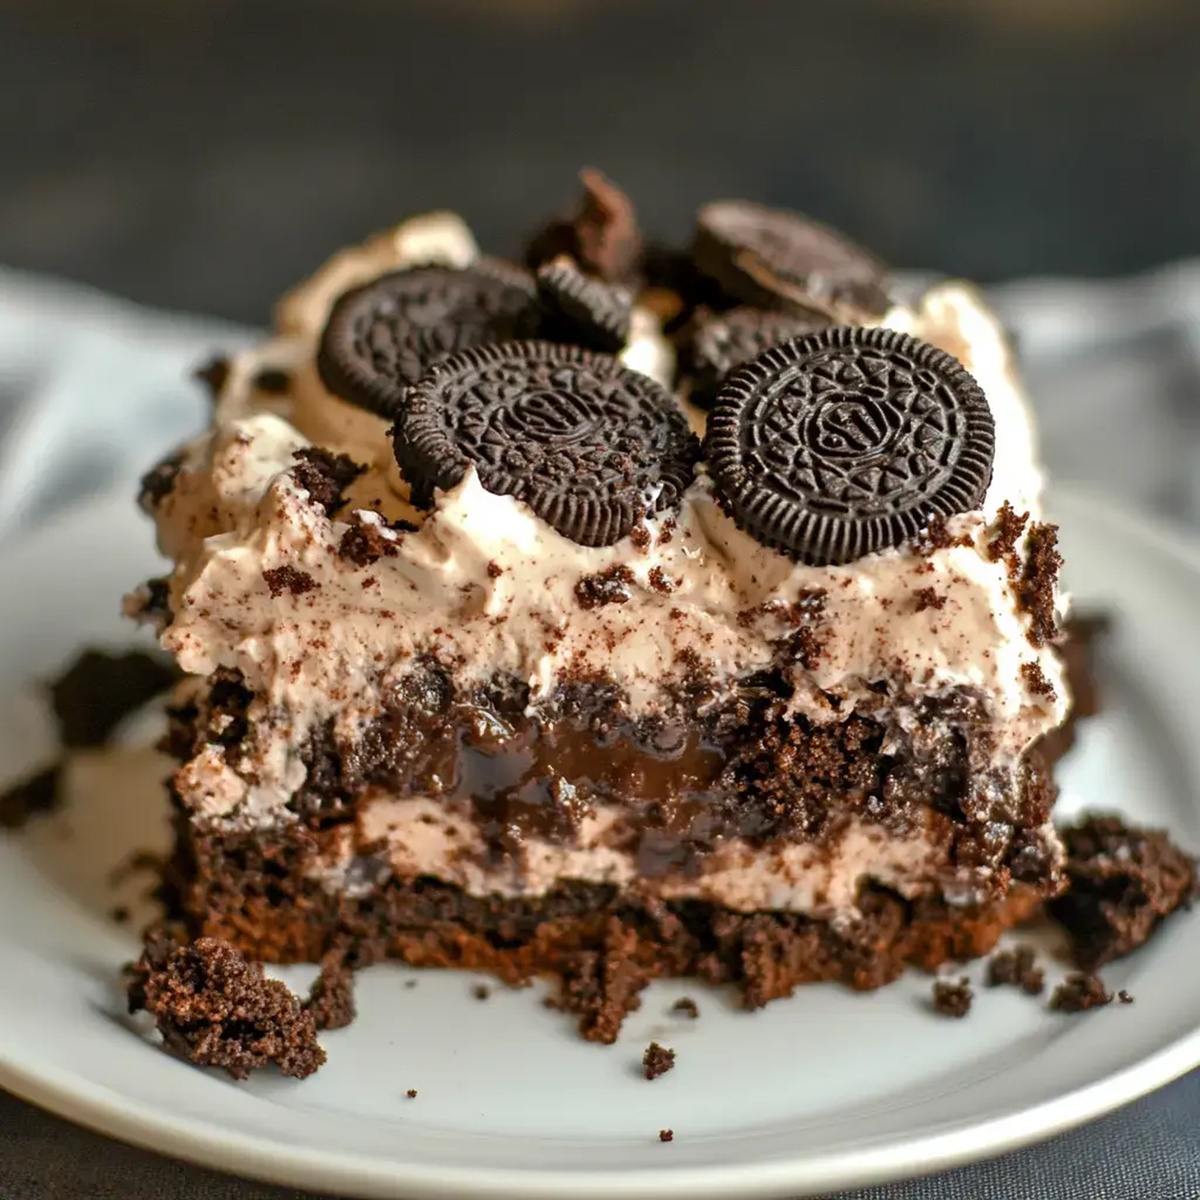
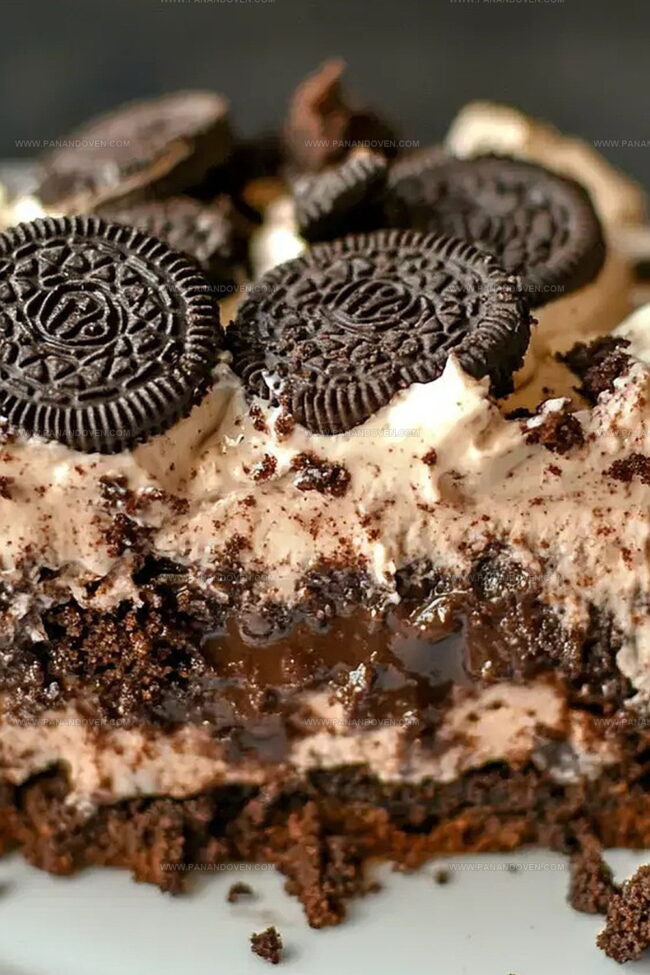
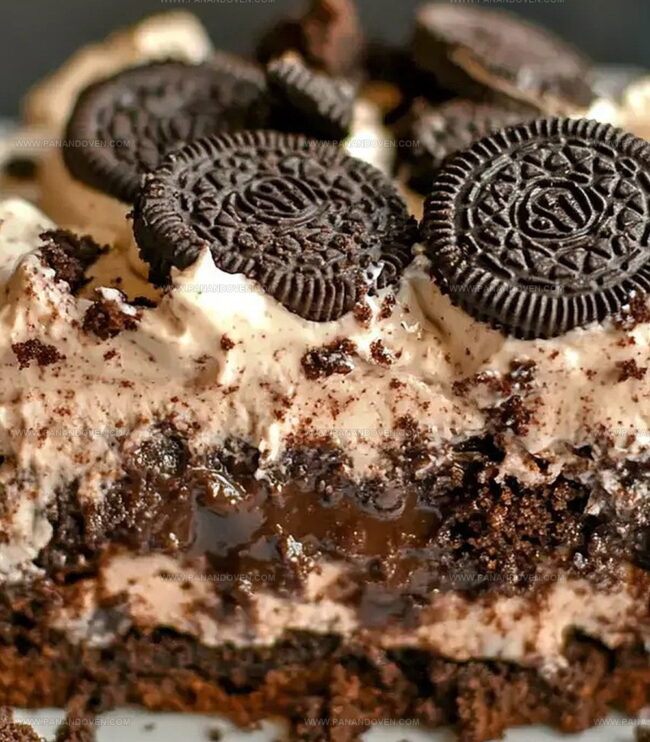
Layers of creamy pudding, crushed cookies, and unexpected textures make this dirt cake recipe a true crowd-pleaser.
Chocolate lovers will rejoice in the rich, decadent blend of ingredients that create a dessert both whimsical and delicious.
Each spoonful brings a delightful crunch and smooth creaminess that transports you to sweet moments of joy.
The simple yet ingenious combination of ingredients transforms ordinary ingredients into an extraordinary treat.
Minimal effort yields maximum satisfaction with this crowd-pleasing dessert that’s sure to spark smiles and conversation.
Prepare to indulge in a dessert that’s as fun to make as it is to eat.
Dirt Cake Recipe What Makes It So Fun
Dirt Cake Ingredients to Pick Up
Cake Base:Pudding Layers:Dairy and Cream:Cookies and Topping:Fudge:Tools for Making Dirt Cake Easy
Steps for Creamy Layered Dirt Cake
Step 1: Bake The Base
Prepare the cake according to the package instructions.
Once baked, let it cool for approximately 10 minutes on a wire rack to ensure the perfect texture and prevent burning.
Step 2: Create Fudge Holes
Use the handle of a wooden spoon or a fork to poke multiple holes across the entire surface of the warm cake.
Carefully pour the warm fudge sauce over the cake, allowing it to seep into the holes and infuse the cake with rich chocolate flavor.
Step 3: Chill And Set
Allow the cake to cool completely at room temperature.
This helps the fudge settle and creates a moist, delectable base for the upcoming layers.
Step 4: Prepare First Pudding Layer
In a mixing bowl, combine the first pudding mix with milk.
Whisk thoroughly until the mixture is smooth and free of lumps.
Pour the pudding evenly over the cooled cake.
Step 5: Initial Chilling Phase
Refrigerate the cake with the first pudding layer for 20 minutes.
This helps the pudding set and creates a stable foundation for the next layer.
Step 6: Create Second Pudding Mixture
In a separate bowl, mix the second pudding packet with the remaining milk.
Blend until the mixture is completely smooth and creamy.
Step 7: Blend Creamy Ingredients
Gently fold the prepared pudding mixture with the following ingredients:Ensure the ingredients are well combined but not overmixed to maintain a light, fluffy texture.
Step 8: Final Layer And Decoration
Spread the creamy mixture evenly over the cake.
Sprinkle the remaining crushed Oreo cookies on top to create a delightful “dirt” appearance.
Refrigerate until ready to serve.
Pro Tips for Creative Dirt Cake Layers
Flavorful Dirt Cake Mix Ins to Try
Ideas for Serving Dirt Cake at Parties
Storing Dirt Cake for Dessert Time
FAQs
The key ingredients include cake mix, fudge sauce, instant pudding mix, milk, Cool Whip, and Oreo cookies.
Yes, you can substitute Cool Whip with homemade whipped cream for a fresher taste and more natural ingredients.
Absolutely! Kids love the chocolate layers, crushed Oreo “dirt” topping, and the fun, playful presentation of this dessert.
This recipe is quite simple and beginner-friendly. It requires basic mixing skills and doesn’t need advanced baking techniques.
Print
Dirt Cake Recipe
- Total Time: 55 minutes
- Yield: 12 1x
Description
Rich chocolate dirt cake offers a playful dessert reminiscent of childhood gardens. Layers of crushed cookies, creamy pudding, and gummy worms create a whimsical treat you’ll eagerly devour.
Ingredients
Main Ingredients:
- 1 box chocolate cake mix
- 30 Oreos, crushed
- 2 (3.4 ounces) boxes chocolate instant pudding
- 12.8 ounces hot fudge
Dairy and Creamy Components:
- 3 1/2 cups milk
- 8 ounces Cool Whip, thawed
Cake Mix Additional Components:
- Box cake mix additional ingredients (as specified on box)
Instructions
- Prepare the cake according to package instructions, allowing it to cool for approximately 10 minutes after baking.
- Create multiple holes across the cake’s surface using a fork or wooden skewer.
- Drizzle warm fudge sauce evenly over the cake, ensuring it seeps into the punctured openings.
- Let the cake rest at room temperature until completely cooled, about 30 minutes.
- Whisk the first pudding mix with milk until smooth and creamy, using precise measurements.
- Gently pour the initial pudding layer over the cooled cake, covering the surface uniformly.
- Refrigerate the cake for 20 minutes to allow the first pudding layer to set.
- Prepare the second pudding mix with remaining milk, mixing until fully incorporated.
- Gently fold whipped topping and crushed cookies into the second pudding mixture, creating a light and airy texture.
- Spread the combined pudding and cookie mixture evenly across the cake’s surface.
- Garnish the top with remaining crushed cookies, creating an appealing and textured finish.
- Chill the dessert for an additional 1-2 hours before serving to enhance flavor and consistency.
Notes
- Customize the cake mix by choosing different flavors to match your taste preferences or dietary needs.
- Use sugar-free pudding and low-fat milk alternatives for a lighter version of the dessert.
- Crush Oreos more finely for a smoother texture or leave them chunkier for added crunch.
- Prepare the cake ahead of time and refrigerate overnight to enhance the flavor melding and make serving easier.
- Prep Time: 25 minutes
- Cook Time: 30 minutes
- Category: Desserts, Snacks
- Method: Baking
- Cuisine: American
Nutrition
- Serving Size: 12
- Calories: 300
- Sugar: 25 g
- Sodium: 350 mg
- Fat: 15 g
- Saturated Fat: 7 g
- Unsaturated Fat: 6 g
- Trans Fat: 0 g
- Carbohydrates: 40 g
- Fiber: 2 g
- Protein: 4 g
- Cholesterol: 20 mg
Clara Thompson
Recipe Developer & Food Educator
Expertise
Plant-based and vegetarian recipe development, Nutritional analysis and meal planning, Culinary education and workshop facilitation, Content writing with a focus on healthy living
Education
Diploma in Culinary Arts, Mt. San Jacinto College, CA
Focus: Comprehensive culinary training with an emphasis on sustainable cooking practices.
Certificate in Nutrition and Healthy Living, Cornell University (Online Program)
Focus: Understanding the principles of nutrition to create balanced and health-conscious recipes.
Clara lives where fresh ideas and fresh ingredients meet. She pairs her culinary know-how with her passion for healthy, planet-friendly cooking.
For Clara, good food should taste great, nourish your body, and feel easy to make. Her recipes highlight whole foods, colorful produce, and a deep respect for seasonal eating.