
Crispy Golden Deep Fried Oreos Recipe: A Sweet Carnival Treat
Crispy, golden-brown deep fried Oreos spark joy at every carnival and home kitchen.
These decadent treats deliver an unexpected twist on the classic chocolate sandwich cookie.
Coating each oreo in a light, airy batter before plunging it into bubbling hot oil creates a magical transformation.
The exterior becomes delightfully crunchy while the inner cookie melts into a warm, gooey center that promises pure indulgence.
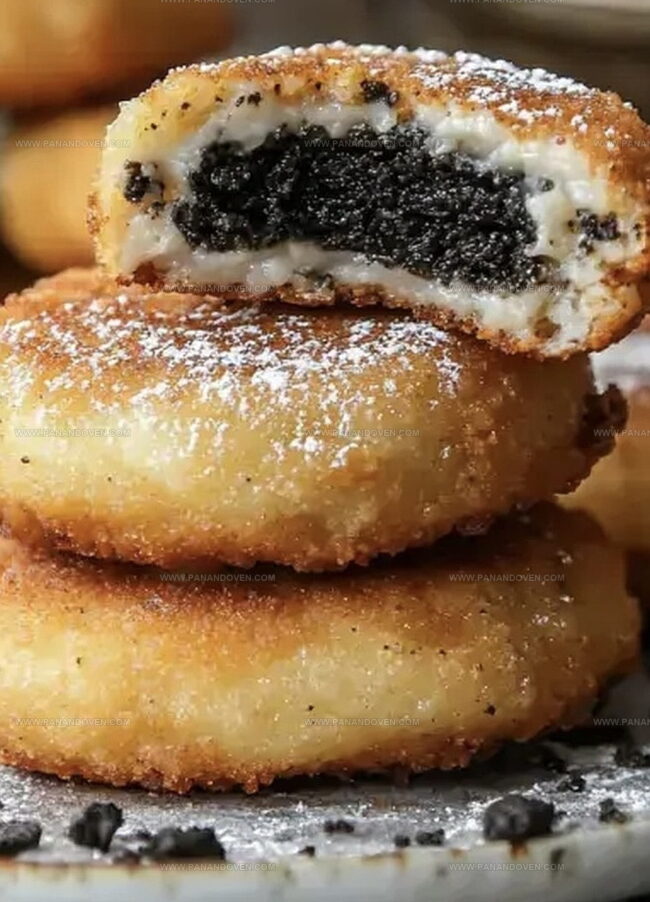
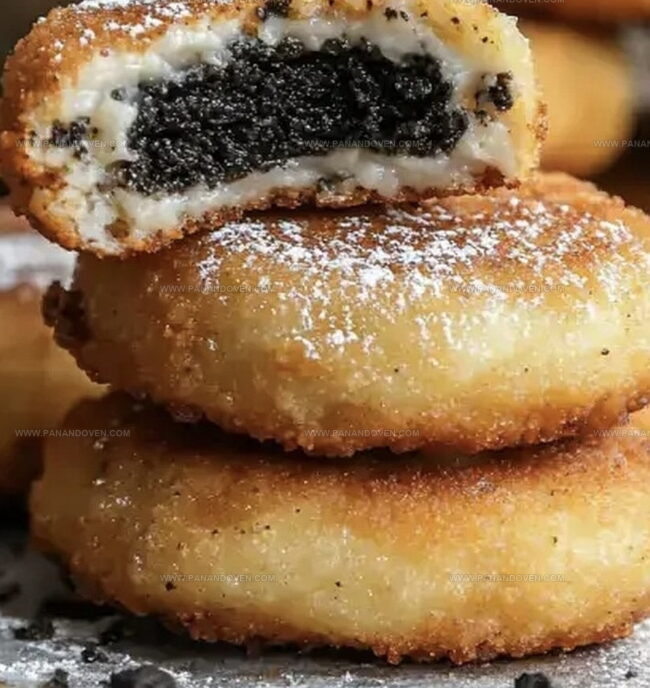
Powdered sugar dusted on top adds a final touch of sweetness that makes these Oreos impossible to resist.
Each bite guarantees a delightful crunch followed by a soft, creamy middle that melts in your mouth.
You won’t be able to stop at just one of these irresistible deep fried delights.
Deep Fried Oreos Fun Fair Dessert at Home
Must-Have Ingredients for Fried Oreos
Dry Ingredients:Wet Ingredients:Frying and Serving Ingredients:Tools for Crispy Deep Fried Oreos
Easy Steps for Deep Fried Oreos
Step 1: Create Fluffy Batter
Grab a mixing bowl and whisk together flour, sugar, baking powder, and salt until everything looks evenly combined.
This dry mix will be the secret to creating a super crispy coating for your Oreos.
Step 2: Blend Wet Ingredients
Pour in milk, crack an egg, and add melted butter to your dry ingredients.
Stir everything gently – you want the batter slightly lumpy, not perfectly smooth.
Let the batter sit and rest for five minutes, which helps the ingredients meld together beautifully.
Step 3: Prepare Frying Station
Select a large pot and pour vegetable oil inside.
Heat the oil until it reaches 350 degrees Fahrenheit.
Line a plate with paper towels to help absorb extra oil after frying.
This will keep your Oreos crisp and not greasy.
Step 4: Coat Oreo Cookies
Take each Oreo and carefully dunk it into the batter using forks.
Make sure the entire cookie gets a nice, even coating.
Let excess batter drip off before moving to the next step.
Step 5: Fry To Golden Perfection
Gently slide battered Oreos into hot oil.
Fry 3-4 cookies at a time to avoid overcrowding.
Cook each side for approximately one minute until they turn a beautiful golden brown color.
Step 6: Remove and Drain
Use a slotted spoon to rescue your fried Oreos from the oil.
Transfer them onto the paper towel-lined plate to drain excess oil and cool down slightly.
Step 7: Serve With Sweet Flourish
Dust the warm fried Oreos with powdered sugar.
Serve immediately while they’re still warm and wonderfully crispy.
Tips for Perfect Carnival-Style Fried Oreos
Oreo Variations for Every Sweet Tooth
How to Serve Deep Fried Oreos
Storing Fried Oreos for Late Night Snacks
FAQs
The batter requires flour, granulated sugar, baking powder, kosher salt, milk, egg, and melted butter. These ingredients create a light, crispy coating for the Oreos.
Vegetable oil works best due to its neutral flavor and high smoke point. You can also use canola or peanut oil as alternatives for deep frying.
Use a kitchen thermometer to ensure the oil reaches exactly 350F. If you don’t have a thermometer, drop a small amount of batter into the oil – it should sizzle and rise immediately when the temperature is correct.
Print
Deep Fried Oreos Recipe
- Total Time: 20 minutes
- Yield: 12 1x
Description
Indulgent deep fried oreos deliver a carnival-style dessert that blends crispy batter with classic cookie goodness. Simple ingredients and quick frying technique create a nostalgic treat you cannot resist enjoying.
Ingredients
Main Dry Ingredients:
- 1 cup all-purpose flour
- 1 tablespoon (15 ml) granulated sugar
- 1 tablespoon (15 ml) baking powder
- 1/4 teaspoon (1.25 ml) kosher salt
Wet Ingredients:
- 1 cup milk
- 1 large egg
- 2 tablespoons (30 ml) butter, melted
Frying and Additional Ingredients:
- 3 cups vegetable oil (for frying)
- 36 Oreos (1 package, 14.3 ounces / 405 grams)
- Powdered sugar (for garnish)
Instructions
- Whisk together flour, sugar, baking powder, and salt in a medium mixing bowl, creating a uniform dry base for the batter.
- Pour milk, crack the egg, and add melted butter into the dry ingredients. Stir minimally, allowing a slightly lumpy texture to form. Let the batter relax for 5 minutes to develop consistency.
- Prepare a large pot with vegetable oil, heating to precisely 350°F. Line a separate plate with paper towels to absorb excess oil after frying.
- Immerse each Oreo cookie completely in the prepared batter, using forks to ensure thorough coating. Allow surplus batter to drip off gently before carefully lowering into the hot oil.
- Carefully place 3-4 battered Oreos into the oil simultaneously, avoiding overcrowding. Fry each side for approximately one minute until achieving a rich golden-brown color.
- Extract the fried Oreos using a slotted spoon, transferring them to the paper towel-lined plate to drain and remove excess oil.
- Wait a few minutes for the Oreos to cool slightly, then dust generously with powdered sugar. Serve immediately while warm for optimal taste and texture.
Notes
- Prevent Batter Clumping: Stir the batter minimally to keep it light and airy, which ensures a crispy, delicate coating around the Oreos.
- Oil Temperature Control: Maintain a consistent 350F for even cooking and to prevent the Oreos from absorbing too much oil or burning.
- Batter Consistency Tip: Let the batter rest for five minutes to allow the flour to hydrate, creating a smoother, more adhesive coating.
- Dietary Modifications: Use gluten-free flour and dairy-free milk for a celiac or lactose-intolerant friendly version of this indulgent treat.
- Prep Time: 10 minutes
- Cook Time: 10 minutes
- Category: Desserts, Snacks
- Method: Frying
- Cuisine: American
Nutrition
- Serving Size: 12
- Calories: 180
- Sugar: 9 g
- Sodium: 70 mg
- Fat: 10 g
- Saturated Fat: 2 g
- Unsaturated Fat: 8 g
- Trans Fat: 0 g
- Carbohydrates: 22 g
- Fiber: 1 g
- Protein: 2 g
- Cholesterol: 20 mg
Marcus Reed
Founder & Food Content Creator
Expertise
Single-recipe development, Seasonal and local ingredient utilization, Food photography and styling, Culinary writing and content creation
Education
Culinary Arts Certificate, Blue Ridge Community and Technical College, WV
Focus: Fundamentals of culinary techniques, emphasizing hands-on experience in small-scale kitchen settings.
Marcus’s story begins in Asheville, where good food and family kitchens shaped his earliest memories. After hands-on culinary training and a lot of trial (and a little error), he realized that real cooking isn’t about perfection, it’s about connection.
At Pan and Oven, Marcus crafts recipes that are easy to follow, packed with flavor, and built for real kitchens.