Quick & Crispy Chicken Katsu Recipe: A Delightful Japanese Classic
Weeknight dinners demand something special, and this crispy chicken katsu recipe delivers a knockout punch of flavor and texture.
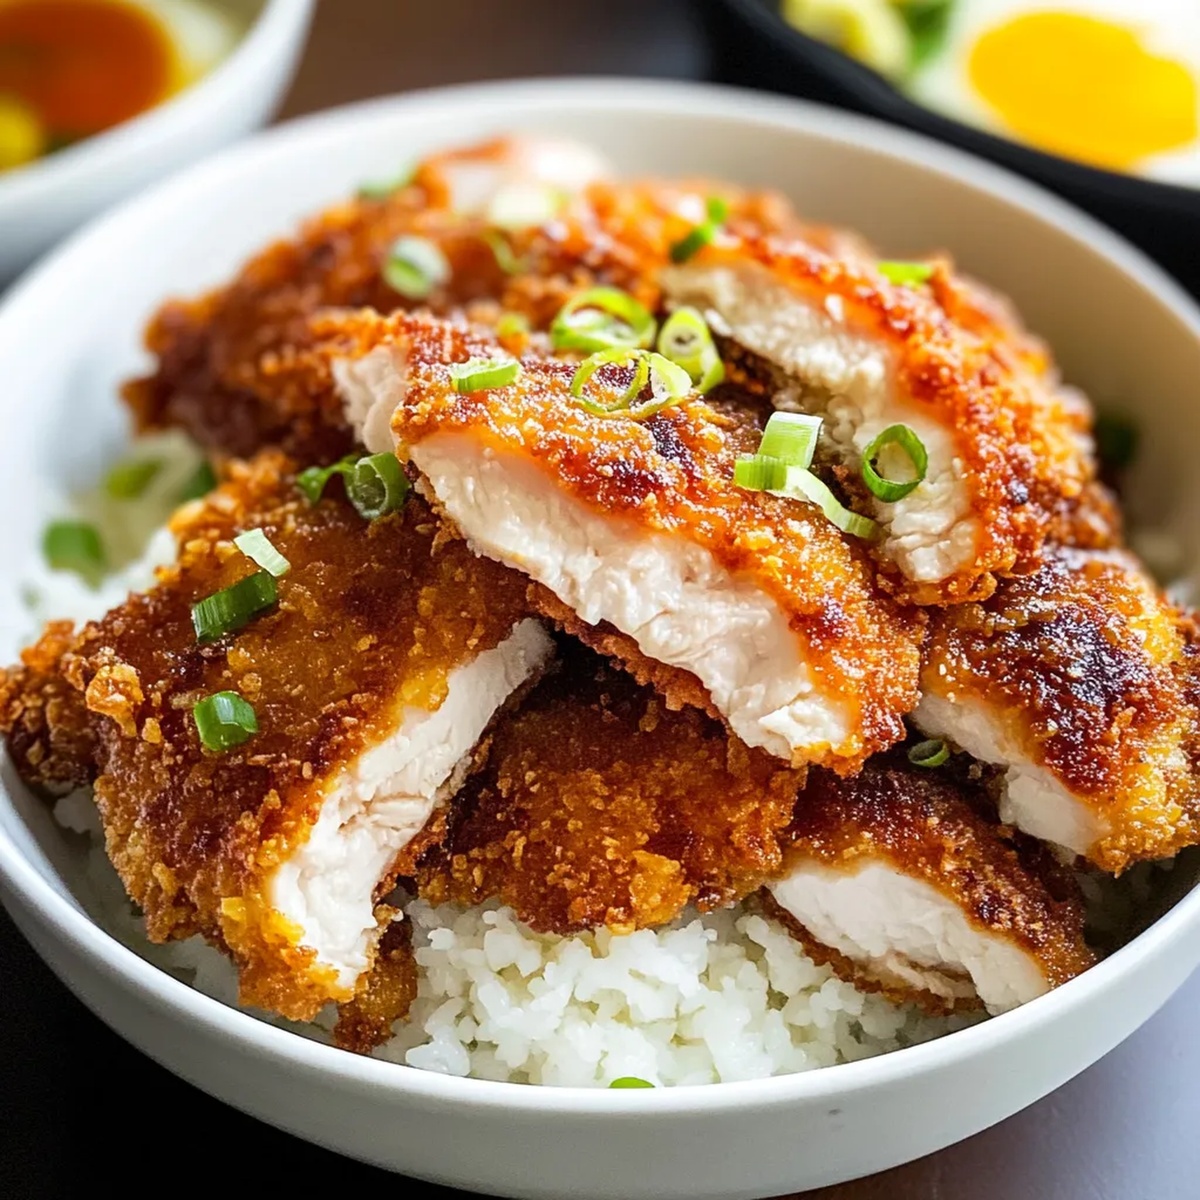
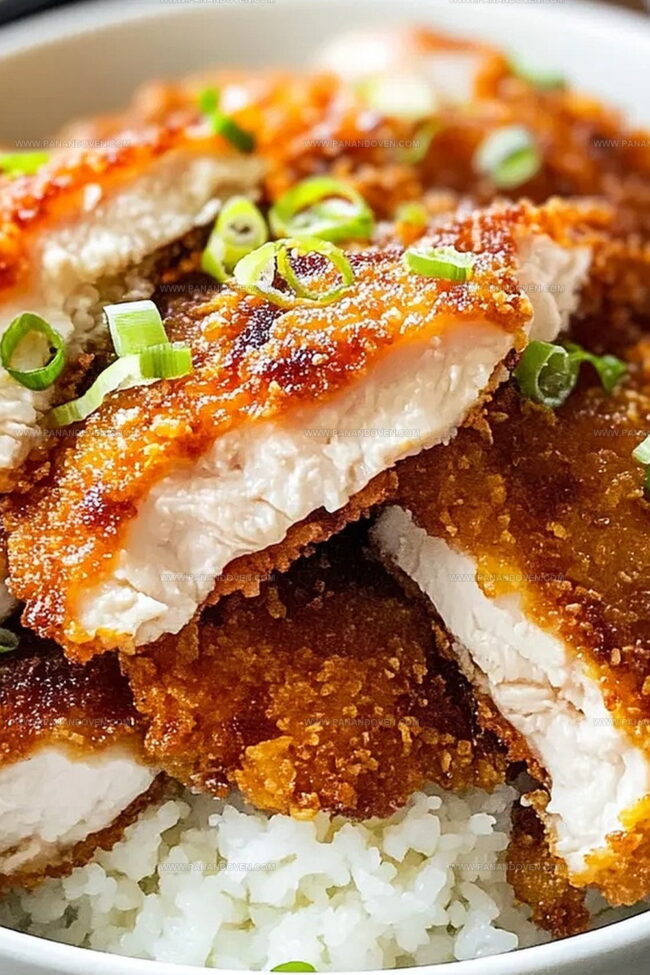
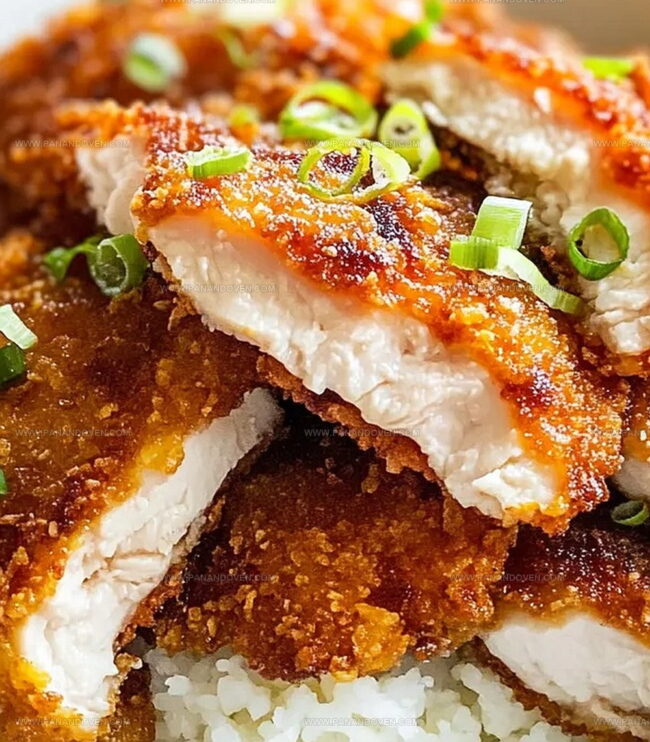
Golden-brown breaded chicken cutlets promise pure culinary delight.
Japanese comfort food doesn’t get more satisfying than this crisp, juicy dish.
Each slice of tender chicken transforms into a crispy masterpiece with a perfectly crunchy exterior.
Panko breadcrumbs create an irresistible coating that seals in moisture and adds incredible crunch.
Home cooks can easily master this restaurant-quality meal with simple ingredients and straightforward techniques.
Prepare to elevate your dinner game with this crowd-pleasing chicken katsu that’ll have everyone asking for seconds.
Crispy Chicken Katsu Crunch Factor
What You Need for Chicken Katsu Success
Main Protein:Coating Ingredients:Cooking Ingredients:Essential Tools for Chicken Katsu Cooking
How to Prepare Crispy Chicken Katsu at Home
Step 1: Prepare Chicken
Pat chicken thighs completely dry using paper towels to ensure a crispy coating.
Remove any excess moisture which could prevent the breading from sticking properly.
Step 2: Create Coating Zones
Prepare three separate bowls for breading:Step 3: Bread the Chicken
Carefully coat each chicken thigh by following this sequence:Let breaded chicken rest for 10 minutes to help coating adhere
Step 4: Fry to Golden Perfection
Heat vegetable or canola oil in a deep skillet to 350°F.
Gently place breaded chicken into hot oil.
Fry chicken in small batches to maintain oil temperature.
Cook until exterior turns deep golden brown and internal temperature reaches 165°F.
Remove chicken and place on wire rack to drain excess oil.
Serve hot with preferred dipping sauce like tonkatsu or sweet chili sauce.
Tips for Golden Fried Chicken Katsu
Chicken Katsu Recipe Swaps to Explore
Katsu Serving Suggestions for Every Table
Perfect Plate Companions: Crispy Chicken Katsu Pairings
Keeping Chicken Katsu Crispy Longer
FAQs
Resting helps the coating stick better to the chicken, preventing it from falling off during frying and creating a crispier exterior.
Panko breadcrumbs are lighter, airier, and create a crunchier, more delicate coating that gives chicken katsu its signature crispy texture.
Use a meat thermometer to check that the internal temperature reaches 165°F at the thickest part of the chicken, ensuring it’s safe to eat.
Print
Crispy Chicken Katsu Recipe
- Total Time: 35 minutes
- Yield: 4 1x
Description
Savory crispy chicken katsu brings Japanese comfort to your kitchen with golden-brown panko-crusted chicken. Served alongside tangy tonkatsu sauce, this dish offers a delightful crunch you’ll crave again and again.
Ingredients
Main Ingredients:
- 1 pound (454 grams) boneless skinless chicken thighs (about 5 pieces)
Wet Batter:
- 2 large eggs
- 1 tablespoon milk
- 1/4 teaspoon salt
- 1/4 teaspoon black pepper
- 1/4 teaspoon garlic powder
Dry Coating and Breading:
- 1/2 cup all-purpose flour
- 1/2 teaspoon salt
- 1/4 teaspoon black pepper
- 1/4 teaspoon garlic powder
- 2 cups panko breadcrumbs
- 1/2 teaspoon salt
- 1/4 teaspoon black pepper
- 1/4 teaspoon garlic powder
Cooking Oil:
- Vegetable oil for frying
Instructions
- Thoroughly blot chicken thighs with paper towels to remove excess moisture, ensuring a crisp coating.
- Create three distinct seasoning stations: first, blend flour with salt, black pepper, and garlic powder; second, whisk eggs with milk and complementary seasonings; third, combine Panko breadcrumbs with additional salt, black pepper, and garlic powder.
- Systematically enrobe each chicken thigh: initially dust with seasoned flour, completely submerge in egg mixture, then meticulously cover with breadcrumb mixture, pressing crumbs firmly to create an even, adherent layer.
- Allow breaded chicken to rest for 10 minutes, enabling coating to set and adhere securely.
- Preheat cooking oil to precisely 350°F in a deep skillet or fryer, maintaining consistent temperature for optimal crispiness.
- Carefully lower chicken pieces into hot oil, cooking in small batches to prevent overcrowding and ensure even browning.
- Fry each piece until exterior turns golden brown and interior reaches safe internal temperature, approximately 3-4 minutes per side.
- Remove katsu and place on wire rack, allowing excess oil to drain and maintaining crispy texture.
- Let chicken rest briefly before slicing and serving to preserve juiciness and crunch.
Notes
- Ensure chicken is completely dry before breading to achieve maximum crispiness and prevent soggy coating.
- For gluten-free option, substitute all-purpose flour with rice flour or gluten-free breadcrumbs to accommodate dietary restrictions.
- Use a meat thermometer to check internal temperature reaches 165F, guaranteeing perfectly cooked chicken without drying out.
- For lighter version, try oven-baking at 425F on a wire rack, lightly spraying breaded chicken with cooking spray to help achieve golden color and crispy texture.
- Prep Time: 20 minutes
- Cook Time: 15 minutes
- Category: Lunch, Dinner, Appetizer
- Method: Frying
- Cuisine: Japanese
Nutrition
- Serving Size: 4
- Calories: 508
- Sugar: 1 g
- Sodium: 720 mg
- Fat: 24 g
- Saturated Fat: 4 g
- Unsaturated Fat: 20 g
- Trans Fat: 0 g
- Carbohydrates: 49 g
- Fiber: 2 g
- Protein: 28 g
- Cholesterol: 175 mg
Clara Thompson
Recipe Developer & Food Educator
Expertise
Plant-based and vegetarian recipe development, Nutritional analysis and meal planning, Culinary education and workshop facilitation, Content writing with a focus on healthy living
Education
Diploma in Culinary Arts, Mt. San Jacinto College, CA
Focus: Comprehensive culinary training with an emphasis on sustainable cooking practices.
Certificate in Nutrition and Healthy Living, Cornell University (Online Program)
Focus: Understanding the principles of nutrition to create balanced and health-conscious recipes.
Clara lives where fresh ideas and fresh ingredients meet. She pairs her culinary know-how with her passion for healthy, planet-friendly cooking.
For Clara, good food should taste great, nourish your body, and feel easy to make. Her recipes highlight whole foods, colorful produce, and a deep respect for seasonal eating.