Crispy Cheesy Bacon Rolls Recipe: A Savory Homemade Delight
Comfort food reaches new heights with these irresistible crispy cheesy bacon rolls that promise to tantalize every taste bud.
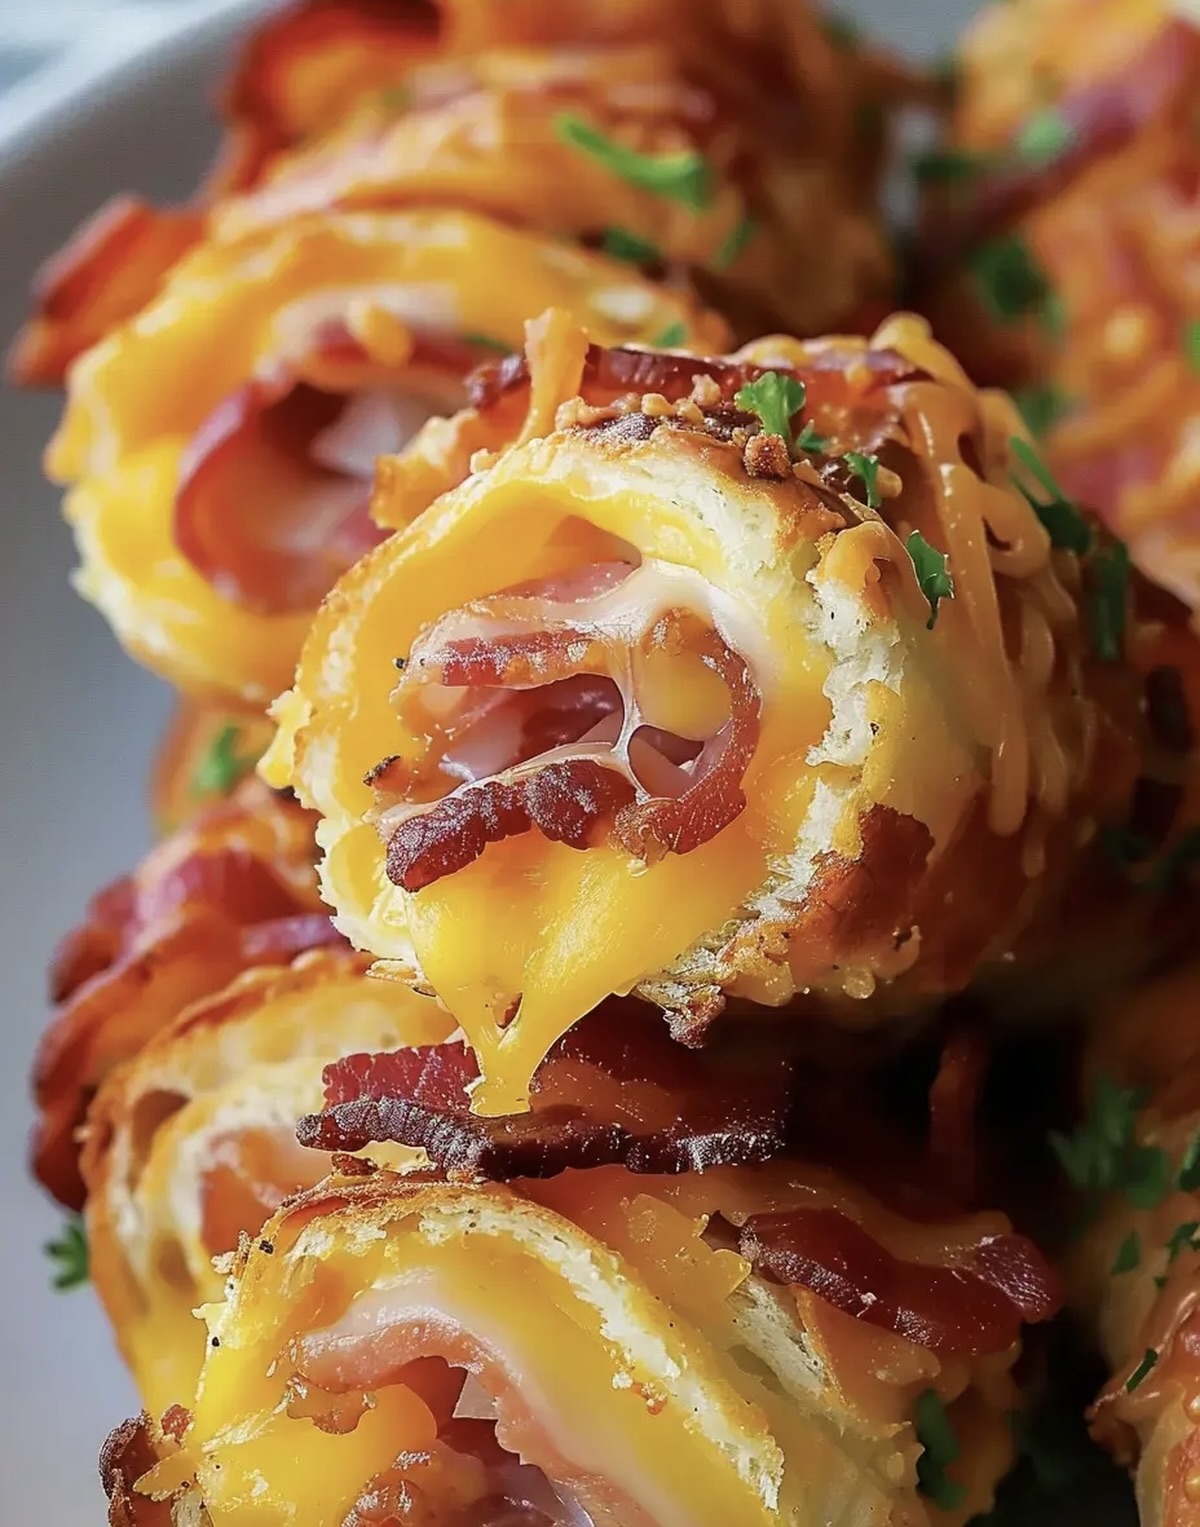
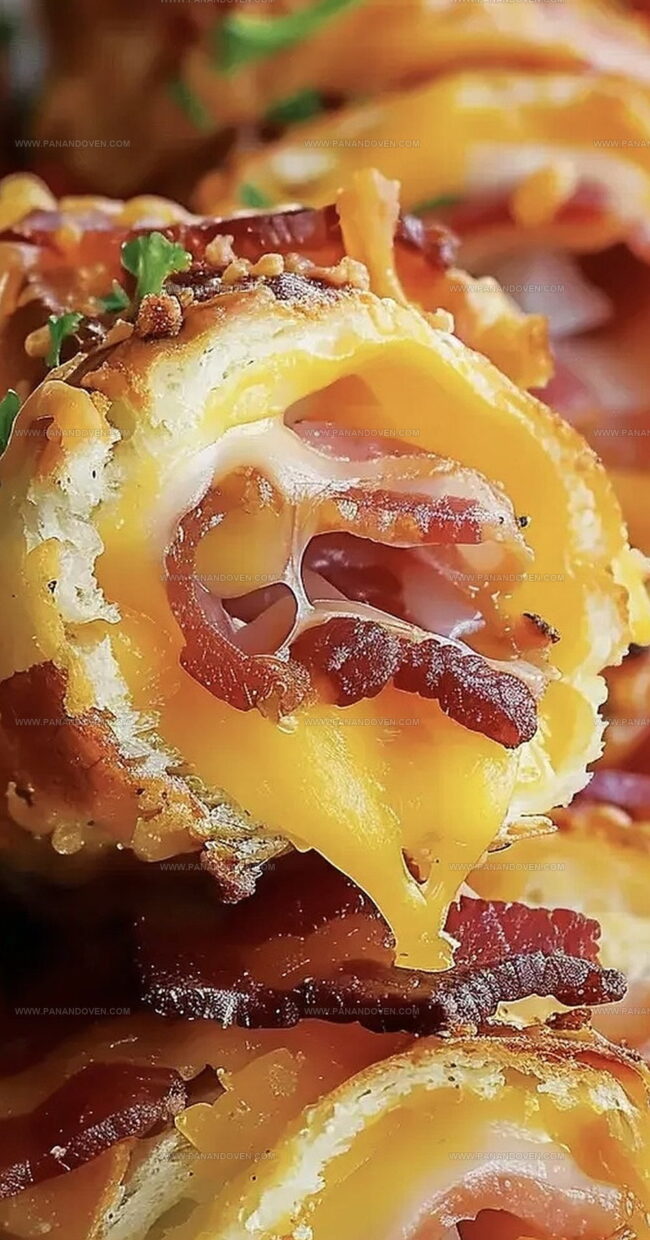
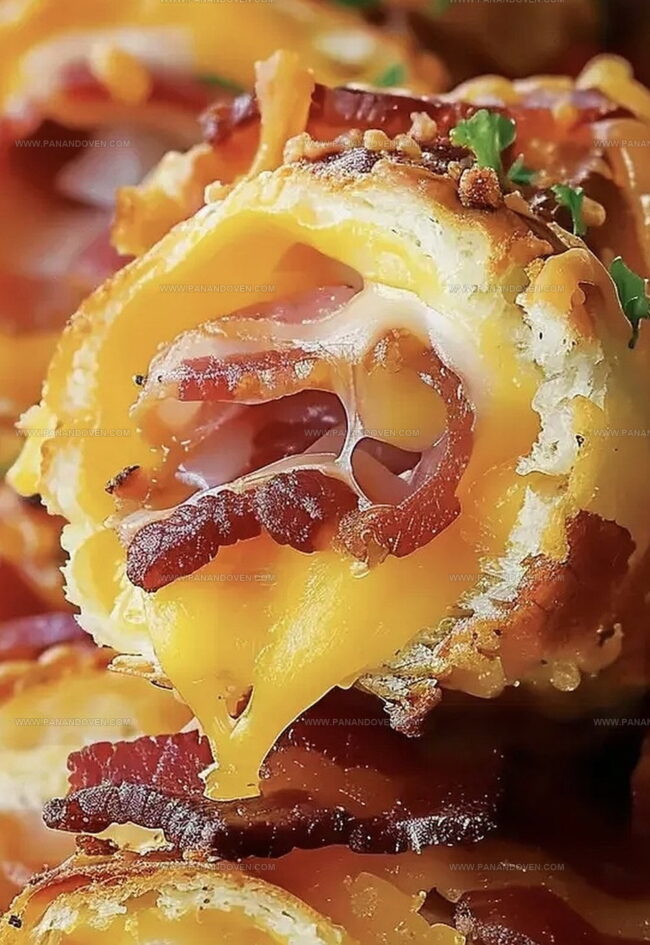
Golden-brown pastry wrapped around melted cheese and crisp bacon creates a mouthwatering sensation.
Each bite delivers a perfect blend of savory flavors and delightful textures.
The combination of flaky dough and salty bacon makes these rolls an instant crowd-pleaser.
Simple ingredients come together to craft a stunning appetizer or snack that everyone will adore.
Home cooks can easily master this recipe with just a few basic steps.
These delectable rolls will steal the show at any gathering and leave everyone craving more.
Crispy Cheesy Bacon Rolls: Snack Time That Sizzles
Ingredients List for Bacon Cheese Roll-Ups
Main Ingredients:
Bread Slices: A soft, white bread that provides the base for the rolls and creates a delicate wrapper for the cheese.
Cheese: A melty cheese that adds rich, creamy flavor and gooey texture to the rolls.
Bacon: A savory, smoky meat that wraps around the rolls and adds crispy, flavorful edges.
Flavor Enhancers:Optional Additions:Essential Tools for Perfectly Crispy Bacon Rolls
Rolling and Baking Cheesy Bacon Snacks at Home
Step 1: Prepare The Bacon
Start by cooking the bacon partially in an air fryer or skillet over medium-high heat.
You want to render some fat but keep the bacon flexible enough to wrap around the rolls.
Remove the bacon and let it cool slightly.
Step 2: Flatten The Bread
Take your bread slices and roll them out flat using a rolling pin.
This helps create a smooth surface for rolling and ensures the bread is thin and pliable.
Step 3: Layer With Cheese
Sprinkle shredded cheese or place a cheese slice onto each flattened bread piece.
The cheese will melt beautifully inside the roll and create a gooey center.
Step 4: Create Bacon-Wrapped Rolls
Carefully roll the bread around the cheese, creating a tight cylinder.
Wrap a slice of partially cooked bacon around each roll, securing the ends with toothpicks to keep everything in place.
Step 5: Brown And Melt
Heat a pan over medium-low heat and add a small amount of butter.
Use tongs to gently turn the rolls, coating them in butter and ensuring even browning.
Continue cooking and turning until the bread is golden and the cheese has melted completely.
Step 6: Serve Immediately
Transfer the crispy cheesy bacon rolls to a serving plate.
Remove the toothpicks and enjoy while they’re hot and the cheese is still gooey.
Tips for Bacon That’s Always Crispy and Cheesy
Delicious Spin-Offs for Bacon Cheese Rolls
Serving Bacon Rolls Hot and Fresh
How to Keep Bacon Cheese Rolls Crisp
FAQs
Yes, you can experiment with various cheeses like cheddar, mozzarella, or swiss. Just ensure the cheese melts well and complements the bacon’s flavor.
Absolutely! Turkey bacon works great as a leaner alternative. Just watch the cooking time as it might crisp up faster than regular bacon.
White bread is traditional, but you can use wheat, sourdough, or brioche. The key is using soft, fresh bread that rolls easily without cracking.
You can assemble the rolls ahead of time and store them in the refrigerator, covered, for a few hours before cooking. Cook just before serving to maintain the crispy texture.
Print
Crispy Cheesy Bacon Rolls Recipe
- Total Time: 15 minutes
- Yield: 4 1x
Description
Savory crispy cheesy bacon rolls highlight comfort cuisine with irresistible flavors. Melted cheese and crisp bacon create a delightful snack you won’t be able to resist.
Ingredients
Main Ingredients:
- 8 slices bread (crusts removed)
- 8 slices cheese (or 1 cup / 240 milliliters grated cheddar)
- 8 slices bacon (raw or pre-cooked)
Binding Ingredients:
- 1/4 cup (60 milliliters) butter
Instructions
- Partially render bacon in an air fryer or skillet at medium-high temperature until fat starts to release but bacon remains pliable, approximately 2-3 minutes.
- Trim bread crusts and flatten each slice thoroughly using a rolling pin to create a thin, uniform surface.
- Distribute cheese evenly across the flattened bread slices, ensuring complete coverage from edge to edge.
- Carefully roll bread with cheese into compact cylindrical shapes, maintaining tight and consistent form.
- Encase each bread roll completely with a single bacon slice, securing ends with toothpicks to prevent unraveling during cooking.
- Melt butter in a pan over medium-low heat, creating a thin coating across the cooking surface.
- Gently place bacon-wrapped rolls into the buttered pan, using tongs to rotate and brown evenly until bacon becomes crisp and golden, roughly 4-5 minutes.
- Continuously baste rolls with melted butter to enhance browning and prevent burning, turning periodically to ensure uniform crispness.
- Remove from heat once bacon achieves desired crispness and cheese appears thoroughly melted.
- Transfer immediately to serving plate, removing toothpicks before presenting.
Notes
- Select bacon carefully to ensure even cooking and crispy texture without burning.
- Partially pre-cook bacon allows better control over final crispiness and prevents undercooked sections.
- Use room temperature cheese for smoother melting and more consistent coverage inside the roll.
- Experiment with different cheese varieties like sharp cheddar, Swiss, or pepper jack for unique flavor profiles.
- Gluten-free option: Replace white bread with gluten-free bread or low-carb alternatives like lettuce wraps.
- Vegetarian adaptation: Substitute bacon with thin sliced zucchini or eggplant and use plant-based cheese.
- Control heat carefully during cooking to prevent burning and ensure even golden-brown coloration.
- Toothpicks are crucial for maintaining roll structure and preventing unraveling during cooking.
- Prep Time: 10 minutes
- Cook Time: 5 minutes
- Category: Appetizer, Snacks
- Method: Frying
- Cuisine: American
Nutrition
- Serving Size: 4
- Calories: 330
- Sugar: 1 g
- Sodium: 800 mg
- Fat: 25 g
- Saturated Fat: 12 g
- Unsaturated Fat: 10 g
- Trans Fat: 0 g
- Carbohydrates: 22 g
- Fiber: 1 g
- Protein: 11 g
- Cholesterol: 30 mg
Marcus Reed
Founder & Food Content Creator
Expertise
Single-recipe development, Seasonal and local ingredient utilization, Food photography and styling, Culinary writing and content creation
Education
Culinary Arts Certificate, Blue Ridge Community and Technical College, WV
Focus: Fundamentals of culinary techniques, emphasizing hands-on experience in small-scale kitchen settings.
Marcus’s story begins in Asheville, where good food and family kitchens shaped his earliest memories. After hands-on culinary training and a lot of trial (and a little error), he realized that real cooking isn’t about perfection, it’s about connection.
At Pan and Oven, Marcus crafts recipes that are easy to follow, packed with flavor, and built for real kitchens.