
The Best Creamy Peanut Butter Fudge Recipe for Sweet Tooth Magic
Chocolate and peanut butter dance together in this decadent peanut butter fudge recipe that melts hearts with every bite.
Sweet memories of childhood drift through each velvety square of goodness.
Rich, smooth, and impossibly addictive, this fudge brings pure comfort to dessert lovers everywhere.
No complicated techniques stand between you and confectionery bliss.
Condensed milk provides the silky base that helps create perfect texture and incredible richness.
The simplicity of this recipe means even novice bakers can craft a delightful treat in minutes.
Prepare to be the star of any gathering with this irresistible confection that disappears faster than you can slice it.
Creamy Peanut Butter Fudge What Sets It Apart
Ingredient List for Peanut Butter Fudge Lovers
Main Ingredients:Flavor Enhancers:Optional Preparation Items:Gear Needed for Perfect Peanut Butter Fudge
How to Whip Up Peanut Butter Fudge Easily
Step 1: Prep Your Workspace
Grab a medium-sized microwave-safe bowl or saucepan.
Line an 8-inch square baking dish with parchment paper, allowing extra edges to hang over for easy removal.
Have your mixing tools ready and clear some space in the refrigerator.
Step 2: Melt Creamy Base
For microwave method:Combine ingredients in the microwave-safe bowl.
Heat for 90 seconds, stopping halfway to stir.
Blend until everything looks silky and combined.
For stovetop method:
Place ingredients in a saucepan.
Heat over medium-low, stirring constantly until smooth and fully incorporated.
Remove from heat immediately after melting.
Step 3: Create Fudge Texture
Gradually add powdered sugar to the warm mixture.
Stir vigorously until the mixture becomes thick and pulls away from the bowl’s sides.
The consistency should resemble a soft, glossy dough.
Step 4: Shape and Chill
Transfer the fudge mixture into the prepared pan.
Use a spatula or clean hands to press evenly into all corners.
Smooth the top for a perfect finish.
Step 5: Set and Slice
Refrigerate the fudge for 4 hours or overnight until completely firm.
Use parchment paper edges to lift the entire block out.
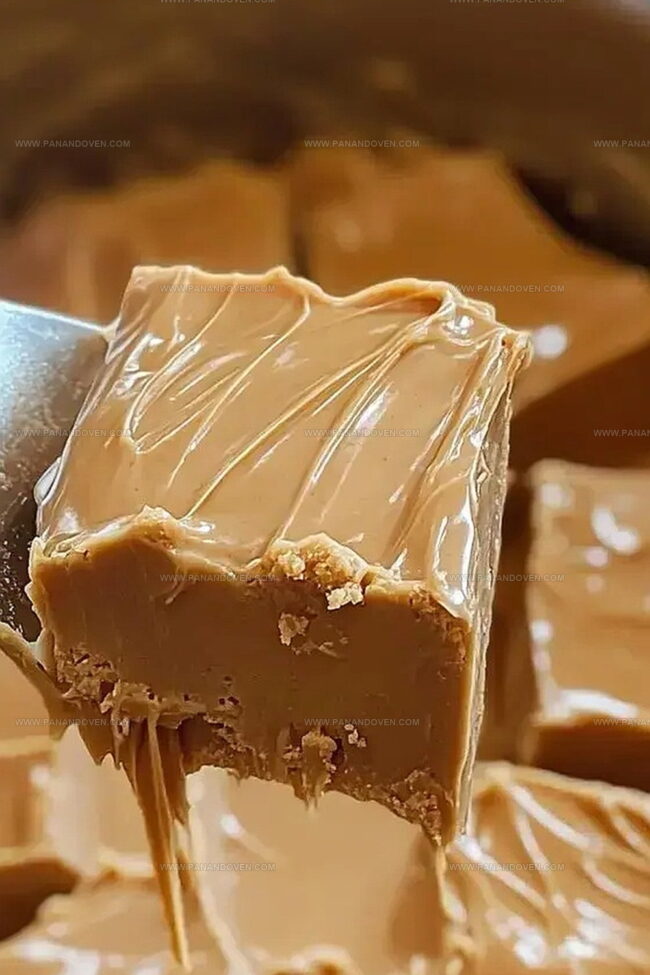
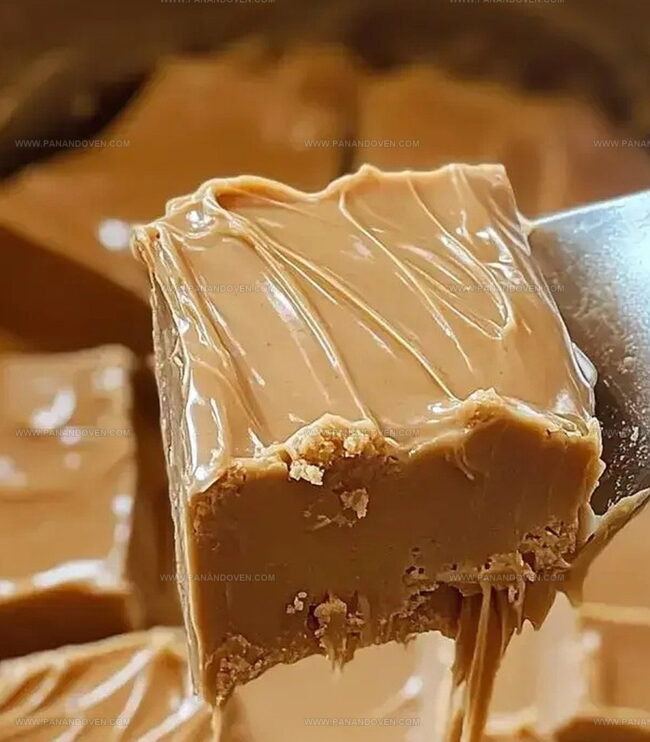
Slice into bite-sized squares using a sharp knife.
Step 6: Store and Enjoy
Keep fudge in an airtight container in the refrigerator.
Enjoy within one week for maximum freshness.
Bring to room temperature before serving for the best creamy texture.
Peanut Butter Fudge Tricks from the Pros
Ideas for Changing Up Peanut Butter Fudge
Creative Peanut Butter Fudge Presentation
Peanut Butter Fudge Storage Pointers
FAQs
Yes, but you’ll need to stir it well and potentially adjust the consistency. Natural peanut butter might make the fudge slightly softer, so you may need to add a bit more powdered sugar to help it set properly.
Most likely yes, but always check your specific ingredients. Peanut butter, butter, vanilla, and powdered sugar are typically gluten-free, but verify the labels of each ingredient to be certain.
Reduce the amount of powdered sugar slightly or use a natural peanut butter with no added sugar. You can also add a pinch of salt to balance the sweetness and enhance the peanut butter flavor.
Print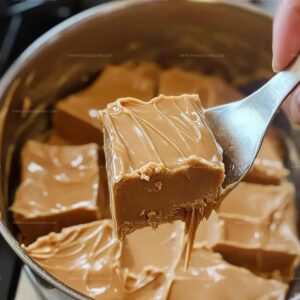
Creamy Peanut Butter Fudge Recipe
- Total Time: 4 hours 15 minutes
- Yield: 16 1x
Description
Homemade creamy peanut butter fudge delivers rich chocolate and nutty flavors in a classic sweet treat. Simple ingredients and easy preparation make this dessert a perfect indulgence for weekend gatherings and special occasions you’ll savor.
Ingredients
Main Ingredients:
- 1 cup (240 ml) butter
- 1 cup (250 g) creamy peanut butter
- 3 1/2 cups (440 g) powdered sugar
Flavor Enhancers:
- 1 teaspoon (5 ml) vanilla extract
Instructions
- Prepare an 8-9 inch pan by lightly greasing or lining with parchment paper to ensure easy removal of the fudge.
- Select either microwave or stovetop method to melt butter and peanut butter together, heating until completely smooth and integrated.
- Remove melted mixture from heat source and incorporate vanilla extract, stirring thoroughly to distribute flavor evenly.
- Gradually fold powdered sugar into the warm mixture, mixing consistently until a uniform, thick consistency develops without any sugar lumps.
- Transfer the fudge mixture into the prepared pan, using a spatula to spread evenly and create a smooth, level surface.
- Refrigerate the fudge for approximately 4 hours, allowing it to completely set and firm up to the ideal cutting texture.
- Once chilled, remove from refrigerator and slice into neat, uniform squares using a sharp knife.
- Store the finished fudge in an airtight container within the refrigerator to maintain its creamy texture and prevent melting.
Notes
- Choose creamy peanut butter for a smoother, more consistent texture that blends easily without lumps.
- Sift powdered sugar before mixing to prevent clumping and ensure a silky, uniform fudge.
- Use room temperature ingredients to help ingredients combine more smoothly and reduce microwaving time.
- Consider using natural peanut butter for a less sweet, more intense nutty flavor profile.
- Prep Time: 15 minutes
- Cook Time: 4 hours
- Category: Desserts, Snacks
- Method: Blending
- Cuisine: American
Nutrition
- Serving Size: 16
- Calories: 229
- Sugar: 17 g
- Sodium: 72 mg
- Fat: 14 g
- Saturated Fat: 6 g
- Unsaturated Fat: 8 g
- Trans Fat: 0 g
- Carbohydrates: 25 g
- Fiber: 0 g
- Protein: 3 g
- Cholesterol: 30 mg
Clara Thompson
Recipe Developer & Food Educator
Expertise
Plant-based and vegetarian recipe development, Nutritional analysis and meal planning, Culinary education and workshop facilitation, Content writing with a focus on healthy living
Education
Diploma in Culinary Arts, Mt. San Jacinto College, CA
Focus: Comprehensive culinary training with an emphasis on sustainable cooking practices.
Certificate in Nutrition and Healthy Living, Cornell University (Online Program)
Focus: Understanding the principles of nutrition to create balanced and health-conscious recipes.
Clara lives where fresh ideas and fresh ingredients meet. She pairs her culinary know-how with her passion for healthy, planet-friendly cooking.
For Clara, good food should taste great, nourish your body, and feel easy to make. Her recipes highlight whole foods, colorful produce, and a deep respect for seasonal eating.