Indulge in a Divine Creamy Coffee Cheesecake Recipe Tonight
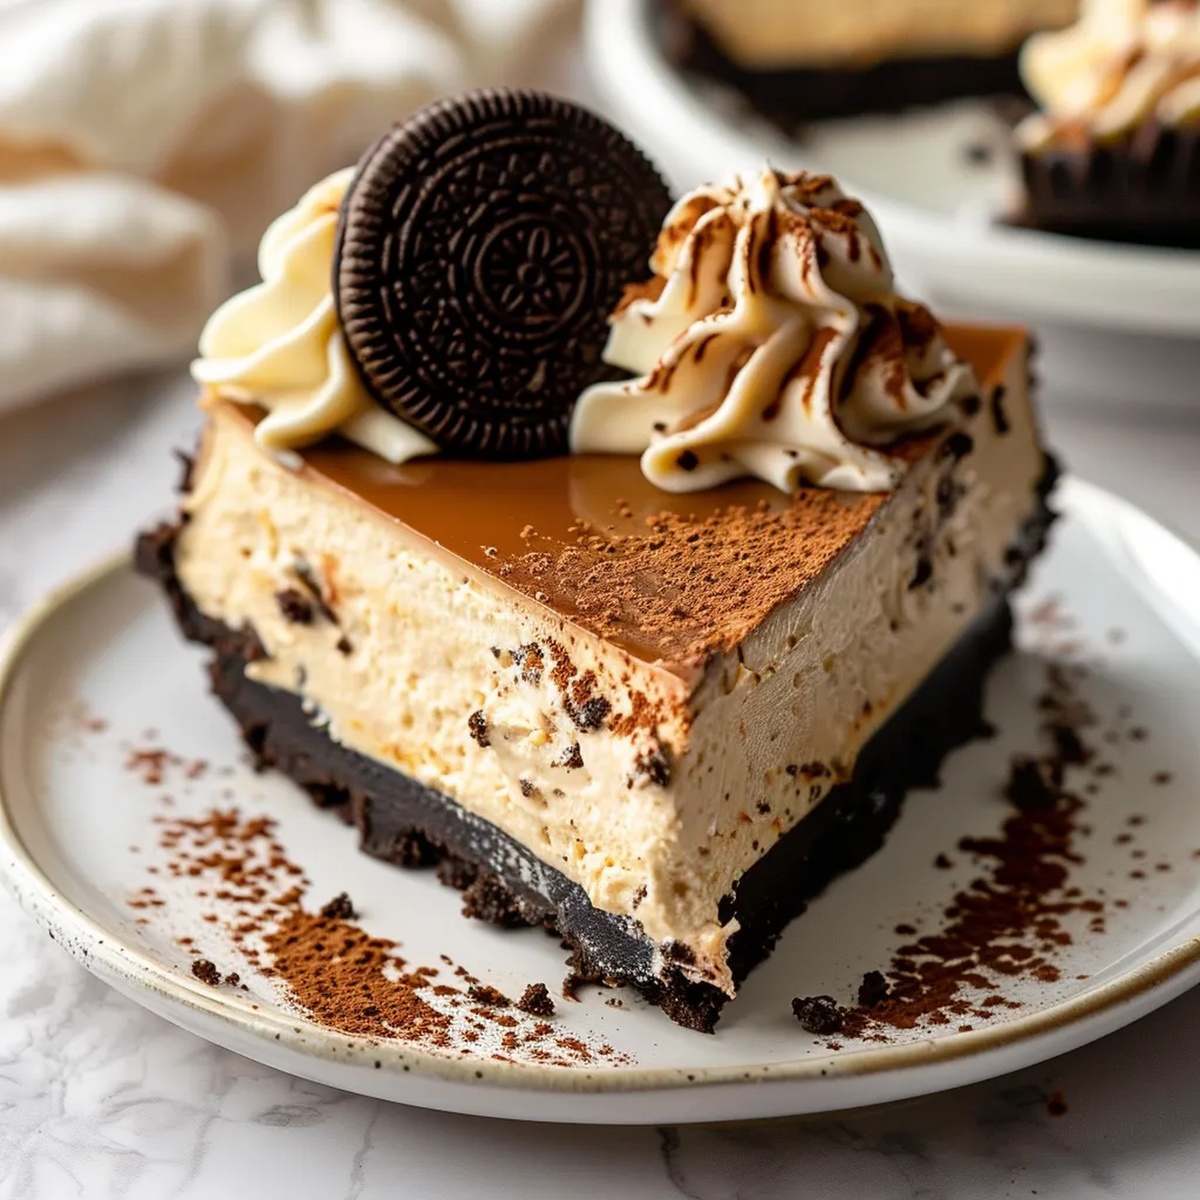
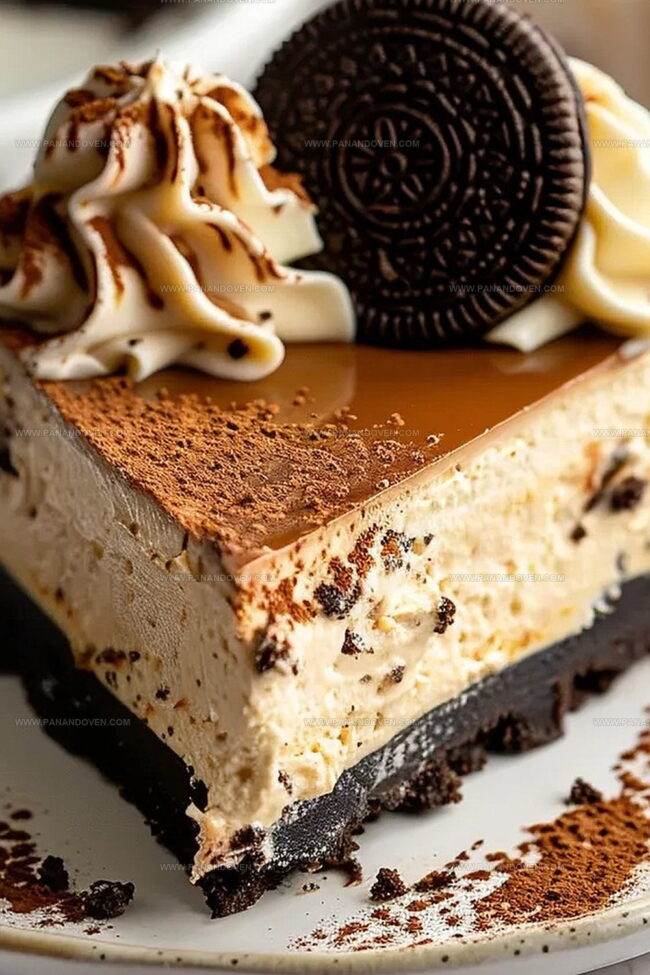
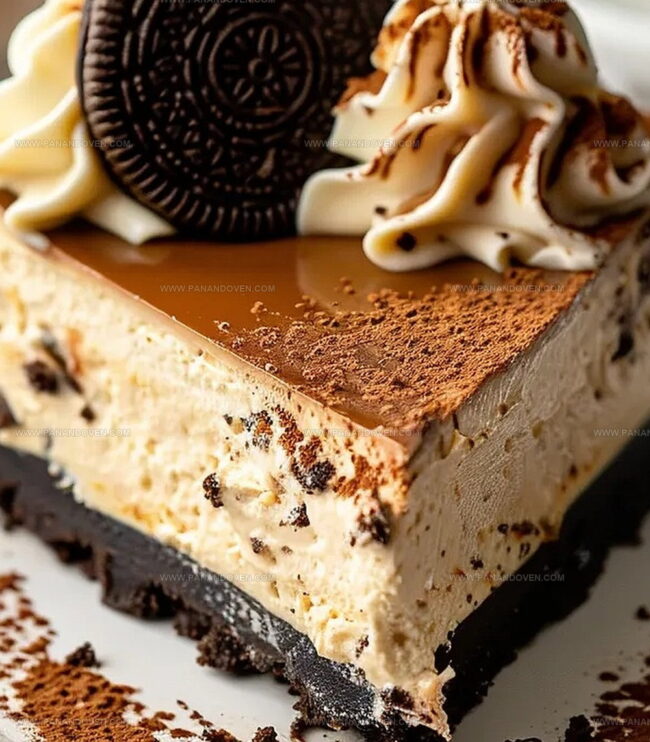
Coffee lovers adore this decadent creamy coffee cheesecake that promises pure indulgence.
Rich cream cheese blends seamlessly with bold espresso flavors for an irresistible dessert.
The smooth, velvety texture melts on your tongue with each delightful bite.
Layers of intense coffee notes dance through the silky cheesecake filling, creating a luxurious experience.
Chocolate cookie crust provides a perfect crumbly base that complements the creamy center.
Every slice delivers a sophisticated balance of sweetness and robust coffee essence.
This dessert will elevate your after-dinner moments from ordinary to extraordinary.
Prepare to fall in love with the most elegant coffee-infused cheesecake you’ve ever tasted.
Creamy Coffee Cheesecake – Why It’s a Crowd-Pleaser
Everything Needed for a Coffee-Infused Cheesecake
Crust Base:Cheesecake Filling:Topping and Decoration:Handy Tools for Coffee Cheesecake Prep
Baking Steps for Silky Coffee Cheesecake
Step 1: Prepare Baking Setup
Line a 9-inch springform pan with parchment paper.
Preheat the oven to 350F (180C).
Step 2: Create Oreo Crust
Crush Oreos into fine crumbs using a food processor or by placing them in a ziplock bag and crushing with a cup.
Ingredients:Mix all ingredients until well combined.
Press the mixture firmly into the bottom of the prepared pan.
Step 3: Bake Crust Foundation
Bake the crust for 8 minutes.
Watch carefully to prevent burning.
Remove and let cool to room temperature.
Step 4: Mix Creamy Filling
In a large mixing bowl, blend cream cheese, sugar, sour cream, and vanilla extract using an electric hand mixer until smooth and creamy.
Step 5: Incorporate Eggs and Seasonings
Lightly whisk eggs and fold into the cream cheese mixture.
Carefully sift cornstarch and espresso powder into the batter.
Mix until evenly combined, scraping down bowl sides.
Step 6: Bake Cheesecake
Pour batter over the cooled crust.
Tap pan gently to remove air bubbles.
Bake at 280F (140C) for approximately one hour until edges set but center remains slightly jiggly.
Step 7: Cool and Chill Cheesecake
Open oven door halfway and allow cheesecake to cool gradually for 1-2 hours.
Wrap tightly with plastic wrap and refrigerate for minimum 5 hours or overnight.
Step 8: Create Chocolate Ganache
Combine dark chocolate, espresso powder, and heavy cream in a small bowl.
Microwave for one minute.
Let sit for 10 minutes, then stir until smooth and silky.
Step 9: Apply Ganache Topping
Pour chocolate ganache over chilled cheesecake.
Smooth with an offset spatula.
Refrigerate to set ganache.
Step 10: Whip Coffee Cream
Ingredients:Whip ingredients until stiff peaks form.
Step 11: Decorate and Serve
Pipe coffee whipped cream around cheesecake edges using a star tip.
Optional: Garnish with chocolate shavings.
Slice and serve chilled.
Expert Tips for Creamy Cheesecake Texture
Unique Flavors to Try in Your Coffee Cheesecake
How to Serve Up Slices for Dessert Lovers
How to Store Leftover Coffee Cheesecake
FAQs
Espresso powder intensifies the coffee flavor throughout the cheesecake, adding depth and richness to both the crust and filling without making the dessert taste bitter.
No, instant coffee has a different texture and won’t provide the same concentrated flavor. Espresso powder is finely ground and more potent, which makes it ideal for baking.
The edges should be set but the center will still have a slight jiggle when gently shaken. This indicates the cheesecake is cooked but will continue to set while cooling.
Print
Creamy Coffee Cheesecake Recipe
- Total Time: 1 hour 38 minutes
- Yield: 12 1x
Description
Classic Creamy Coffee Cheesecake blends rich espresso flavors with smooth cream cheese perfection. Rich layers of coffee-infused goodness create a dessert you’ll savor with each delectable bite.
Ingredients
Oreo Crust:
- 30 Oreos, crushed into fine crumbs
- 1/2 teaspoon espresso powder
- 1/3 cup (80 milliliters) unsalted butter, melted
Main Cheesecake Ingredients:
- 24 ounces (680 grams) cream cheese, room temperature
- 3 eggs, room temperature
- 1 egg yolk, room temperature
- 1 cup (200 grams) granulated sugar
Complementary Cheesecake Ingredients:
- 1/2 cup (120 milliliters) sour cream, room temperature
- 2 teaspoons vanilla extract
- 2 tablespoons cornstarch
- 2 tablespoons espresso powder
Chocolate Ganache:
- 3.5 ounces (100 grams) dark chocolate
- 3.5 ounces (100 milliliters) heavy cream
- 1/2 teaspoon espresso powder
Coffee Whipped Cream:
- 2/3 cup (160 milliliters) cold heavy cream
- 2 tablespoons powdered sugar
- 1 teaspoon espresso powder
- 1 teaspoon vanilla extract
Instructions
- Prepare the baking vessel by lining a 9-inch springform pan with parchment paper and heating the oven to 350F (180C).
- Create the Oreo foundation by pulverizing cookies into fine crumbs using a food processor or sealed bag crushing method. Blend crumbs with espresso powder and melted butter until thoroughly combined.
- Press the Oreo mixture evenly into the pan’s bottom, ensuring a compact and uniform base.
- Bake the crust for 8 minutes, monitoring closely to prevent burning. Allow to cool completely at room temperature.
- Reduce oven temperature to 280F (140C). Blend cream cheese, sugar, sour cream, and vanilla until ultra-smooth using an electric mixer.
- Gently incorporate whisked eggs into the cream cheese mixture, avoiding overmixing. Sift cornstarch and espresso powder, stirring until fully integrated.
- Transfer batter over the cooled crust, eliminating air bubbles by gentle tapping. Bake approximately one hour until edges set but center remains slightly wobbly.
- After baking, crack the oven door open, allowing gradual cooling for 1-2 hours. Once at room temperature, wrap securely and refrigerate 5-8 hours.
- Craft chocolate ganache by combining dark chocolate, espresso powder, and heavy cream. Microwave for one minute, then let rest 10 minutes before stirring to silky perfection.
- Drizzle ganache over chilled cheesecake, spreading evenly with an offset spatula. Refrigerate to set the topping.
- Whip cold heavy cream with powdered sugar, espresso powder, and vanilla until stiff peaks form.
- Decorate cheesecake edges with piped coffee whipped cream using a star tip. Optional: garnish with chocolate shavings before serving chilled.
Notes
- Prevent Cracks: Bake the cheesecake in a water bath to create a moist environment and prevent surface cracking, ensuring a smooth, silky texture.
- Ingredient Temperature Matters: Always use room-temperature cream cheese and eggs to achieve a perfectly smooth and lump-free batter that blends seamlessly.
- Customize Coffee Intensity: Adjust the espresso powder quantity to control the coffee flavor – less for a subtle hint, more for a bold coffee punch.
- Gluten-Free Adaptation: Swap Oreo cookies with gluten-free chocolate sandwich cookies or use gluten-free graham crackers for the crust to make the dessert celiac-friendly.
- Prep Time: 30 minutes
- Cook Time: 1 hour 8 minutes
- Category: Desserts
- Method: Baking
- Cuisine: American
Nutrition
- Serving Size: 12
- Calories: 420
- Sugar: 28 g
- Sodium: 350 mg
- Fat: 29 g
- Saturated Fat: 17 g
- Unsaturated Fat: 10 g
- Trans Fat: 0 g
- Carbohydrates: 34 g
- Fiber: 1 g
- Protein: 6 g
- Cholesterol: 100 mg
Clara Thompson
Recipe Developer & Food Educator
Expertise
Plant-based and vegetarian recipe development, Nutritional analysis and meal planning, Culinary education and workshop facilitation, Content writing with a focus on healthy living
Education
Diploma in Culinary Arts, Mt. San Jacinto College, CA
Focus: Comprehensive culinary training with an emphasis on sustainable cooking practices.
Certificate in Nutrition and Healthy Living, Cornell University (Online Program)
Focus: Understanding the principles of nutrition to create balanced and health-conscious recipes.
Clara lives where fresh ideas and fresh ingredients meet. She pairs her culinary know-how with her passion for healthy, planet-friendly cooking.
For Clara, good food should taste great, nourish your body, and feel easy to make. Her recipes highlight whole foods, colorful produce, and a deep respect for seasonal eating.