Zesty Cream Cheese Stuffed Mini Peppers Recipe for Snack Lovers
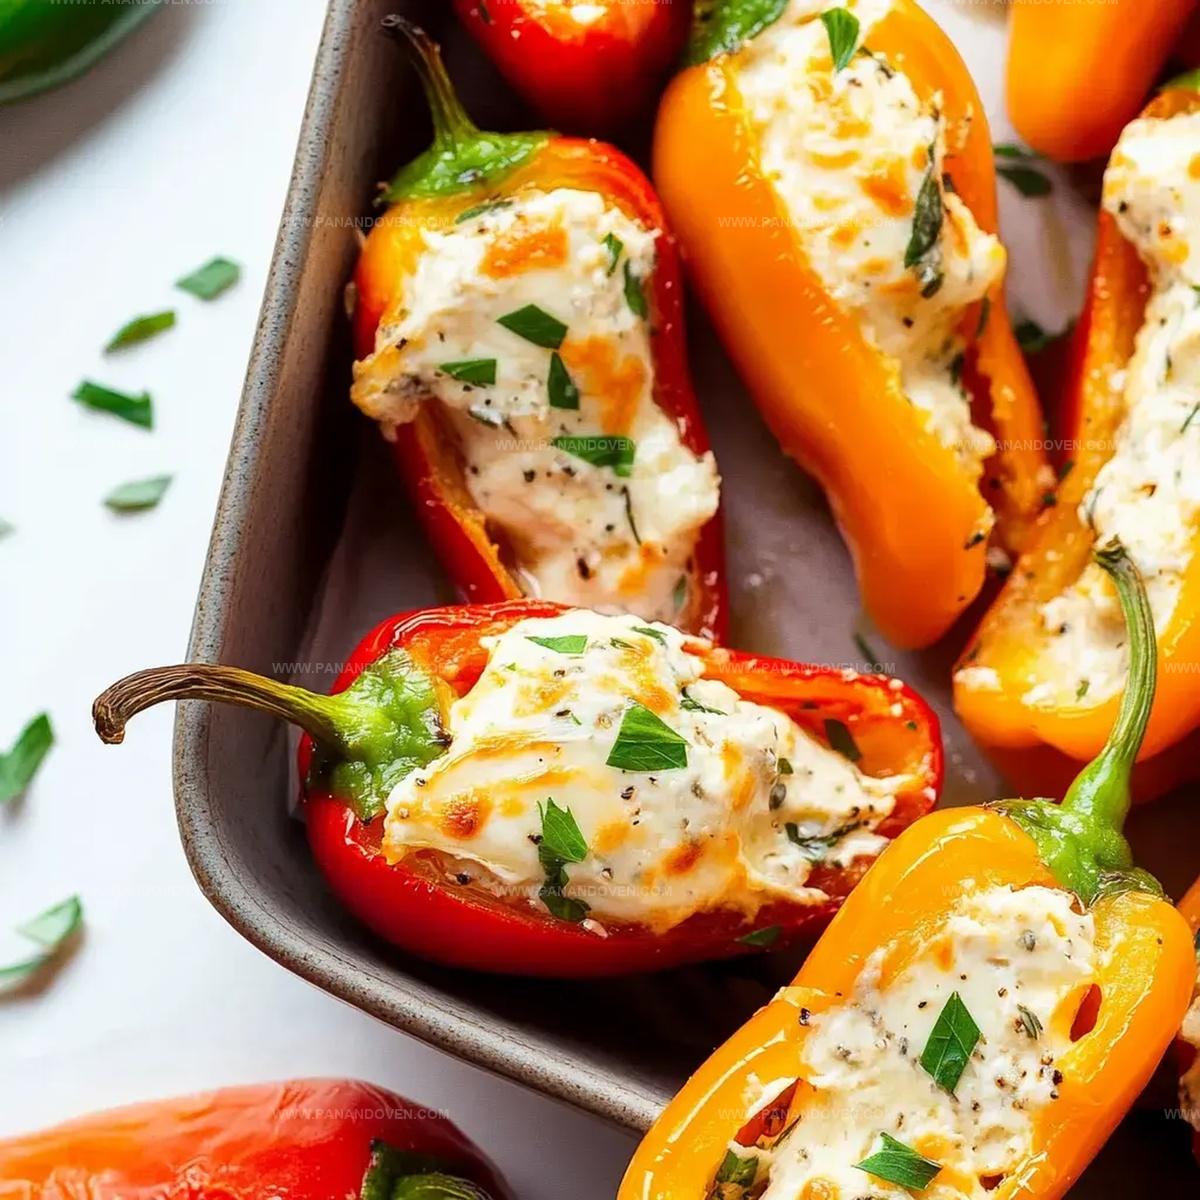
Colorful mini peppers bursting with creamy cheese are a game-changing appetizer that will steal the show at any gathering.
These bite-sized delights pack an irresistible punch of flavor and texture.
stuffed with smooth, tangy cream cheese and seasoned just right, they offer a perfect balance of richness and zest.
Vibrant peppers create a stunning presentation that makes everyone want to dig in.
Each pepper is a little package of deliciousness that disappears in seconds.
Quick to prepare and even quicker to devour, these mini peppers are sure to become your new favorite party snack.
Your guests won’t be able to resist these addictive little bites.
Cream Cheese Stuffed Mini Peppers Snack Highlights
Ingredients List for Cream Cheese Mini Peppers
Main Ingredients:Seasoning and Herbs:Preparation Ingredients:Equipment to Prep Mini Peppers with Ease
Stuffed Mini Peppers Step-by-Step Directions
Step 1: Preheat Oven
Heat your oven to a toasty 425°F.
Grab two baking sheets and line them with parchment paper to prevent sticking and make cleanup a breeze.
Step 2: Create Creamy Mixture
In a mixing bowl, blend together these delightful ingredients:Stir until the mixture is smooth and all ingredients are thoroughly incorporated.
Step 3: Stuff Colorful Peppers
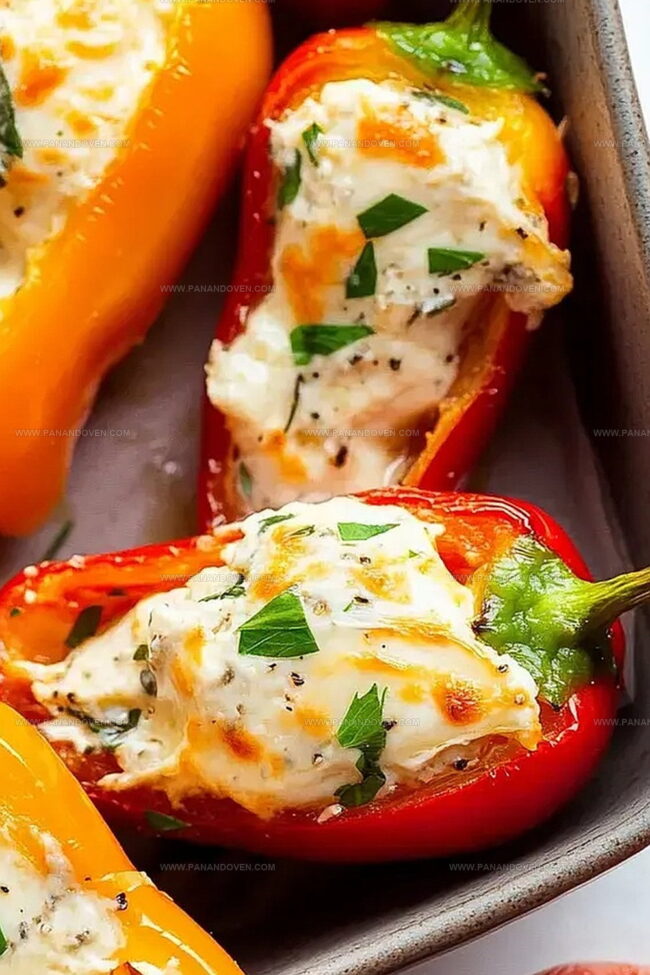
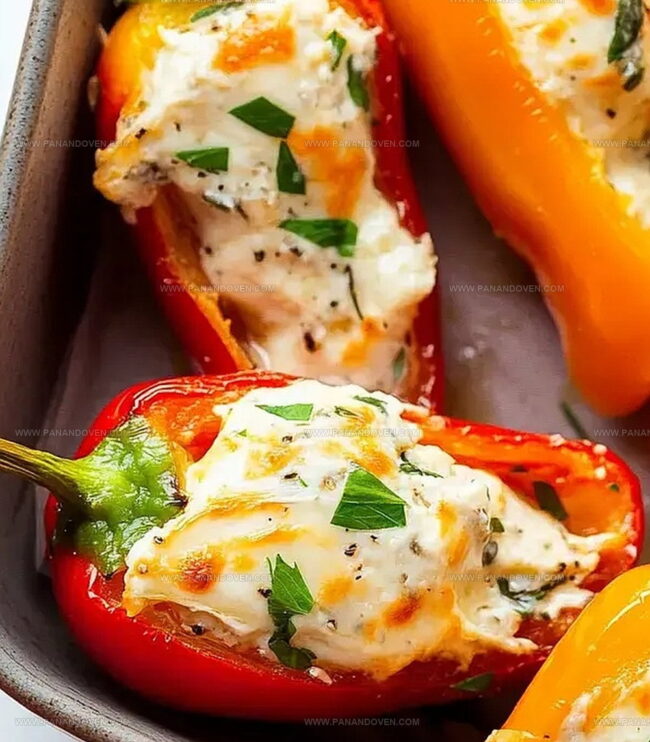
Take your mini peppers and carefully fill each half with the creamy cheese blend.
Make sure to distribute the filling evenly so every bite is packed with flavor.
Step 4: Bake to Perfection
Place the stuffed pepper halves onto the prepared baking sheets.
Slide them into the preheated oven and bake for 15 minutes.
You’ll know they’re ready when the filling is hot and bubbly.
Step 5: Serve and Enjoy
Transfer the golden, cheesy peppers to a beautiful serving platter.
Sprinkle some extra fresh chives on top for a pop of color and added freshness.
Serve these delectable bites warm and watch them disappear quickly!
Mini Peppers Tips for Creamy Results
Ways to Switch Up Cream Cheese Mini Peppers
Serving Up Cream Cheese Stuffed Mini Peppers
Mini Peppers Storage and Freshness Tips
FAQs
Yes, you can substitute mini bell peppers with jalapeños or larger bell peppers, but adjust baking time accordingly based on pepper size.
Absolutely! You can prepare the stuffed peppers and refrigerate them up to 24 hours before baking. Just add 2-3 minutes to baking time when cooking directly from the refrigerator.
Yes, you can freeze them before baking. Arrange peppers on a baking sheet, freeze until solid, then transfer to a freezer bag. When ready to cook, bake directly from frozen, adding 5-7 minutes to the original baking time.
Print
Cream Cheese Stuffed Mini Peppers Recipe
- Total Time: 30 minutes
- Yield: 4 1x
Description
Mini peppers stuffed with creamy Philadelphia cream cheese become irresistible party appetizers. Colorful bell pepper bites deliver zesty flavor with rich, tangy filling that guests will devour quickly.
Ingredients
Main Ingredients:
- 1 pound (454 grams) mini sweet peppers, halved and seeded
- 8 ounces (227 grams) cream cheese, softened
- 3/4 cup (85 grams) cheddar cheese, grated
Seasonings:
- 1/2 teaspoon salt
- 1/2 teaspoon black pepper
Garnish:
- 2 tablespoons (30 milliliters) chives, plus more for garnish
Instructions
- Preheat the oven to 425°F and prepare two baking sheets with parchment paper for optimal heat distribution and easy cleanup.
- Create a smooth, creamy filling by thoroughly blending cream cheese, shredded cheddar, finely chopped chives, and seasonings until uniformly mixed.
- Carefully spoon the cheese mixture into each pepper half, ensuring an even and generous distribution of filling.
- Arrange the stuffed pepper halves on the prepared baking sheets, maintaining space between them for consistent heating.
- Roast in the preheated oven for 15 minutes, allowing the peppers to soften and the cheese filling to become hot and slightly bubbly.
- Remove from oven and transfer to a serving platter, garnishing with additional fresh chives for a vibrant presentation and enhanced flavor.
- Serve immediately while the peppers are warm and the cheese filling is at its most creamy and appetizing state.
Notes
- Swap cream cheese for dairy-free alternatives like cashew cream or vegan cream cheese to accommodate lactose-intolerant or vegan guests.
- Use different cheese varieties like goat cheese or pepper jack for unique flavor profiles and to match personal taste preferences.
- Pat peppers dry before filling to prevent excess moisture and ensure crispy, golden edges during baking.
- Prepare filling ahead of time and store in refrigerator for quick assembly when unexpected guests arrive or for meal prep convenience.
- Prep Time: 15 minutes
- Cook Time: 15 minutes
- Category: Appetizer, Snacks
- Method: Baking
- Cuisine: American
Nutrition
- Serving Size: 4
- Calories: 185
- Sugar: 2 g
- Sodium: 310 mg
- Fat: 15 g
- Saturated Fat: 8 g
- Unsaturated Fat: 7 g
- Trans Fat: 0 g
- Carbohydrates: 7 g
- Fiber: 2 g
- Protein: 4 g
- Cholesterol: 35 mg
Clara Thompson
Recipe Developer & Food Educator
Expertise
Plant-based and vegetarian recipe development, Nutritional analysis and meal planning, Culinary education and workshop facilitation, Content writing with a focus on healthy living
Education
Diploma in Culinary Arts, Mt. San Jacinto College, CA
Focus: Comprehensive culinary training with an emphasis on sustainable cooking practices.
Certificate in Nutrition and Healthy Living, Cornell University (Online Program)
Focus: Understanding the principles of nutrition to create balanced and health-conscious recipes.
Clara lives where fresh ideas and fresh ingredients meet. She pairs her culinary know-how with her passion for healthy, planet-friendly cooking.
For Clara, good food should taste great, nourish your body, and feel easy to make. Her recipes highlight whole foods, colorful produce, and a deep respect for seasonal eating.