
Heavenly Coconut Pie Recipe: A Silky Tropical Dream
Sweet, creamy coconut pie with a tropical essence that dances on your taste buds transports you to paradise.
Rich layers of coconut flavor create a delightful dessert experience.
Each bite promises pure indulgence and comfort.
The silky smooth filling nestled in a perfectly golden crust will make your heart sing.
coconut lovers rejoice as this recipe delivers a delectable treat that’s both simple and elegant.
Pastry chefs and home bakers alike will adore this classic dessert.
Prepare to fall in love with every heavenly slice.
What Makes Coconut Pie a Crowd Pleaser
Everything Needed for Coconut Pie from Scratch
Pie Crust:Filling Base:Primary Filling Ingredient:Pie-Baking Tools for Coconut Dessert Perfection
How to Make the Best Coconut Pie at Home
Step 1: Fire Up the Oven
Crank your oven to a toasty 300 degrees Fahrenheit.
This warm temperature will help create a perfectly golden coconut pie.
Step 2: Whip Together the Base
In a spacious mixing bowl, combine:Blend these ingredients until they transform into a smooth, creamy mixture.
Pour in milk and vanilla, stirring until everything is perfectly combined.
Gently fold in fluffy coconut flakes, ensuring an even distribution throughout the batter.
Step 3: Prepare the Pie Crust
Carefully transfer your luscious coconut mixture into a prepared pie crust.
Make sure the filling is evenly spread for consistent baking.
Step 4: Bake to Perfection
Slide the pie into the preheated oven and let it bake for a full hour.
The pie will develop a beautiful golden-brown color and set perfectly.
Step 5: Cool and Serve
Allow the pie to cool completely at room temperature.
This resting period helps the filling firm up and makes slicing a breeze.
Once cooled, slice and serve this delectable coconut pie to eager dessert lovers.
Pro Tips for Perfectly Baked Coconut Pie
Coconut Pie Variations to Change Things Up
Coconut Pie: Serving Suggestions and Presentation
Storage Tips for Fresh Coconut Pie
FAQs
Yes, you can use a pre-made pie crust to save time. Just ensure it’s the right size for this recipe and fits your pie dish perfectly.
The pie is done when the center is set but slightly jiggly and the top is golden brown. A knife inserted near the center should come out clean.
Absolutely! You can prepare the pie a day in advance and store it in the refrigerator. Just cover it loosely with plastic wrap to keep it fresh.
Yes, you can freeze the pie for up to 2 months. Wrap it tightly in plastic wrap and aluminum foil before freezing to preserve its texture and flavor.
Print
Coconut Pie Recipe
- Total Time: 1 hour 15 minutes
- Yield: 8 1x
Description
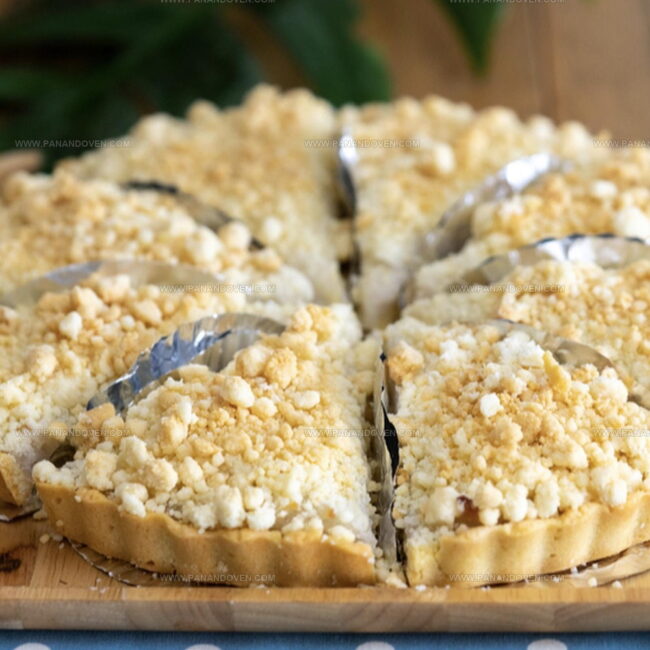
Silky coconut pie delights dessert enthusiasts with its creamy tropical essence. Rich layers of sweet coconut custard nestle in a buttery crust, promising pure comfort you’ll savor with each blissful bite.
Ingredients
Main Ingredients:
- 3 large eggs
- 1 cup milk
- 1 cup white sugar
- 1 cup flaked coconut
- 1/2 cup (120 milliliters) butter, softened
- 1 (9 inch) unbaked pie crust
Dry Ingredients:
- 2 tablespoons all-purpose flour
Flavor Enhancers:
- 1 teaspoon vanilla extract
Instructions
- Warm the oven to a gentle 300°F, creating an ideal baking environment for the delicate coconut pie.
- In a spacious mixing bowl, combine granulated sugar and flour, creating a smooth, even base for the pie filling.
- Incorporate eggs and softened butter, whisking thoroughly until the mixture achieves a creamy, uniform consistency.
- Gently pour in milk and vanilla extract, stirring carefully to blend all ingredients into a silky liquid.
- Fold shredded coconut into the mixture, ensuring an even distribution of the tropical ingredient throughout the filling.
- Transfer the luscious filling into the prepared pie crust, spreading it evenly to create a smooth surface.
- Place the pie in the preheated oven and bake for precisely 60 minutes, allowing the filling to set and develop a golden, slightly crisp top.
- Remove from the oven and let the pie cool completely at room temperature, which helps the filling stabilize and achieve the perfect texture.
- Once fully cooled, slice and serve this luxurious coconut pie, revealing its creamy, tropical interior.
Notes
- Ensure your butter is at room temperature for smoother mixing and better ingredient incorporation.
- Toast coconut flakes lightly before adding to the filling for enhanced nutty flavor and deeper golden color.
- For a gluten-free version, replace regular flour with almond flour or a gluten-free all-purpose blend.
- Allow pie to cool completely to room temperature for clean, precise slicing and optimal texture setting.
- Prep Time: 15 minutes
- Cook Time: 1 hour
- Category: Desserts
- Method: Baking
- Cuisine: Caribbean
Nutrition
- Serving Size: 8
- Calories: 300
- Sugar: 18 g
- Sodium: 150 mg
- Fat: 16 g
- Saturated Fat: 10 g
- Unsaturated Fat: 6 g
- Trans Fat: 0 g
- Carbohydrates: 35 g
- Fiber: 1 g
- Protein: 4 g
- Cholesterol: 100 mg
Marcus Reed
Founder & Food Content Creator
Expertise
Single-recipe development, Seasonal and local ingredient utilization, Food photography and styling, Culinary writing and content creation
Education
Culinary Arts Certificate, Blue Ridge Community and Technical College, WV
Focus: Fundamentals of culinary techniques, emphasizing hands-on experience in small-scale kitchen settings.
Marcus’s story begins in Asheville, where good food and family kitchens shaped his earliest memories. After hands-on culinary training and a lot of trial (and a little error), he realized that real cooking isn’t about perfection, it’s about connection.
At Pan and Oven, Marcus crafts recipes that are easy to follow, packed with flavor, and built for real kitchens.