
Magical Cinnamon Ornaments Recipe: Crafting Holiday Joy
Crafting beautiful holiday cinnamon ornaments brings magic to seasonal decorating.
These delightful cinnamon ornaments create nostalgic memories that sparkle with warmth.
festive and fragrant, each ornament tells a story of tradition and creativity.
Handmade ornaments become cherished keepsakes that hang beautifully on Christmas trees.
Families love creating these simple yet stunning decorations together.
The sweet cinnamon scent fills homes with joy and holiday cheer.
You can transform basic ingredients into elegant ornaments that will delight everyone who sees them.
craft these charming decorations and watch your holiday spirit come to life.
Festive Cinnamon Ornaments DIY Christmas Reasons
Cinnamon Ornament Ingredients for Crafty Fun
Base Ingredients:Preparation Tools:Optional Decorative Supplies:Tools Needed for Cinnamon Ornament Making
Simple Steps for Homemade Cinnamon Ornaments
Step 1: Blend Dough Ingredients
Grab a spacious mixing bowl and combine ground cinnamon, smooth applesauce, and white craft glue.
Stir the mixture thoroughly until it transforms into a consistent, moldable dough.
If the texture feels too crumbly, add a splash more applesauce.
Conversely, sprinkle extra cinnamon if the dough appears too wet.
Step 2: Shape Ornamental Designs
Transfer the dough onto a clean, flat surface dusted with cinnamon.
Using a rolling pin, gently flatten the mixture to approximately quarter-inch thickness.
Select festive holiday cookie cutters like stars, hearts, Christmas trees, or snowflakes.
Press cutters firmly into the dough and carefully lift to reveal charming shapes.
Step 3: Create Hanging Holes
While the ornament shapes remain slightly damp, take a drinking straw and delicately puncture a small hole near the top of each design.
This opening will allow you to thread ribbon or string for hanging later.
Step 4: Dry And Stabilize Ornaments
Place the shaped ornaments onto a parchment-lined baking sheet.
Slide the tray into a preheated oven set at low temperature.
Bake for approximately half an hour, which helps solidify and preserve the ornaments.
After baking, remove from oven and let them air dry completely for one to two days.
Step 5: Personalize And Display
Once thoroughly dried, thread decorative ribbons through the hanging holes.
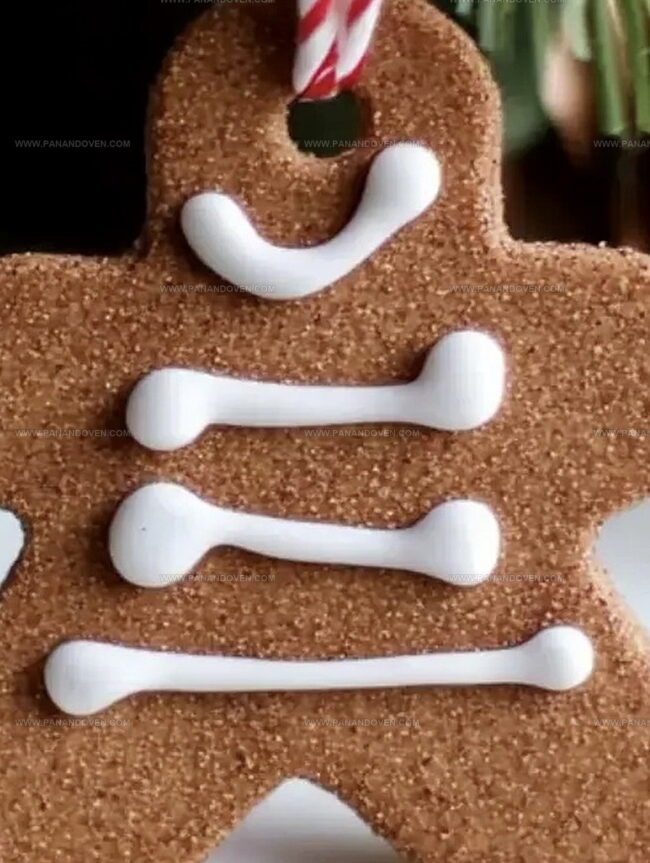
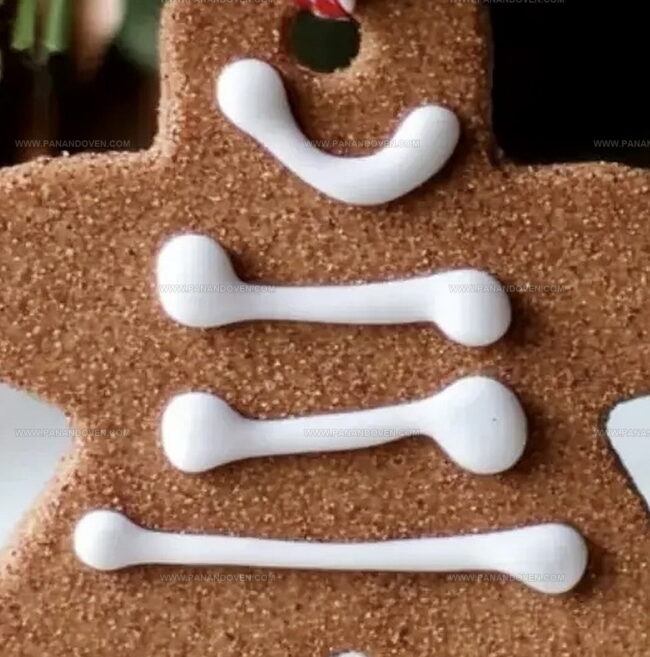
For additional creativity, use puffy paint to add glittery accents, names, or intricate designs.
Hang these aromatic ornaments on your Christmas tree or share as heartwarming handmade gifts.
Pro Tips for Beautiful and Fragrant Ornaments
Ornament Variations for Unique Christmas Decor
How to Display Homemade Cinnamon Ornaments
Storing Cinnamon Ornaments for the Next Season
FAQs
No, these cinnamon ornaments are decorative and not meant for eating. They contain glue and are for craft purposes only.
White school glue or craft glue works best. Avoid using hot glue or gel-based adhesives as they won’t mix properly with the ingredients.
When stored properly in a cool, dry place, these ornaments can last several years without losing their cinnamon scent and shape.
Air drying helps remove remaining moisture, prevents warping, and ensures the ornaments become completely hard and sturdy for hanging.
Print
Cinnamon Ornaments Recipe
- Total Time: 50 minutes
- Yield: 1 1x
Description
Homemade cinnamon ornaments bring festive charm to holiday decorations with simple kitchen ingredients. Fragrant spices and common pantry supplies create memorable craft moments that families cherish during seasonal celebrations.
Ingredients
Main Ingredients:
- 1 cup cinnamon
- 3/4 cup (177 ml) smooth applesauce
- 1/8 cup (30 ml) liquid white glue
Crafting Tools:
- Christmas cookie cutters
- Straw
- Ribbon
- Extra cinnamon (for dusting)
Instructions
- Combine the fragrant cinnamon mixture in a spacious mixing bowl, blending applesauce, ground cinnamon, and craft glue until the texture becomes smooth and consistent. Adjust the consistency by adding more applesauce if the dough appears crumbly or extra cinnamon if too moist.
- Transfer the aromatic dough onto a clean, flat surface and gently roll it out to approximately 1/4 inch thickness using a rolling pin. Select festive holiday cookie cutters to create charming ornament shapes.
- Create hanging capabilities while the dough remains pliable by carefully inserting a drinking straw near the top of each cut-out shape, forming a clean, precise hole for ribbon threading.
- Arrange the delicate ornaments on a parchment-lined baking sheet, ensuring they are not touching. Place in a preheated oven at 200°F and bake for precisely 30 minutes to set the shape and dry the mixture.
- After removing from the oven, allow ornaments to air-dry completely for 24-48 hours in a cool, dry location to ensure maximum durability and prevent cracking.
- Once fully dried, thread festive ribbons through the pre-made holes and embellish with optional decorative touches like puffy paint for personalized holiday charm.
Notes
- Choose high-quality ground cinnamon for the most vibrant color and strongest fragrance in your ornaments.
- Handle the dough gently to prevent cracking, ensuring a smooth surface by rolling evenly and using light pressure.
- Opt for non-toxic white glue to make these ornaments safe around children and pets, creating a family-friendly craft experience.
- Store completed ornaments in a cool, dry place to preserve their shape and prevent moisture damage during off-season storage.
- Prep Time: 20 minutes
- Cook Time: 30 minutes
- Category: Snacks, Desserts
- Method: Baking
- Cuisine: American
Nutrition
- Serving Size: 1
- Calories: 35
- Sugar: 0 g
- Sodium: 1 mg
- Fat: 0 g
- Saturated Fat: 0 g
- Unsaturated Fat: 0 g
- Trans Fat: 0 g
- Carbohydrates: 9 g
- Fiber: 1 g
- Protein: 0 g
- Cholesterol: 0 mg
Marcus Reed
Founder & Food Content Creator
Expertise
Single-recipe development, Seasonal and local ingredient utilization, Food photography and styling, Culinary writing and content creation
Education
Culinary Arts Certificate, Blue Ridge Community and Technical College, WV
Focus: Fundamentals of culinary techniques, emphasizing hands-on experience in small-scale kitchen settings.
Marcus’s story begins in Asheville, where good food and family kitchens shaped his earliest memories. After hands-on culinary training and a lot of trial (and a little error), he realized that real cooking isn’t about perfection, it’s about connection.
At Pan and Oven, Marcus crafts recipes that are easy to follow, packed with flavor, and built for real kitchens.