
The Best Homemade Cinnamon Hard Candy Recipe for Sweet Moments
Crafting sweet memories starts with this delightful cinnamon hard candy recipe that packs a spicy punch.
Homemade candies bring nostalgic warmth to any kitchen gathering.
The crisp, fiery flavor of cinnamon transforms simple ingredients into a spectacular treat.
Sugar bubbles and crystallizes, creating a mesmerizing dance of culinary magic.
Precision matters when brewing these vibrant red confections that snap and crackle with intense heat.
Each piece promises a bold, tongue-tingling experience that connects generations through a shared love of traditional sweets.
Prepare to savor every spicy, sparkling moment of this classic candy adventure.
Hot Cinnamon Hard Candy: Spice Up Snack Time
Ingredients Needed for Cinnamon Hard Candy
Main Ingredients:Flavoring and Coloring:Preparation Ingredients:Candy-Making Equipment and Tools
Making Hot Cinnamon Candy Step by Step
Step 1: Butter Your Baking Sheets
Grab two baking sheets and slather them generously with butter.
Make sure every inch is coated to prevent the candy from sticking.
Set these prepared sheets aside and get ready for some sweet candy magic.
Step 2: Create Sugar Base
Combine sugar and corn syrup in a large pot.
Crank the heat to high and bring the mixture to a rolling boil.
Cover the pot and let it bubble away for 3 minutes, creating a sweet foundation for your candy.
Step 3: Cook to Perfection
Remove the lid and lower the heat to medium-high.
Stir constantly as the mixture heats up.
Watch your candy thermometer carefully – you’re aiming for the magical hard crack stage between 300-310°F.
This is where sugar transforms into crisp, beautiful candy.
Step 4: Bring on the Color
Once you hit 310°F, pull the pot off the heat.
Add red food coloring and mix thoroughly.
Swirl and stir until the mixture looks like a vibrant crimson dream, spreading color evenly throughout the candy base.
Step 5: Infuse with Cinnamon Kick
Let the mixture cool for a moment.
Carefully add cinnamon oil, stirring gently to avoid splashing.
The steam might be intense, so move slowly and deliberately.
The spicy aroma will start to fill your kitchen.
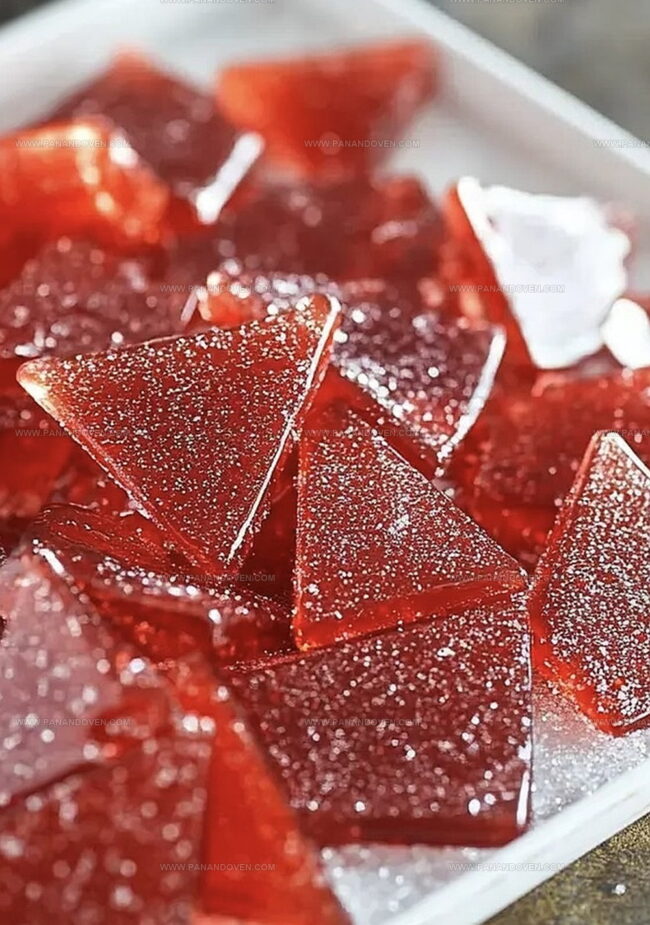
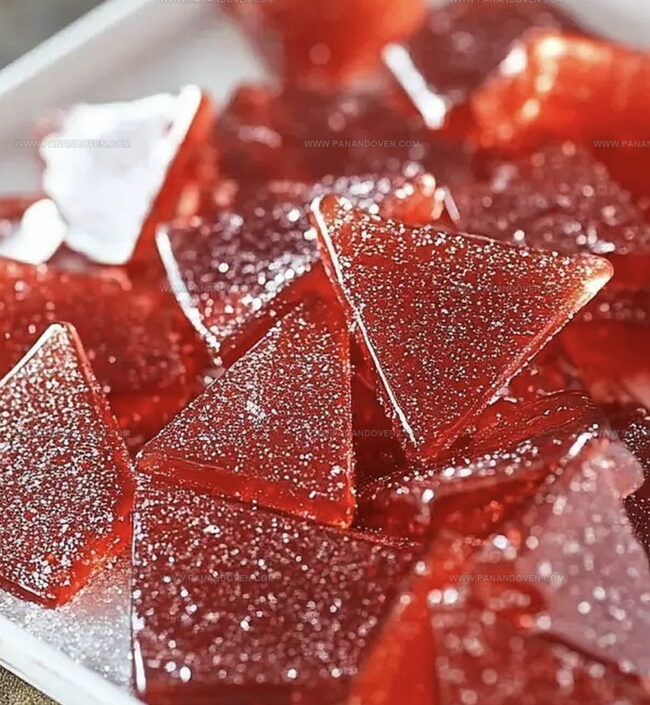
Step 6: Shape Your Candy Creation
Pour the molten candy into your buttered baking sheets.
Grab a buttered pizza wheel and score lines across the surface to create break points.
Allow the candy to cool and set for 30-60 minutes.
Once cooled, break along the scored lines into individual pieces of spicy, sweet goodness.
Candy Tips for Bold Cinnamon Flavor
Cinnamon Candy Variations and Shapes
Serving Suggestions for Cinnamon Candy
Festive Flavor Party: Perfect ways to enjoy and share this spicy sweet treat!
Candy Storage to Keep it Fresh
FAQs
The hard crack stage is when sugar syrup reaches 300-310°F, creating a brittle, glass-like texture that snaps when broken, perfect for making hard candies.
A candy thermometer ensures precise temperature control, which is critical for achieving the right sugar crystallization and preventing burning or undercooking.
No, cinnamon oil provides intense flavor and is specifically designed for candy making, while ground cinnamon won’t dissolve properly and can affect the candy’s texture.
Stir regularly, use medium-high heat after the initial boiling, and remove from heat immediately when the thermometer reaches 310°F to prevent burning.
Print
Cinnamon Hard Candy Recipe
- Total Time: 1 hour 10 minutes
- Yield: 20 1x
Description
Sweet cinnamon hard candy delivers a spicy-sweet kick that delights candy enthusiasts. Crafted with simple ingredients and careful heating, you’ll savor this classic confection’s bold flavor profile.
Ingredients
Candy Ingredients:
- 2.33 cups granulated sugar
- 4 cups corn syrup
- 3 teaspoons (3 tsp) cinnamon oil
Coloring and Greasing:
- Red food coloring
- Butter, for greasing
Instructions
- Grease two baking sheets thoroughly with butter, ensuring complete coverage to prevent candy from sticking.
- Combine sugar and corn syrup in a large pot, heating on high until mixture reaches a rolling boil. Cover and maintain boiling for exactly 3 minutes.
- Uncover the pot and reduce heat to medium-high. Continuously stir the liquid mixture, monitoring the temperature carefully until it reaches 300-310°F on a candy thermometer, indicating the hard crack stage.
- Once thermometer indicates 310°F, immediately remove pot from heat source and integrate red food coloring, stirring until color is uniformly distributed throughout the mixture.
- Allow mixture to cool slightly for 30-45 seconds to reduce intense steam, then gently incorporate cinnamon oil, stirring carefully to prevent splashing.
- Quickly pour the hot candy into prepared buttered baking sheets, using a pre-buttered pizza wheel to create scoring lines while mixture remains malleable.
- Let candy cool undisturbed for 45-60 minutes at room temperature, then break into individual pieces along scored lines, creating sharp, clean edges.
Notes
- Always use a reliable candy thermometer to ensure precise temperature, as accuracy is crucial for achieving the perfect hard crack stage.
- Wear long sleeves and oven mitts during the entire process to protect against potential hot sugar splashes, which can cause serious burns.
- Work quickly when pouring and scoring the candy, as the mixture hardens rapidly and becomes challenging to manipulate once it starts cooling.
- Consider using silicone baking mats instead of buttered baking sheets for easier candy removal and more consistent cooling.
- Prep Time: 10 minutes
- Cook Time: 1 hour
- Category: Snacks, Desserts
- Method: Boiling
- Cuisine: American
Nutrition
- Serving Size: 20
- Calories: 178
- Sugar: 38 g
- Sodium: 0 mg
- Fat: 0 g
- Saturated Fat: 0 g
- Unsaturated Fat: 0 g
- Trans Fat: 0 g
- Carbohydrates: 44 g
- Fiber: 0 g
- Protein: 0 g
- Cholesterol: 0 mg
Marcus Reed
Founder & Food Content Creator
Expertise
Single-recipe development, Seasonal and local ingredient utilization, Food photography and styling, Culinary writing and content creation
Education
Culinary Arts Certificate, Blue Ridge Community and Technical College, WV
Focus: Fundamentals of culinary techniques, emphasizing hands-on experience in small-scale kitchen settings.
Marcus’s story begins in Asheville, where good food and family kitchens shaped his earliest memories. After hands-on culinary training and a lot of trial (and a little error), he realized that real cooking isn’t about perfection, it’s about connection.
At Pan and Oven, Marcus crafts recipes that are easy to follow, packed with flavor, and built for real kitchens.