Irresistible Chicken Bacon Ranch Tortilla Roll-Ups Recipe
Creamy, savory chicken bacon ranch tortilla roll-ups dance with flavor in every delectable bite.
Packed with irresistible ingredients, this crowd-pleasing appetizer promises to steal the show at any gathering.
Crisp bacon adds a smoky crunch that perfectly complements the tender chicken.
ranch dressing brings a tangy richness that ties all the elements together with mouthwatering ease.
Soft tortillas wrap these incredible ingredients into neat, portable rolls that disappear quickly from any party platter.
The combination of textures and tastes makes these roll-ups an instant hit for game days, potlucks, or casual snacking.
Prepare to impress with this simple yet spectacular recipe that transforms ordinary ingredients into something extraordinary.
Chicken Bacon Ranch Roll-Ups Features
Ingredients for Chicken Bacon Ranch Roll-Ups
Main Ingredients:Seasoning and Herbs:Preparation Components:Tools for Roll-Ups
Steps for Chicken Bacon Ranch Roll-Ups
Step 1: Whip Up Creamy Filling
Grab a mixing bowl and toss in softened cream cheese.
Sprinkle ranch seasoning mix over the cream cheese.
Shred or dice cooked chicken into small pieces.
Crumble crispy bacon.
Add chopped fresh parsley.
Throw in a pinch of salt and pepper.
Mix everything together until the ingredients are perfectly blended and look super creamy.
Ingredients:Step 2: Create Tasty Tortilla Rolls
Lay out soft tortillas on a clean surface.
Spread the creamy chicken mixture evenly across each tortilla, leaving a small border around the edges.
Start rolling from one side, tucking and pressing gently to create tight, compact rolls.
Make sure the filling stays tucked inside as you roll.
Ingredients:Step 3: Secure and Wrap
Take each rolled tortilla and wrap it tightly in plastic wrap.
Twist the ends of the plastic wrap to create a secure seal.
This helps the rolls keep their shape and allows flavors to meld together.
Step 4: Chill and Develop Flavors
Place the wrapped tortilla rolls in the refrigerator.
Let them chill for at least 4 hours or overnight.
This resting time helps the flavors blend and makes the rolls easier to slice.
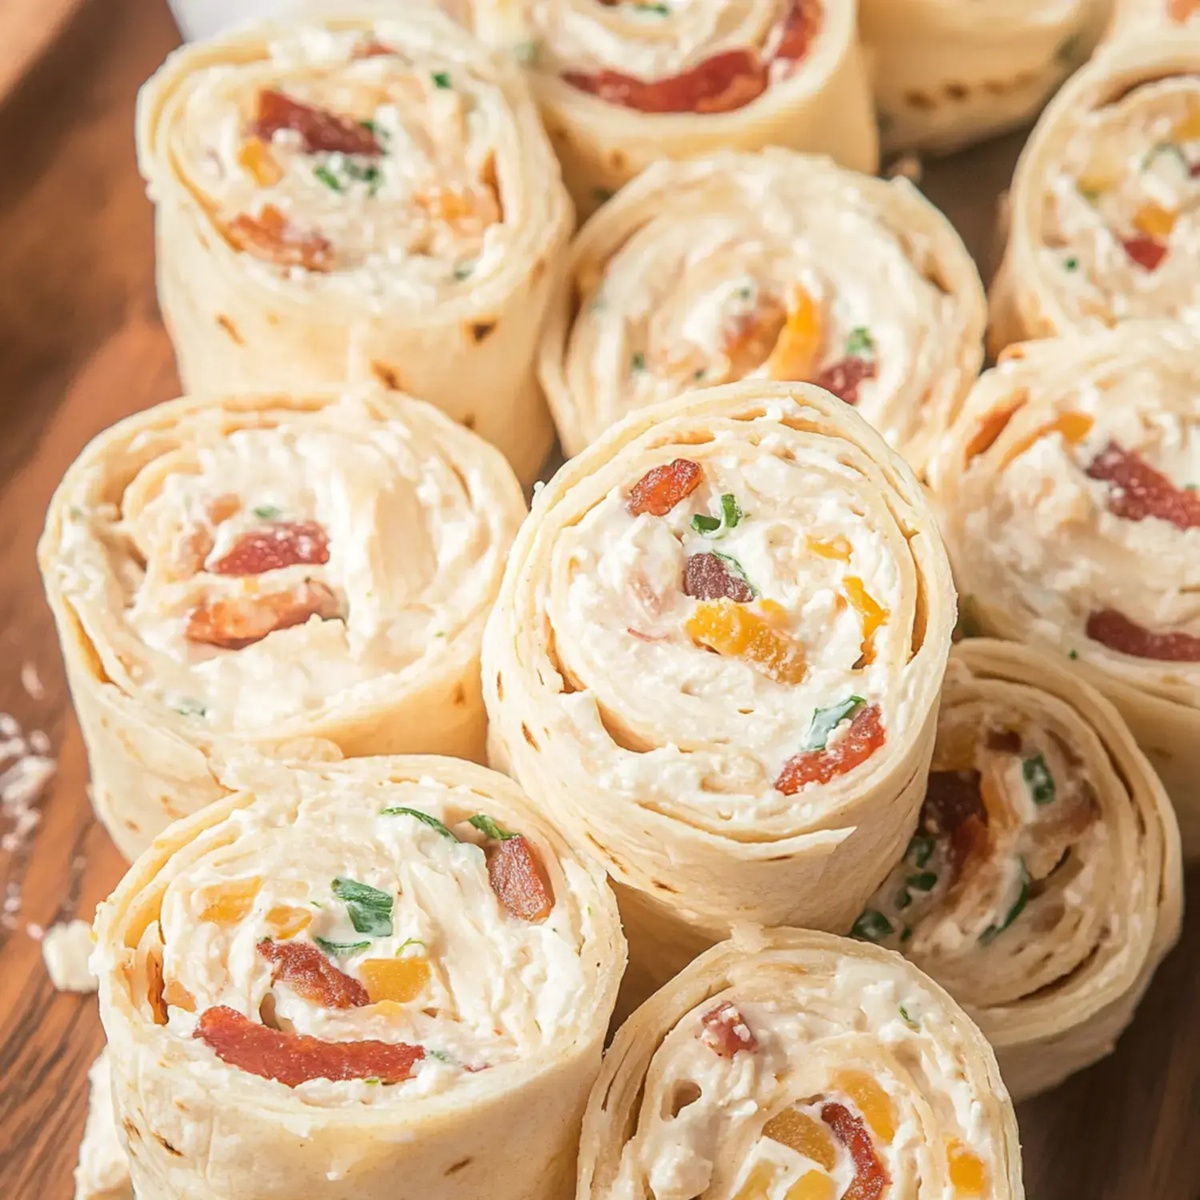
Step 5: Slice and Serve
Remove rolls from the refrigerator.
Using a sharp serrated knife, slice each roll into bite-sized pieces about 1/2 to 3/4 inch thick.
Arrange on a serving platter and watch them disappear at your next gathering!
Tips for Chicken Bacon Ranch Roll-Ups

Variations for Chicken Bacon Ranch Roll-Ups

Serving Chicken Bacon Ranch Roll-Ups
Storage for Chicken Bacon Ranch Roll-Ups
FAQs
Yes, rotisserie or leftover grilled chicken works perfectly and saves time in preparation.
Both work well – fresh crispy bacon gives better flavor, but pre-cooked bacon bits are convenient and still delicious.
Large flour tortillas are ideal because they’re soft, flexible, and roll easily without cracking. Thin tortillas between 8-10 inches are recommended.
You can prepare these roll-ups up to 24 hours ahead of time, keeping them tightly wrapped in the refrigerator until ready to serve.
Print
Chicken Bacon Ranch Tortilla Roll-Ups Recipe
- Total Time: 20 minutes
- Yield: 8 1x
Description
Creamy chicken bacon ranch tortilla roll-ups combine classic comfort ingredients for a crowd-pleasing appetizer. Savory layers of tender chicken, crispy bacon, and zesty ranch dressing roll perfectly into irresistible bites you’ll crave.
Ingredients
Main Proteins:
- 1 cup cooked chicken, shredded
- 2.5 ounces (70 grams) bacon pieces
Cheeses:
- 16 ounces (454 grams) cream cheese, softened
- 1 cup shredded cheddar cheese
Additional Ingredients:
- 6 10-inch flour tortillas
- 2 tablespoons ranch seasoning mix
- 1/4 cup fresh parsley
- Salt to taste
- Pepper to taste
Instructions
- In a spacious mixing bowl, blend softened cream cheese with ranch seasoning mix until smooth and fully incorporated.
- Fold shredded chicken, crispy crumbled bacon, and finely chopped parsley into the creamy mixture, ensuring even distribution of ingredients.
- Lay out soft tortillas and spread the prepared filling evenly across each one, leaving a small border around the edges.
- Carefully roll each tortilla tightly, pressing gently to secure the filling and create a compact cylinder.
- Individually wrap each roll in plastic wrap, twisting the ends to create a secure seal that prevents filling from leaking.
- Refrigerate the wrapped rolls for at least 4 hours, allowing flavors to meld and the filling to set firmly.
- After chilling, remove plastic wrap and use a sharp serrated knife to slice each roll into bite-sized pieces approximately 1/2 to 3/4 inches thick.
- Arrange slices on a serving platter, presenting the colorful and appetizing tortilla roll-ups for immediate enjoyment.
Notes
- Softening cream cheese at room temperature helps create a smoother, easier-to-spread filling without lumps.
- Drain bacon bits completely to prevent excess moisture from making tortillas soggy and compromising roll-up texture.
- Use large, flexible tortillas like flour or spinach varieties for easier rolling and more consistent appetizer slices.
- For low-carb options, swap traditional tortillas with large lettuce leaves or low-carb wraps to reduce calories and carbohydrates.
- Prep Time: 20 minutes
- Cook Time: 0 minutes
- Category: Lunch, Snacks, Appetizer
- Method: Rolling
- Cuisine: American
Nutrition
- Serving Size: 8
- Calories: 330
- Sugar: 2 g
- Sodium: 780 mg
- Fat: 22 g
- Saturated Fat: 10 g
- Unsaturated Fat: 9 g
- Trans Fat: 0 g
- Carbohydrates: 24 g
- Fiber: 1 g
- Protein: 14 g
- Cholesterol: 60 mg
Clara Thompson
Recipe Developer & Food Educator
Expertise
Plant-based and vegetarian recipe development, Nutritional analysis and meal planning, Culinary education and workshop facilitation, Content writing with a focus on healthy living
Education
Diploma in Culinary Arts, Mt. San Jacinto College, CA
Focus: Comprehensive culinary training with an emphasis on sustainable cooking practices.
Certificate in Nutrition and Healthy Living, Cornell University (Online Program)
Focus: Understanding the principles of nutrition to create balanced and health-conscious recipes.
Clara lives where fresh ideas and fresh ingredients meet. She pairs her culinary know-how with her passion for healthy, planet-friendly cooking.
For Clara, good food should taste great, nourish your body, and feel easy to make. Her recipes highlight whole foods, colorful produce, and a deep respect for seasonal eating.