
Sweet Cherry Rice Krispie Treats Recipe: Juicy Snack Magic
Crafting the perfect sweet snack takes creativity and a dash of childhood nostalgia.
These cherry rice krispie treats bring a delightful twist to the classic marshmallow dessert.
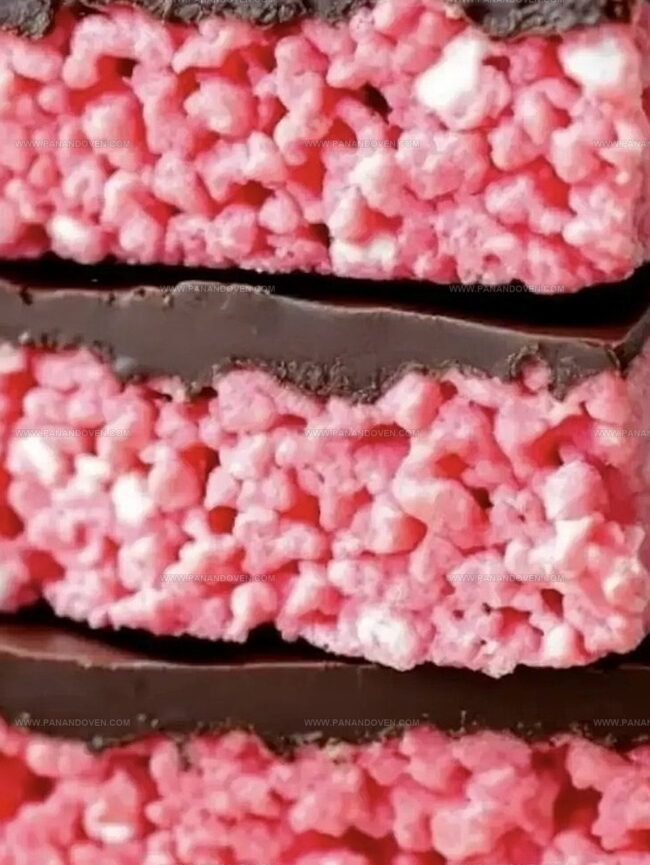
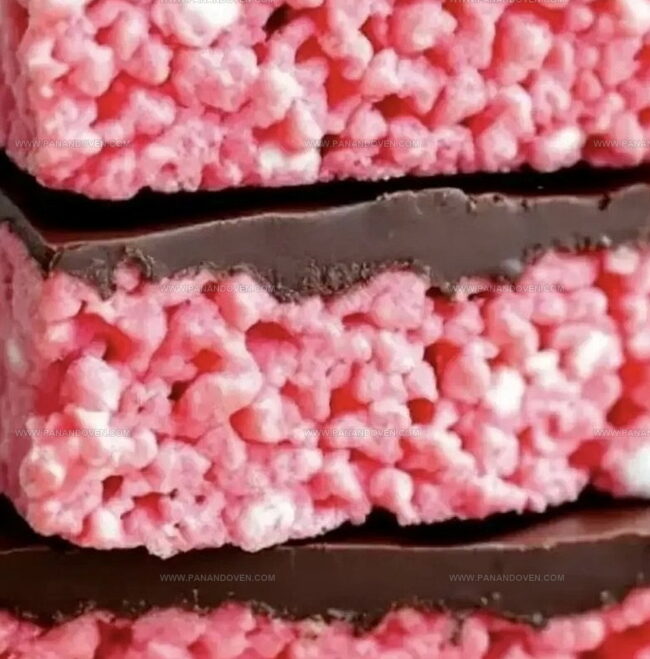
Bursts of vibrant red cherries dance through gooey, crispy squares that promise pure delight.
The unexpected fruity blend transforms an ordinary treat into something extraordinary.
Soft marshmallows and crisp cereal create a magical backdrop for the bright cherry flavor.
Each bite delivers a playful combination of textures that will make you smile.
Prepare to indulge in a dessert that brings joy with every delicious morsel.
Cherry Rice Krispie Treats What’s to Love
Cherry Rice Krispie Treat Ingredients
Base Ingredients:Flavor Enhancers:Preparation Helpers:Kitchen Gear for Rice Krispie Treat Making
Steps for Cherry Rice Krispie Treats
Step 1: Warm Up the Base
Grab a large saucepan and melt butter and marshmallows over low heat.
Keep stirring until everything transforms into a smooth, silky mixture.
Watch it carefully to prevent burning.
Step 2: Infuse Cherry Flavor
Sprinkle cherry gelatin powder into the melted marshmallow mixture.
Stir vigorously until the powder completely dissolves and creates a vibrant red-pink color.
Step 3: Introduce the Crunch
Pour Rice Krispies cereal into the warm mixture.
Fold gently and lovingly, ensuring every single cereal piece gets coated with the sweet, cherry-flavored marshmallow goodness.
Step 4: Shape and Smooth
Transfer the mixture into a buttered baking dish.
Use a greased spatula or wax paper to press and spread the treats evenly, creating a smooth, compact layer.
Step 5: Add Chocolate Elegance
Melt dark chocolate wafers using a double boiler or microwave.
Drizzle and spread the melted chocolate across the surface, creating a luxurious topping.
Step 6: Let Treats Rest
Allow the treats to set at room temperature for about an hour.
This helps the chocolate firm up and the flavors meld together perfectly.
Step 7: Slice and Serve
Cut the treats into delightful squares.
Store in an airtight container and enjoy these cherry-chocolate Rice Krispie treats whenever a sweet craving hits!
Tips for Chewy and Fruity Rice Krispie Squares
Cherry Rice Krispie Treat Variations
Fun Ways to Serve Rice Krispie Treats
Storage Advice for Rice Krispie Treats
FAQs
Yes, you can use regular marshmallows. Just measure the equivalent weight or volume of 16 ounces of mini marshmallows.
The cherry gelatin adds a distinct cherry flavor. If you don’t have it, you can skip it, but the treats will lack the cherry taste.
Dark chocolate wafers are recommended, but you can use chocolate chips or chocolate bars. Just ensure it melts smoothly and complements the cherry flavor.
Grease your spatula, hands, or wax paper with butter or cooking spray before pressing the mixture into the pan. This helps prevent sticking and makes spreading easier.
Print
Cherry Rice Krispie Treats Recipe
- Total Time: 15 minutes
- Yield: 12 1x
Description
Homemade cherry rice krispie treats combine classic marshmallow cereal bars with delightful cherry flavor. Sweet nostalgia meets simple summer dessert magic, offering quick satisfaction for those craving a playful twist on traditional treats.
Ingredients
Main Ingredients:
- 16 ounces (454 grams) mini marshmallows
- 6 cups (150 grams) Rice Krispies cereal
- 1 12 tablespoons (22.5 grams) cherry gelatin powder (JELL-O, not sugar-free)
Chocolate and Fat:
- 10 ounces (283 grams) Ghirardelli dark chocolate melting wafers
- 6 tablespoons (85 grams) unsalted butter
Optional Topping:
- Sprinkles
Instructions
- In a large saucepan, melt butter and marshmallows over low heat, stirring continuously until smooth and completely liquefied.
- Remove from heat and quickly incorporate cherry gelatin powder, whisking until mixture becomes uniform and vibrant pink.
- Introduce Rice Krispies cereal into the warm marshmallow base, folding gently to ensure even distribution without crushing the delicate cereal.
- Transfer the mixture to a prepared baking dish, using a greased spatula or wax paper to evenly press and compact the treats into a uniform layer.
- Gently melt dark chocolate wafers using a double boiler or microwave, stirring periodically to maintain a glossy consistency.
- Drizzle and spread melted chocolate across the surface of the treats, creating an even, luxurious coating.
- Allow the treats to cool and set at room temperature for approximately 60 minutes, or until chocolate hardens and becomes firm.
- Using a sharp knife, slice into square or rectangular portions, ensuring clean edges and consistent sizing.
- Store treats in an airtight container at room temperature, separating layers with parchment paper to prevent sticking.
Notes
- Swap gelatin with agar-agar powder for a vegetarian version that maintains the cherry flavor and texture.
- Use gluten-free Rice Krispies or similar crispy rice cereal to make the treats celiac-friendly.
- Experiment with different chocolate types like white or milk chocolate for varied flavor profiles and visual appeal.
- Chill the treats in the refrigerator for faster setting and a firmer chocolate layer that cuts more cleanly.
- Prep Time: 15 minutes
- Cook Time: 0 minutes
- Category: Snacks, Desserts
- Method: None
- Cuisine: American
Nutrition
- Serving Size: 12
- Calories: 210
- Sugar: 18g
- Sodium: 50mg
- Fat: 9g
- Saturated Fat: 5g
- Unsaturated Fat: 3g
- Trans Fat: 0g
- Carbohydrates: 32g
- Fiber: 0g
- Protein: 1g
- Cholesterol: 15mg
Marcus Reed
Founder & Food Content Creator
Expertise
Single-recipe development, Seasonal and local ingredient utilization, Food photography and styling, Culinary writing and content creation
Education
Culinary Arts Certificate, Blue Ridge Community and Technical College, WV
Focus: Fundamentals of culinary techniques, emphasizing hands-on experience in small-scale kitchen settings.
Marcus’s story begins in Asheville, where good food and family kitchens shaped his earliest memories. After hands-on culinary training and a lot of trial (and a little error), he realized that real cooking isn’t about perfection, it’s about connection.
At Pan and Oven, Marcus crafts recipes that are easy to follow, packed with flavor, and built for real kitchens.