Fluffy Cherry Cheesecake Recipe: A Cloud-Like Dessert Dream
Creamy desserts have a magical way of bringing smiles to everyone’s faces, and this cherry cheesecake fluff recipe delivers pure bliss with every spoonful.
Light as a cloud and bursting with fruity goodness, this delightful treat combines classic cheesecake flavors in a no-bake wonder.
Soft cream cheese melts into whipped cream, creating a dreamy texture that dances on your palate.
Sweet cherries add a vibrant pop of color and tangy sweetness to this irresistible dessert.
Each bite promises a smooth, velvety experience that feels both indulgent and refreshing.
The simple ingredients come together effortlessly, making this dessert a perfect last-minute crowd-pleaser.
You’ll want to keep this recipe in your back pocket for those moments when a quick, impressive dessert is needed.
Grab a spoon and get ready to fall in love with this heavenly cherry cheesecake fluff.
Why Cherry Cheesecake Fluff is Always a Crowd Pleaser
What’s Inside Cherry Cheesecake Fluff Dessert
Base Layer:Creamy Filling:Topping:Tools for Fluffy, Creamy Cheesecake Fluff
Making Cherry Cheesecake Fluff: Easy Instructions
Step 1: Create Delightful Crumble
In a mixing bowl, combine graham cracker crumbs, melted butter, and sugar.
Stir the ingredients until they form a perfectly blended, crumbly mixture.
Set the crumble aside for later use.
Step 2: Whip Up Creamy Filling
Grab a large mixing bowl and beat the softened cream cheese until it becomes ultra-smooth and creamy.
Add powdered sugar and vanilla extract, continuing to beat until the mixture is completely blended.
Gently fold in whipped topping, creating a light and fluffy texture that’s irresistibly silky.
Step 3: Build Delicious Layers
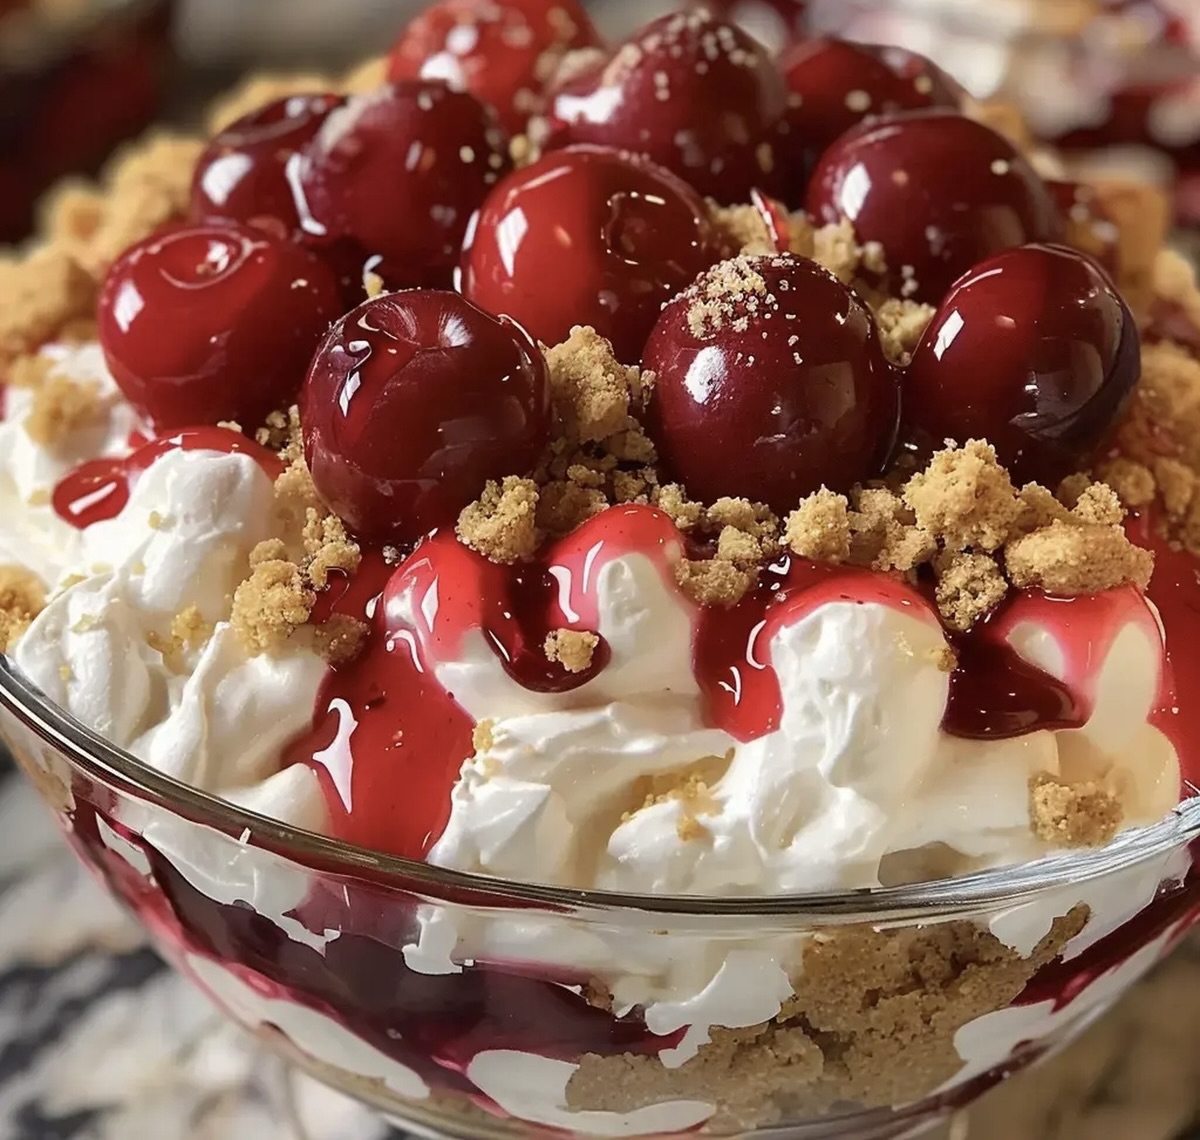
Select a serving dish and spread half of the crumble mixture across the bottom, creating a crunchy base.
Carefully spoon the cream cheese mixture over the crumble, ensuring an even layer.
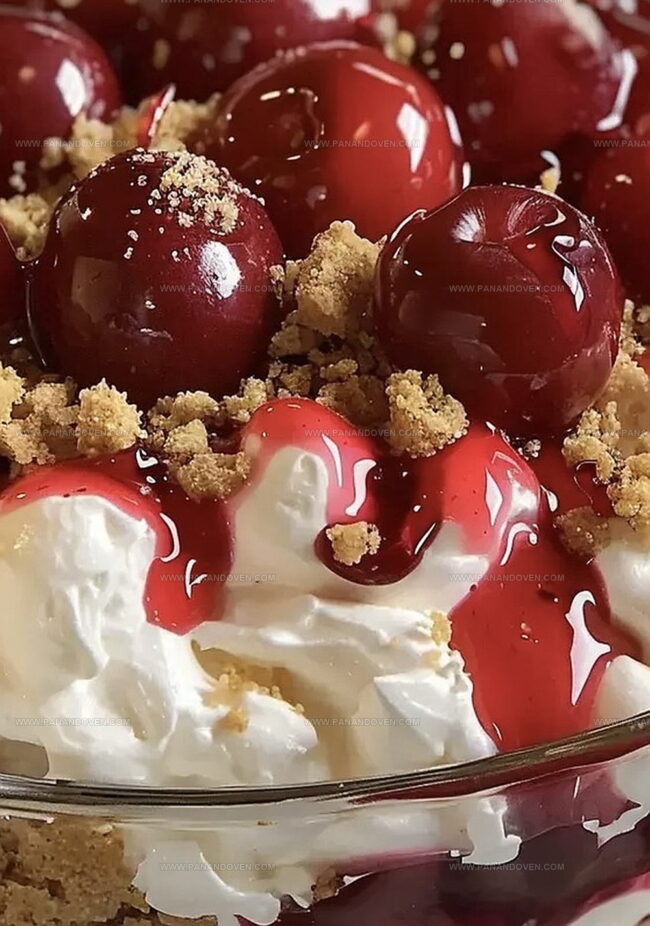
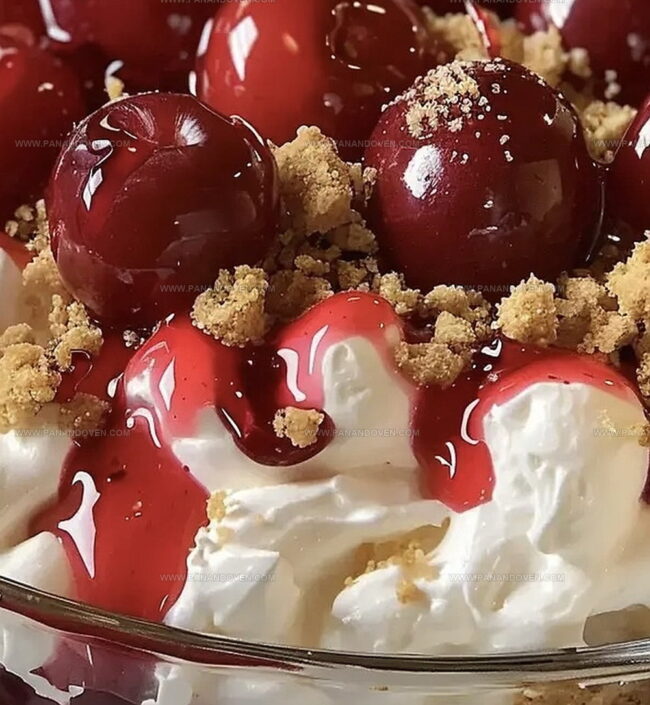
Generously top with cherry pie filling, covering the entire cream cheese layer.
Sprinkle the remaining crumble over the cherry layer, adding a delightful crunch.
Step 4: Chill and Enjoy
Place the dessert in the refrigerator and let it chill for at least 2 hours.
This resting time allows the flavors to mingle and the dessert to set perfectly.
When ready, serve and watch everyone fall in love with this heavenly treat.
Pro Tips for Lighter, Airier Cheesecake Fluff
Cherry Cheesecake Fluff: Tasty Variations to Explore
How to Serve Cheesecake Fluff for Special Occasions
Storing Cherry Cheesecake Fluff for Best Results
FAQs
Yes, it’s a no-bake recipe that requires simple mixing and layering techniques. Even beginner cooks can successfully prepare this dessert with basic kitchen skills.
While pie filling is recommended for consistency and ease, you can chop fresh cherries and mix with a little sugar. Just ensure they’re not too watery to maintain the dessert’s texture.
When stored in an airtight container in the refrigerator, this dessert stays delicious for 3-4 days. Keep it chilled to maintain its creamy texture and prevent spoilage.
Print
Cherry Cheesecake Fluff Recipe
- Total Time: 2 hours 20 minutes
- Yield: 8 1x
Description
Creamy cherry cheesecake fluff delights dessert enthusiasts with its luxurious blend of tangy cream cheese and sweet cherries. Cool, airy textures and rich flavors invite you to savor each spoonful of this irresistible treat.
Ingredients
Dairy and Base:
- 1 (8 ounces / 226 grams) package cream cheese, softened
- 2 cups whipped topping (like Cool Whip), thawed
- 1/4 cup unsalted butter, melted
Fruit and Sweeteners:
- 1 (21 ounces / 595 grams) can cherry pie filling
- 1 cup powdered sugar
- 2 tablespoons sugar
- 1 teaspoon vanilla extract
Crust:
- 1 cup graham cracker crumbs
Instructions
- Crush graham crackers into fine crumbs and blend thoroughly with melted butter and sugar, creating a cohesive sandy-textured base mixture.
- Using an electric mixer, whip cream cheese until silky and completely smooth, eliminating any potential lumps.
- Gradually incorporate powdered sugar and vanilla extract into the cream cheese, blending until the mixture achieves a uniform, creamy consistency.
- Delicately fold whipped topping into the cream cheese mixture, ensuring a light and airy texture without deflating the mixture.
- Select a clear serving dish and distribute half of the graham cracker crumble evenly across the bottom, creating a crisp foundation.
- Carefully spread the cream cheese mixture over the crumble layer, using a spatula to create an even, smooth surface.
- Gently pour cherry pie filling across the cream cheese layer, ensuring complete and uniform coverage.
- Sprinkle remaining graham cracker crumble over the cherry layer, providing a delightful textural contrast.
- Refrigerate the dessert for minimum 2 hours, allowing flavors to meld and the dessert to set into a firm, chilled consistency.
Notes
- Customize the graham cracker base by substituting with gluten-free crackers or crushed cookies for those with dietary restrictions.
- Experiment with different fruit fillings like blueberry, strawberry, or mixed berry to create unique flavor variations.
- Use low-fat cream cheese and sugar-free whipped topping for a lighter, healthier dessert option without compromising taste.
- Create individual servings in small mason jars or glasses for a charming and portable presentation that’s perfect for parties or picnics.
- Prep Time: 20 minutes
- Cook Time: 2 hours
- Category: Desserts, Snacks
- Method: Chilling
- Cuisine: American
Nutrition
- Serving Size: 8
- Calories: 300
- Sugar: 20 g
- Sodium: 150 mg
- Fat: 18 g
- Saturated Fat: 10 g
- Unsaturated Fat: 6 g
- Trans Fat: 0 g
- Carbohydrates: 34 g
- Fiber: 1 g
- Protein: 2 g
- Cholesterol: 30 mg
Marcus Reed
Founder & Food Content Creator
Expertise
Single-recipe development, Seasonal and local ingredient utilization, Food photography and styling, Culinary writing and content creation
Education
Culinary Arts Certificate, Blue Ridge Community and Technical College, WV
Focus: Fundamentals of culinary techniques, emphasizing hands-on experience in small-scale kitchen settings.
Marcus’s story begins in Asheville, where good food and family kitchens shaped his earliest memories. After hands-on culinary training and a lot of trial (and a little error), he realized that real cooking isn’t about perfection, it’s about connection.
At Pan and Oven, Marcus crafts recipes that are easy to follow, packed with flavor, and built for real kitchens.