The Ultimate Cheesy Jalapeño Quesadillas Recipe for Spicy Lovers
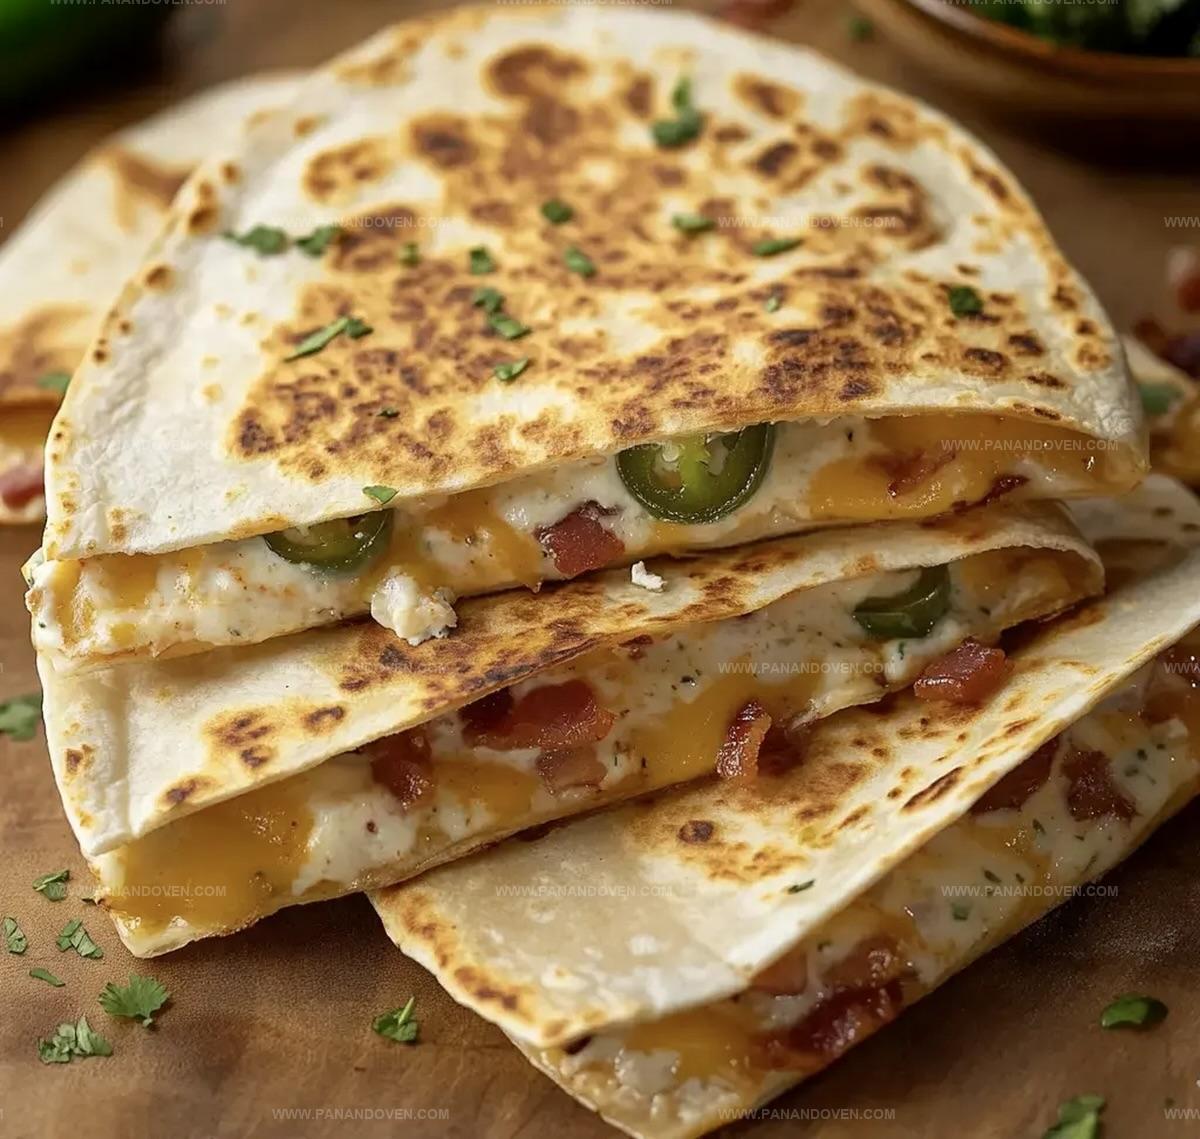
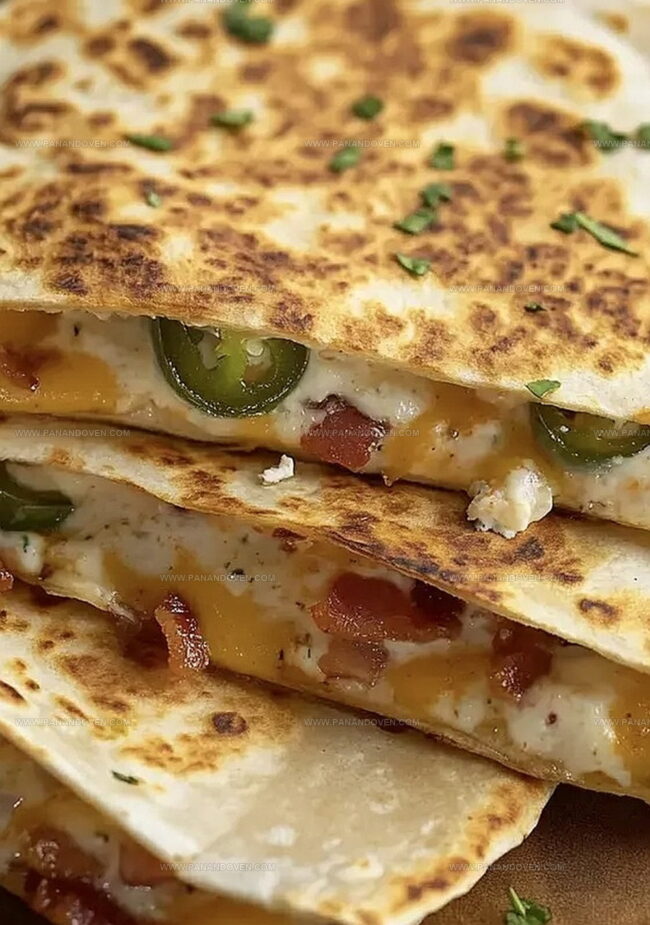
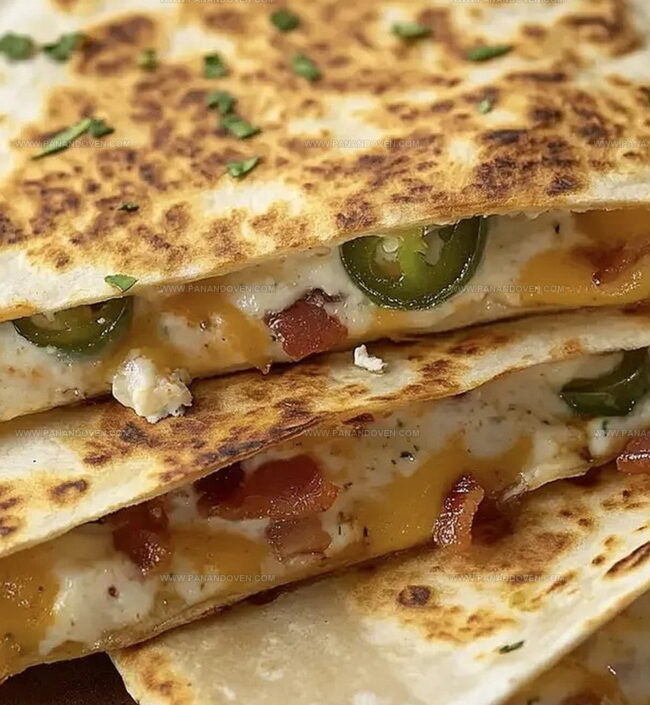
Melted cheese and spicy jalapeños dance together in this irresistible cheesy jalapeño quesadillas recipe that brings authentic Mexican flavors straight to your kitchen.
Crispy tortillas wrap around a molten center of gooey cheese and zesty peppers, creating a mouthwatering combination.
Each bite promises a perfect balance of heat and richness that tingles your taste buds.
Packed with bold flavors, these quesadillas come together in minutes with simple ingredients.
The secret lies in selecting fresh jalapeños and quality cheese for maximum impact.
Quick to prepare and even faster to devour, this dish guarantees smiles around the dinner table.
Serve these quesadillas hot and watch them disappear in record time.
Jalapeño Quesadillas: What Makes Them Zingy
Ingredients for Spicy Quesadillas

Gear List for Cheesy Quesadillas

Easy Instructions for Jalapeño Quesadillas
Step 1: Whip Up The Flavor Fusion
In a spacious mixing bowl, combine the silky cream cheese, sharp cheddar, gooey mozzarella, zesty diced jalapenos, crispy crumbled bacon, and fresh chopped cilantro.
Blend everything together until the ingredients dance in perfect harmony, creating a mouthwatering filling that promises explosive taste.
Step 2: Craft The Cheesy Canvas
Grab your soft flour tortillas and generously spread the tantalizing cheese mixture across one tortilla.
Make sure to leave a small border around the edges to prevent any delicious filling from escaping.
Crown the first tortilla with a second one, creating a delectable cheese sandwich ready for transformation.
Step 3: Sizzle To Golden Perfection
Fire up a skillet over medium heat and add a whisper of butter or oil.
Gently place your quesadilla into the pan, pressing down lightly to ensure even cooking.
Let it sizzle for 3-4 minutes on each side, watching for that gorgeous golden-brown crust and listening for the delightful crispy sound that signals culinary magic.
Step 4: Slice And Unveil The Treasure
Once your quesadilla reaches crispy, melty perfection, transfer it to a cutting board.
Allow it to rest for a brief moment, then slice into tantalizing wedges that reveal the molten cheese interior.
Repeat the process for additional quesadillas if desired.
Step 5: Elevate The Experience
Serve these spicy beauties piping hot, accompanied by cool and creamy sour cream, zesty salsa, or rich guacamole for dipping.
Each bite promises a flavor explosion that will make taste buds dance with joy.
Tips for Cheesy Quesadilla Perfection

Quesadilla Add-In Ideas

Sharing Quesadillas at Gatherings
Storing Quesadillas
FAQs
The spice level depends on the jalapenos used. Remove seeds for less heat, keep seeds for more kick. Fresh jalapenos vary in spiciness, so taste and adjust accordingly.
Absolutely! Simply omit the bacon or replace it with vegetarian bacon alternatives like tempeh bacon or smoky mushroom bits for similar flavor and texture.
Cheddar and mozzarella are perfect, but you can experiment with monterey jack, pepper jack, or pepper blend cheeses for different flavor profiles. Stick to melty cheeses for best results.
Print
Cheesy Jalapeno Quesadillas Recipe
- Total Time: 18 minutes
- Yield: 2 1x
Description
Mexican-style cheesy jalapeño quesadillas deliver spicy, melty goodness in minutes. Crisp tortillas cradle zesty peppers and gooey cheese, promising a quick, satisfying meal you’ll crave again and again.
Ingredients
Main Ingredients:
- 2 large flour tortillas
- 4 ounces (113 grams) cream cheese, softened
- 1/2 cup (50 grams) shredded cheddar cheese
- 1/2 cup (50 grams) shredded mozzarella cheese
Flavor Enhancers:
- 2 jalapenos, seeded and diced
- 4 slices cooked bacon, crumbled (optional)
- 2 tablespoons fresh cilantro, chopped (optional)
Cooking Ingredients:
- Butter or oil for cooking
Instructions
- Craft a zesty filling by blending softened cream cheese with shredded cheddar, mozzarella, finely chopped jalapenos, crispy bacon bits, and freshly chopped cilantro until ingredients are thoroughly incorporated.
- Create a quesadilla base by laying one flour tortilla flat and generously spreading the prepared cheese mixture across its surface, ensuring an even distribution while leaving a small border around the edges.
- Top the first tortilla with a second tortilla, pressing gently to seal the cheesy filling inside and create a unified quesadilla sandwich.
- Preheat a skillet over medium heat, lightly coating the surface with butter or oil to prevent sticking and promote golden browning.
- Carefully transfer the assembled quesadilla to the heated skillet, allowing it to cook for approximately 3-4 minutes until the bottom transforms into a crispy, golden-brown texture.
- Flip the quesadilla using a spatula, cooking the opposite side for an additional 3-4 minutes until both sides achieve a uniform, crisp appearance and the cheese melts completely.
- Remove the quesadilla from the skillet and let it rest momentarily, allowing the melted cheese to stabilize and prevent immediate burning.
- Slice the quesadilla into triangular wedges using a sharp knife, creating clean, even portions.
- Serve immediately with accompanying condiments like tangy sour cream, zesty salsa, or creamy guacamole for enhanced flavor and dipping pleasure.
Notes
- Customize Heat Levels by adjusting the number of jalapenos or using milder peppers like poblano for those sensitive to spice.
- Ensure Even Melting by letting cream cheese soften completely and using room temperature ingredients for smooth blending.
- Create Vegetarian Version by omitting bacon and adding sautéed vegetables like bell peppers or mushrooms for extra texture and flavor.
- Prevent Soggy Tortillas by patting jalapenos dry and using minimal moisture in the filling to maintain crispy exterior during cooking.
- Prep Time: 10 minutes
- Cook Time: 8 minutes
- Category: Appetizer, Snacks, Dinner
- Method: Frying
- Cuisine: Mexican
Nutrition
- Serving Size: 2
- Calories: 466
- Sugar: 2 g
- Sodium: 720 mg
- Fat: 30 g
- Saturated Fat: 15 g
- Unsaturated Fat: 12 g
- Trans Fat: 0 g
- Carbohydrates: 36 g
- Fiber: 2 g
- Protein: 18 g
- Cholesterol: 60 mg
Marcus Reed
Founder & Food Content Creator
Expertise
Single-recipe development, Seasonal and local ingredient utilization, Food photography and styling, Culinary writing and content creation
Education
Culinary Arts Certificate, Blue Ridge Community and Technical College, WV
Focus: Fundamentals of culinary techniques, emphasizing hands-on experience in small-scale kitchen settings.
Marcus’s story begins in Asheville, where good food and family kitchens shaped his earliest memories. After hands-on culinary training and a lot of trial (and a little error), he realized that real cooking isn’t about perfection, it’s about connection.
At Pan and Oven, Marcus crafts recipes that are easy to follow, packed with flavor, and built for real kitchens.