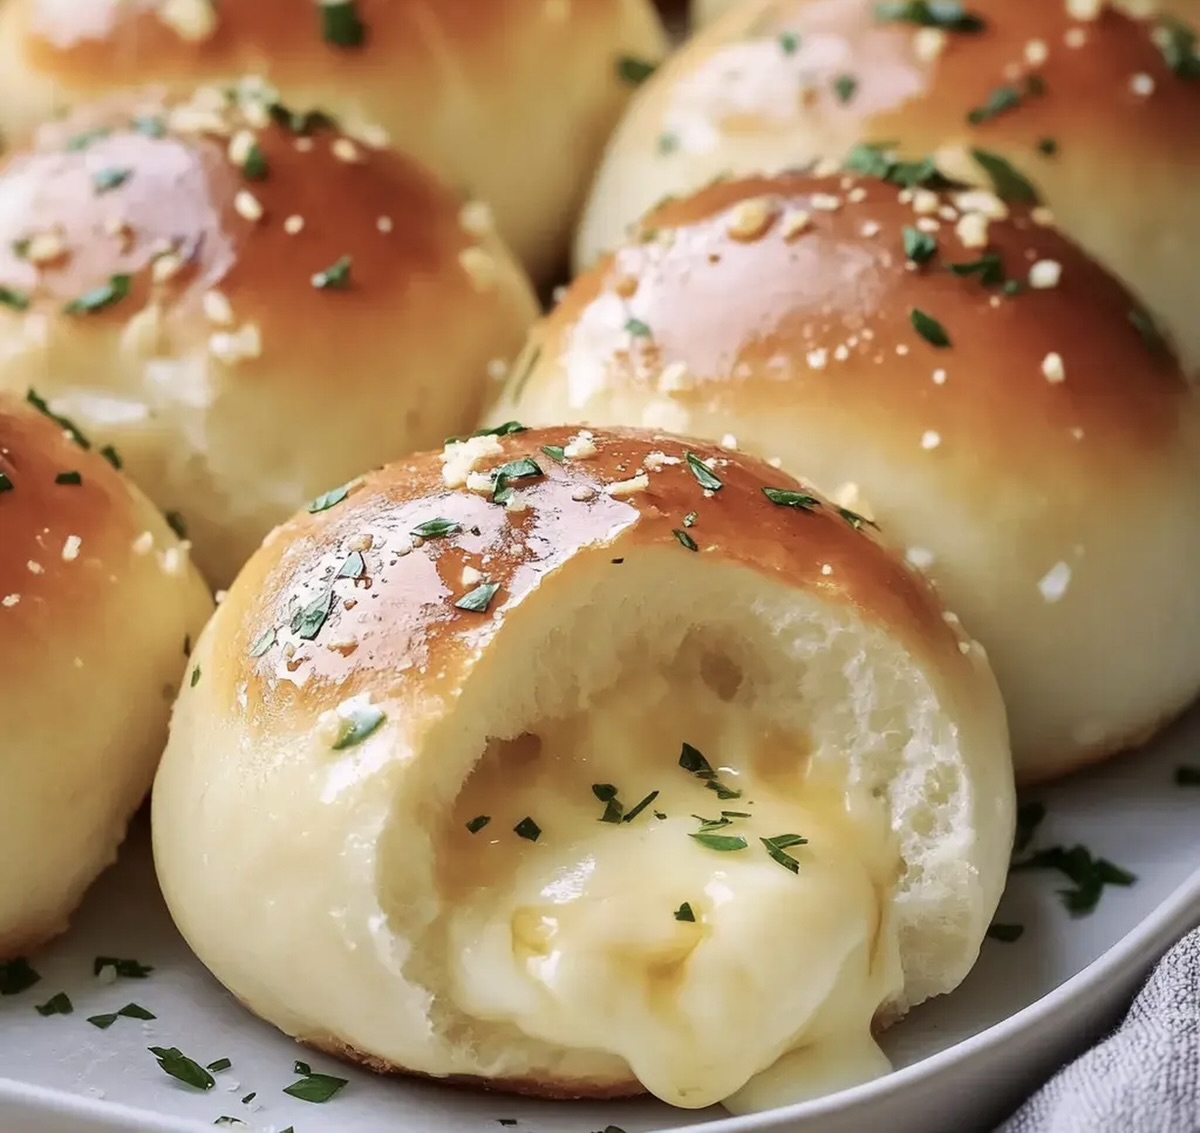
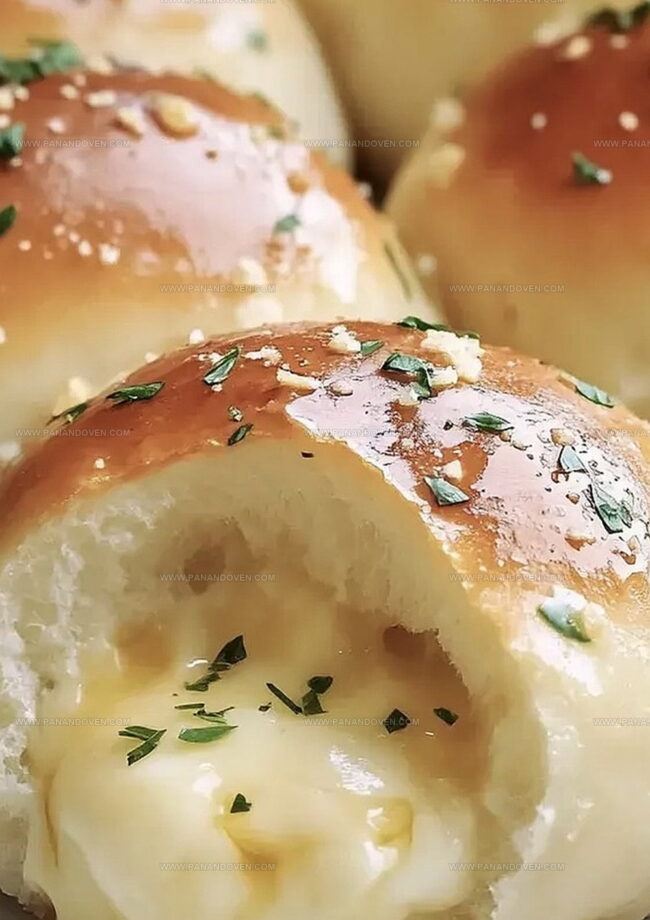
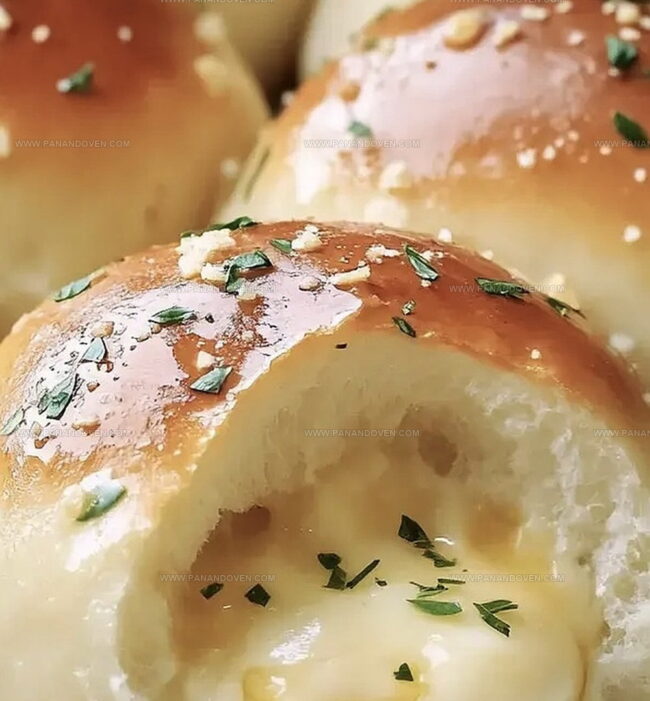
Homemade Cheesy Garlic Bombs Recipe: Irresistibly Gooey Bites
Bursting with flavor, these irresistible cheesy garlic bombs will make your taste buds dance with pure delight.
Warm, golden bread pockets packed with gooey cheese and aromatic garlic create an appetizer that’s simply impossible to resist.
Every bite delivers a melted cheese explosion that melts right in your mouth.
The combination of crispy exterior and soft, cheesy interior makes these bombs a crowd-pleasing sensation.
Simple ingredients and easy preparation mean you can whip up this delectable treat in minutes.
Serve these mouthwatering bombs at your next gathering, and watch them disappear faster than you can say “more, please!” Prepare to become the kitchen hero with this irresistible recipe that promises to steal the show.
Cheesy Garlic Bombs: Bite-Sized Bread Bursting with Cheese
All the Ingredients for Soft and Cheesy Garlic Bombs
Base Ingredients:Flavor Enhancers:Preparation Ingredients:Tools for Baking Gooey Garlic Bombs
How to Assemble and Bake Cheesy Garlic Bombs
Step 1: Thaw The Frozen Rolls
Remove frozen rolls from the package and place them on a plate.
Cover with plastic wrap and let them relax in the refrigerator for 4-8 hours or overnight.
This slow thawing helps the dough become soft and pliable.
Step 2: Prepare The Baking Station
Line a baking sheet with parchment paper.
Preheat the oven to 350°F, creating the perfect warm environment for your delicious bombs.
Step 3: Slice The Cheese
Take mozzarella sticks and chop them into bite-sized chunks, roughly 1-inch pieces.
These will be the gooey, melty center of your bombs.
Step 4: Transform The Dough
Gently press each dough ball with your hands, creating thin round disks.
Be careful not to tear the dough while stretching.
Step 5: Create The Cheese Center
Position two cheese pieces in the middle of each dough disk.
This will ensure a generous cheesy surprise in every bite.
Step 6: Secure The Filling
Carefully pinch the dough edges together, creating a tight seal around the cheese.
Flip each bomb seam-side down on the prepared baking sheet.
Step 7: Bake To Golden Perfection
Slide the baking sheet into the oven and bake for 9-11 minutes.
Watch for a beautiful golden-brown color developing on the rolls.
Step 8: Whip Up Garlic Butter
Melt butter in a microwave-safe dish or small saucepan.
Once melted, stir in:Mix until ingredients are well combined.
Step 9: Butter Blast
Remove the baked bombs from the oven.
Generously brush each roll with the fragrant garlic butter, ensuring complete coverage.
Step 10: Serve And Savor
Let the cheesy garlic bombs cool for a few minutes.
Serve warm and watch everyone’s eyes light up with excitement.
Insider Garlic Bomb Tips for Fluffy Results
Ways to Mix Up Your Garlic Bombs with Tasty Additions
Creative Serving Ideas for Cheesy Garlic Bombs
How to Keep Garlic Bombs Fresh and Delicious
FAQs
You’ll need frozen rolls, mozzarella sticks, butter, minced garlic, and parsley flakes. These simple ingredients create a delicious appetizer that’s easy to prepare.
While the recipe is designed for frozen rolls, you can substitute with homemade dough. Just ensure the dough is soft and pliable enough to wrap around the cheese pieces.
Make sure to pinch the edges of the dough firmly when sealing the cheese inside. Place the rolls seam side down on the baking sheet to help maintain the seal.
Print
Cheesy Garlic Bombs Recipe
- Total Time: 8 hours 27 minutes
- Yield: 8 1x
Description
Homemade cheesy garlic bombs deliver irresistible flavor explosions that combine melted cheese and savory garlic. Crispy bread shells cradle warm, gooey cheese centers you’ll crave with every bite.
Ingredients
Main Ingredients:
- 8 Rhodes brand frozen Texas rolls (thawed)
- 4 sticks mozzarella cheese (cut into 16 pieces)
Flavor Enhancers:
- 4 tablespoons (59 ml) salted butter, melted
- 2 cloves garlic, minced
Herbs and Seasonings:
- 1 tablespoon (15 ml) parsley flakes (freshly chopped or dried)
Instructions
- Remove frozen rolls from packaging and place on a plate, then cover with plastic wrap. Refrigerate for 4-8 hours until completely thawed.
- Heat oven to 350°F and line a baking sheet with parchment paper.
- Slice mozzarella sticks into compact 1-inch chunks.
- Gently press each dough ball into a thin, even circular shape using fingertips.
- Position two cheese pieces precisely in the center of each dough disk.
- Carefully fold dough edges over the cheese, pressing and pinching firmly to create a complete seal. Arrange sealed bombs with seam facing downward on prepared baking sheet.
- Roast in preheated oven for 10-12 minutes until surface turns golden brown.
- During baking, combine melted butter with finely minced garlic and dried parsley in a small bowl.
- Immediately after removing bombs from oven, generously coat each with herbed garlic butter using a pastry brush.
- Let cheesy garlic bombs rest for 3-5 minutes to prevent burning and allow cheese to stabilize before serving.
Notes
- Perfectly Thaw Dough: Always thaw frozen rolls slowly in the refrigerator to maintain texture and prevent uneven rising.
- Cheese Placement Trick: Center cheese pieces precisely to ensure even melting and prevent cheese leakage during baking.
- Sealing Technique: Press dough edges firmly and roll gently between palms to create a tight, seamless seal preventing cheese from escaping.
- Gluten-Free Adaptation: Substitute frozen rolls with gluten-free dough or cauliflower-based alternatives for a low-carb version.
- Prep Time: 8 hours 15 minutes
- Cook Time: 12 minutes
- Category: Appetizer, Snacks
- Method: Baking
- Cuisine: Italian
Nutrition
- Serving Size: 8
- Calories: 250
- Sugar: 1g
- Sodium: 500mg
- Fat: 18g
- Saturated Fat: 10g
- Unsaturated Fat: 8g
- Trans Fat: 0g
- Carbohydrates: 24g
- Fiber: 1g
- Protein: 6g
- Cholesterol: 30mg
Marcus Reed
Founder & Food Content Creator
Expertise
Single-recipe development, Seasonal and local ingredient utilization, Food photography and styling, Culinary writing and content creation
Education
Culinary Arts Certificate, Blue Ridge Community and Technical College, WV
Focus: Fundamentals of culinary techniques, emphasizing hands-on experience in small-scale kitchen settings.
Marcus’s story begins in Asheville, where good food and family kitchens shaped his earliest memories. After hands-on culinary training and a lot of trial (and a little error), he realized that real cooking isn’t about perfection, it’s about connection.
At Pan and Oven, Marcus crafts recipes that are easy to follow, packed with flavor, and built for real kitchens.