Homemade Cheesy Breadsticks Made from Dough Recipe: Golden Delight
Warm, golden breadsticks sprinkled with cheesy goodness are the ultimate comfort food for any gathering.
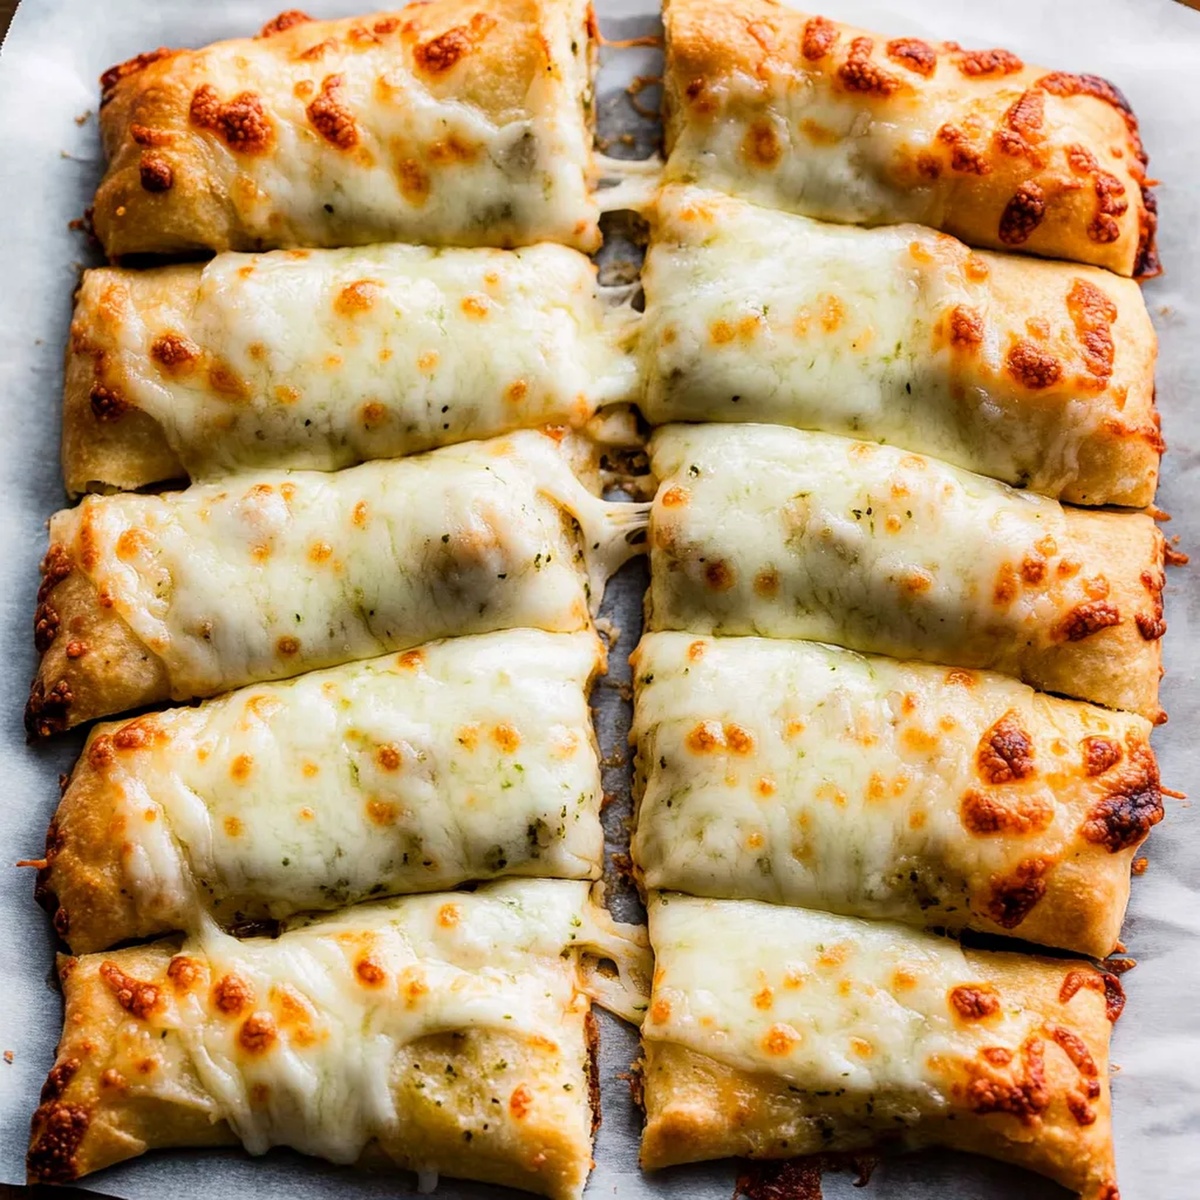
These homemade cheesy breadsticks recipe deliver a crispy exterior with a soft, pillowy center that melts in your mouth.
Every bite promises a delightful blend of herbs and melted cheese that dances across your taste buds.
The simple ingredients come together quickly, making this recipe perfect for busy weeknights or lazy weekend snacking.
You can whip up these irresistible breadsticks in under an hour, impressing everyone at the table.
The aroma of freshly baked cheese and herbs will draw hungry guests straight to the kitchen.
Prepare to savor each delectable, golden-brown morsel that promises to become a new family favorite.
Cheesy Breadsticks Doughy Appeal
Cheesy Breadsticks Ingredient Shortlist
Dough Base:Flavor Enhancers:Optional Serving Accompaniment:Tools for Breadstick Baking Fun
How to Make Cheesy Breadsticks from Scratch
Step 1: Unleash the Dough Magic
Grab your pizza dough and give it a gentle punch to release those pesky air bubbles.
If you’ve got extra dough, pop it in the freezer for another delicious adventure.
Sprinkle some flour on your work surface to prevent sticking.
Step 2: Create Flavor Explosion
Fire up the oven to a toasty 425°F.
Roll out the dough into a rectangular canvas about 9×13 inches.
Whip up a flavor-packed mixture with:Lovingly brush this magical concoction all over the dough.
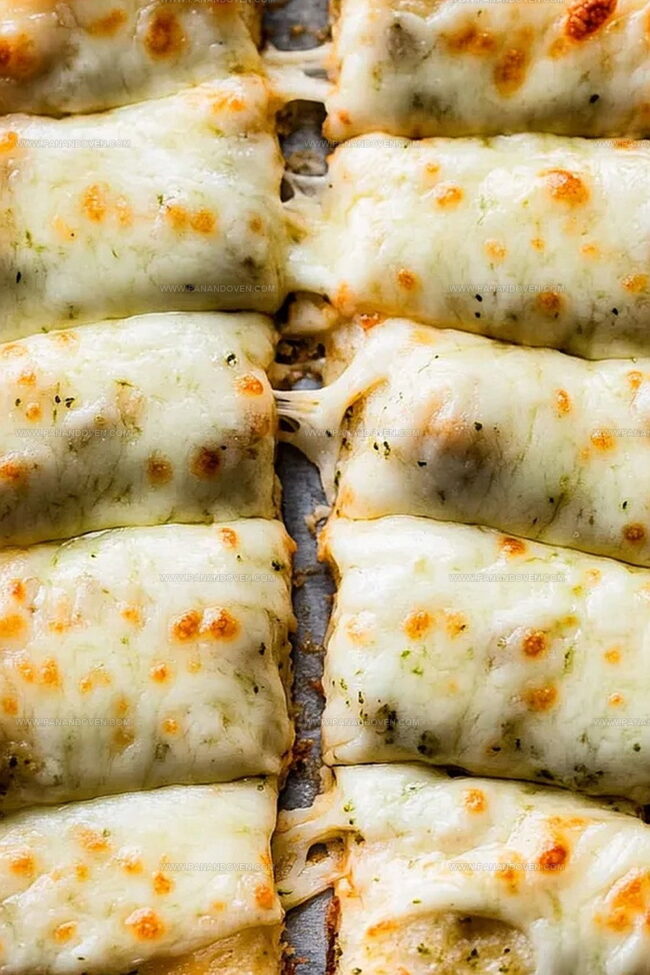
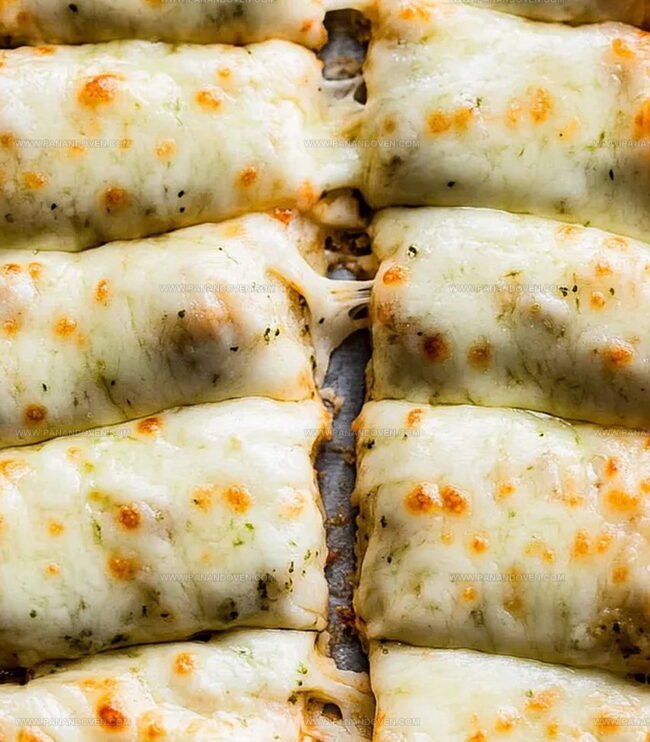
Then, blanket the surface with a generous layer of shredded cheese.
Step 3: Transform in the Oven
Slide your masterpiece into the oven and let the magic happen.
Bake for 12-15 minutes until the edges turn a gorgeous golden brown.
For extra pizzazz, switch to broil for the final minute to create a beautifully bronzed top.
Step 4: Slice and Celebrate
Carve your creation into delectable breadsticks.
Serve them as is or pair with a zesty marinara sauce for dipping.
Get ready for a taste explosion that’ll make your taste buds dance!
Tips for Golden, Melty Breadsticks
Cheesy Breadstick Ideas for Snack Time
Serving Breadsticks for Family Sharing
Storing Cheesy Breadsticks the Right Way
FAQs
Yes, absolutely! Store-bought pizza dough works perfectly and saves time. Just make sure it’s at room temperature before rolling out.
Mozzarella is classic and melts beautifully, but you can also use a blend of mozzarella and parmesan for extra flavor. Sharp cheddar or provolone are great alternatives too.
Look for golden brown edges and a crispy bottom. The cheese should be completely melted and slightly bubbly. If the top isn’t brown enough, a quick 1-minute broil will give you that perfect color.
Print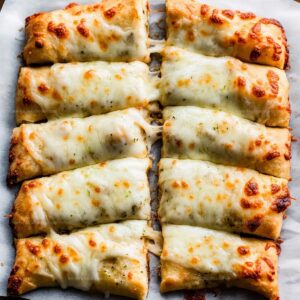
Cheesy Breadsticks Made from Dough Recipe
- Total Time: 30 minutes
- Yield: 4 1x
Description
Homemade cheesy breadsticks elevate classic Italian appetizers with golden, crispy edges and melted cheese. Garlic-infused herbs and perfectly seasoned dough create an irresistible snack you’ll crave again and again.
Ingredients
Main Ingredients:
- 1 pound (454 grams) store-bought or homemade pizza dough
- 1 3/4 cups shredded mozzarella cheese
Seasoning and Flavoring:
- 2 tablespoons (28 grams) unsalted butter, melted
- 1 teaspoon garlic powder or 2 minced garlic cloves
- 1 teaspoon Italian seasoning blend or dried basil
Optional:
- Cornmeal for dusting the pan
- Marinara or pizza sauce for dipping
Instructions
- Gently deflate the fresh dough, eliminating trapped air pockets, and separate into two equal portions. Set aside one half for future use, storing in the freezer if desired.
- Warm the oven to 425°F, preparing a clean workspace with flour or parchment paper. Carefully stretch the dough into a rectangular shape measuring approximately 9×13 inches.
- Create a flavorful butter mixture by combining melted butter with aromatic garlic and fragrant Italian herbs. Generously brush this seasoned butter across the entire surface of the stretched dough.
- Evenly distribute a layer of shredded cheese over the butter-coated dough, ensuring complete coverage from edge to edge.
- Transfer the prepared dough to the preheated oven and bake for 12-15 minutes. Watch for the edges to transform into a rich, golden-brown color indicating perfect doneness.
- For an extra crispy and appealing finish, activate the broiler for the final minute, allowing the cheese to develop a slight caramelization and attractive color.
- Remove from the oven and let cool momentarily. Slice into individual breadsticks and serve immediately. Complement with marinara sauce for an enhanced dining experience.
Notes
- Dough Flexibility: Fresh or store-bought pizza dough works perfectly, allowing quick preparation for busy home cooks.
- Cheese Variety: Experiment with different cheese blends like mozzarella, parmesan, or cheddar to customize flavor profiles.
- Gluten-Free Adaptation: Substitute regular dough with gluten-free alternatives for those with wheat sensitivities.
- Enhance Nutrition: Sprinkle dried herbs or add finely chopped spinach and sun-dried tomatoes for extra nutrients and color.
- Prep Time: 15 minutes
- Cook Time: 15 minutes
- Category: Snacks, Appetizer
- Method: Baking
- Cuisine: Italian
Nutrition
- Serving Size: 4
- Calories: 300
- Sugar: 1g
- Sodium: 500mg
- Fat: 15g
- Saturated Fat: 9g
- Unsaturated Fat: 4g
- Trans Fat: 0g
- Carbohydrates: 30g
- Fiber: 1g
- Protein: 12g
- Cholesterol: 35mg
Clara Thompson
Recipe Developer & Food Educator
Expertise
Plant-based and vegetarian recipe development, Nutritional analysis and meal planning, Culinary education and workshop facilitation, Content writing with a focus on healthy living
Education
Diploma in Culinary Arts, Mt. San Jacinto College, CA
Focus: Comprehensive culinary training with an emphasis on sustainable cooking practices.
Certificate in Nutrition and Healthy Living, Cornell University (Online Program)
Focus: Understanding the principles of nutrition to create balanced and health-conscious recipes.
Clara lives where fresh ideas and fresh ingredients meet. She pairs her culinary know-how with her passion for healthy, planet-friendly cooking.
For Clara, good food should taste great, nourish your body, and feel easy to make. Her recipes highlight whole foods, colorful produce, and a deep respect for seasonal eating.