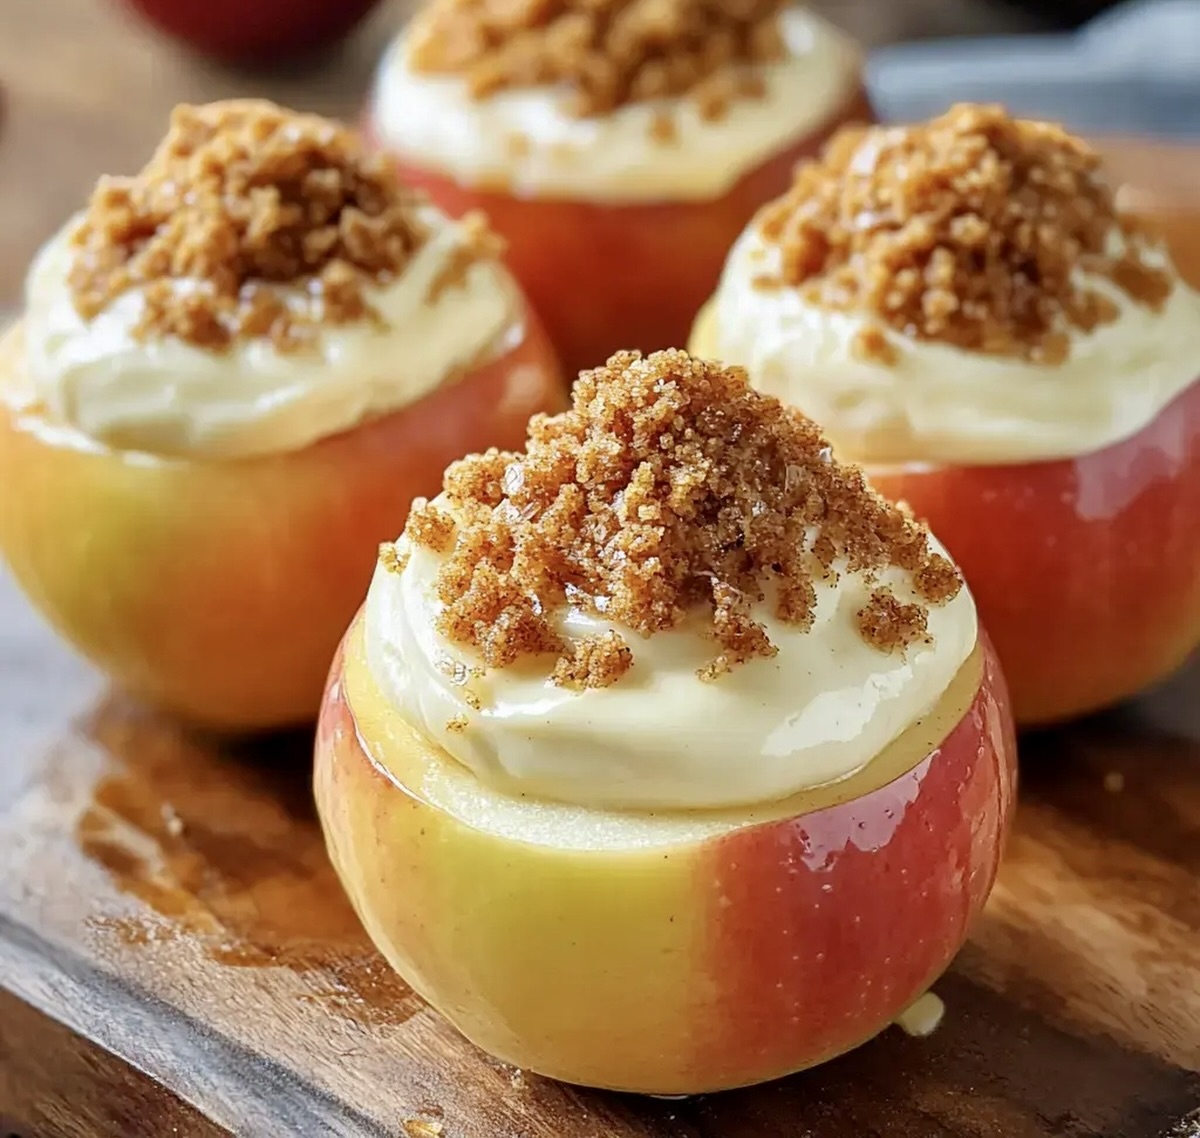
Easy Cheesecake Stuffed Baked Apples Recipe That Wows Every Time
Sweet autumn nights call for a decadent apple dessert that marries the warmth of cheesecake stuffed baked apples with pure comfort.
Crisp, ripe apples become the perfect vessel for a rich, creamy cheesecake filling that melts in your mouth.
Each bite promises a delightful contrast between the tender baked fruit and the smooth, tangy cream cheese center.
The aroma of cinnamon and vanilla will drift through your kitchen, tempting everyone nearby.
Baking these apples transforms a simple fruit into an elegant dessert that feels both rustic and sophisticated.
Golden edges, soft centers, and a sprinkle of warm spices make this treat irresistible.
Gather your ingredients and let’s create a dessert that celebrates the best of fall’s bounty.
Why Cheesecake Stuffed Apples Wow Guests
Ingredients for Baked Cheesecake Apples
Main Ingredients:Filling Ingredients:Topping Ingredients:Tools for Stuffing Baked Apples Easily

Baking Cheesecake Stuffed Apples at Home
Step 1: Warm Up The Oven
Crank the oven to a toasty 375°F (190°C) and get ready for some delicious magic.
Step 2: Prep The Apples
Gently wash the apples and carefully core them, leaving the bottom intact.
This creates a perfect little cradle for the creamy filling.
Step 3: Create Cheesecake Magic
Grab a mixing bowl and whip together these dreamy ingredients:Blend until silky smooth and irresistibly creamy.
Step 4: Stuff Those Apples
Tenderly fill each apple with the cheesecake mixture, pressing down softly to ensure every nook is packed with flavor.
Step 5: Craft The Crunchy Topping
In another bowl, mix these tasty ingredients:Combine until the mixture looks perfectly crumbly.
Step 6: Add The Cracker Crown
Sprinkle the graham cracker topping over each stuffed apple, gently pressing to help it stick.
Step 7: Set The Stage
Place the apple treats in a baking dish and give them a light splash of lemon juice.
This adds a zingy flavor and keeps the apples looking fresh.
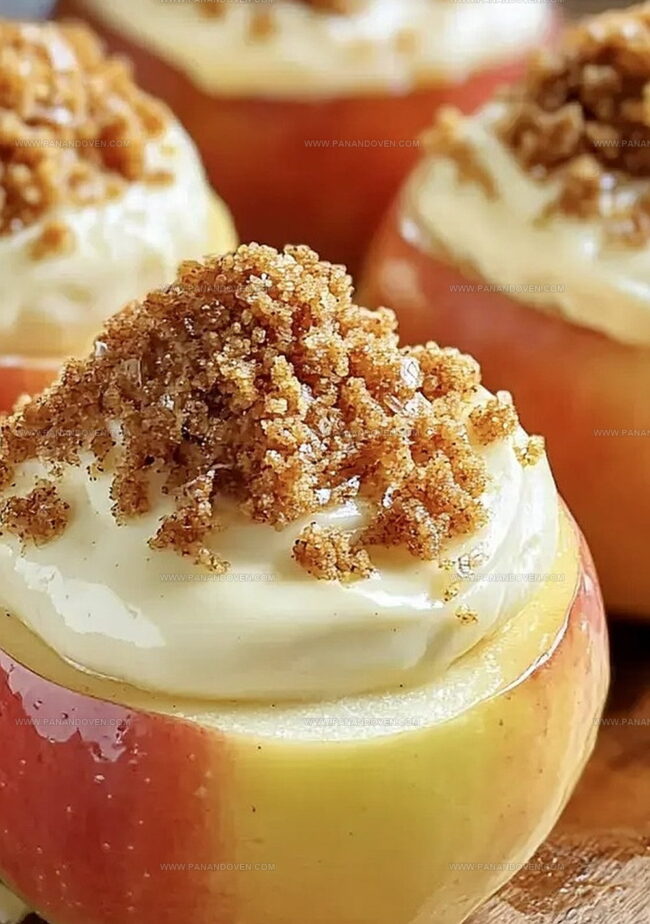
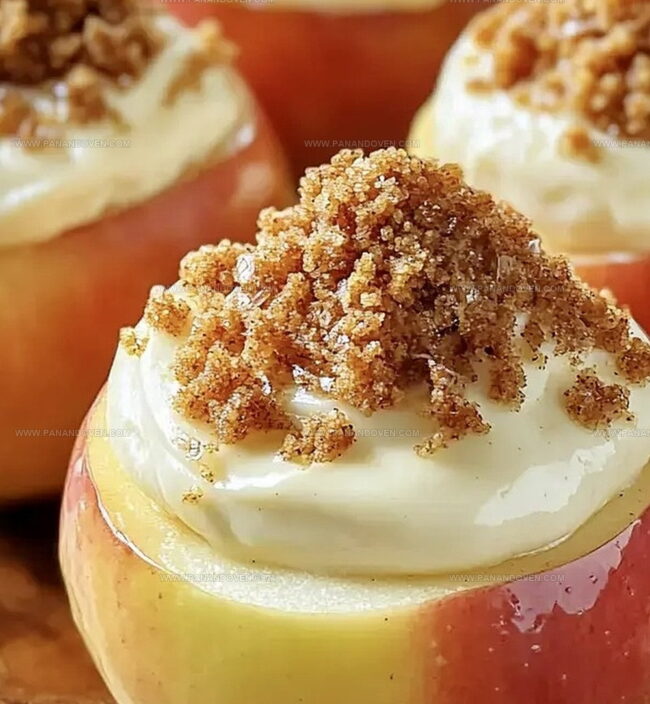
Step 8: Bake To Perfection
Slide the baking dish into the oven and bake for 25-30 minutes.
You’ll know they’re done when the apples are tender and the cheesecake filling looks set.
Step 9: Cool And Devour
Let the apples cool for a few minutes, then get ready to enjoy your mouthwatering creation!
Tips for Luscious Cheesecake Apples
Apple Cheesecake Variations to Explore
Serving Stuffed Apples Warm or Chilled
How to Store Cheesecake Stuffed Apples

FAQs
Firm baking apples like Granny Smith, Honeycrisp, or Braeburn are ideal because they hold their shape during baking and provide a nice tart contrast to the sweet cheesecake filling.
Yes, simply use gluten-free graham crackers or replace them with crushed gluten-free cookies to create the topping. The rest of the ingredients are naturally gluten-free.
Core the apples carefully, leaving the bottom intact, and don’t overbake. Check the apples at 25 minutes to ensure they remain firm but tender. Using firmer apple varieties also helps maintain their structure.
While not a diet food, this recipe offers some nutritional benefits.
Print
Cheesecake Stuffed Baked Apples Recipe
- Total Time: 50 minutes
- Yield: 4 1x
Description
Delectable Cheesecake Stuffed Baked Apples combine classic American dessert flavors in one irresistible treat. Creamy cheesecake filling nestled inside tender baked apples creates a simple yet elegant dessert you can enjoy with friends and family.
Ingredients
Main Ingredients:
- 4 apples (Granny Smith or Honeycrisp)
- 8 ounces (226 grams) cream cheese, softened
- 1/2 cup (60 grams) graham cracker crumbs
Sweeteners and Flavor Enhancers:
- 1/4 cup (50 grams) sugar
- 1 teaspoon vanilla extract
- 1 teaspoon cinnamon
- 1 tablespoon lemon juice
Binding and Preparation Ingredients:
- 2 tablespoons (28 grams) butter, melted
Instructions
- Heat oven to 375°F (190°C), ensuring a perfectly warm environment for baking.
- Select ripe, firm apples and carefully remove cores, maintaining a sturdy base to hold the creamy filling.
- Whisk cream cheese with sugar, vanilla, and a gentle dusting of cinnamon until silky and homogeneous.
- Generously spoon the velvety cheesecake mixture into each apple cavity, pressing softly to eliminate air pockets.
- Pulverize graham crackers and blend with melted butter and a whisper of cinnamon to create a crisp, golden topping.
- Delicately sprinkle the cracker mixture over the stuffed apples, gently patting to create an even, crunchy layer.
- Arrange apples in a baking dish and splash with fresh lemon juice, which adds brightness and prevents fruit discoloration.
- Slide the dish into the preheated oven and bake for 25-30 minutes, watching for tender apples and a set cheesecake center.
- Allow dessert to rest briefly, letting flavors meld and temperature stabilize before serving warm.
Notes
- Choose firm, crisp apples like Honeycrisp or Granny Smith for the best texture and flavor stability.
- Keep cream cheese at room temperature to ensure smooth, lump-free filling when mixing ingredients.
- Pat apple cores dry with paper towels before stuffing to prevent excess moisture ruining the cheesecake texture.
- Customize toppings by substituting graham crackers with gluten-free alternatives like almond flour or crushed nuts for dietary restrictions.
- Prep Time: 20 minutes
- Cook Time: 30 minutes
- Category: Desserts, Snacks
- Method: Baking
- Cuisine: American
Nutrition
- Serving Size: 4
- Calories: 286
- Sugar: 21 g
- Sodium: 150 mg
- Fat: 12 g
- Saturated Fat: 7 g
- Unsaturated Fat: 4 g
- Trans Fat: 0 g
- Carbohydrates: 39 g
- Fiber: 3 g
- Protein: 3 g
- Cholesterol: 30 mg
Marcus Reed
Founder & Food Content Creator
Expertise
Single-recipe development, Seasonal and local ingredient utilization, Food photography and styling, Culinary writing and content creation
Education
Culinary Arts Certificate, Blue Ridge Community and Technical College, WV
Focus: Fundamentals of culinary techniques, emphasizing hands-on experience in small-scale kitchen settings.
Marcus’s story begins in Asheville, where good food and family kitchens shaped his earliest memories. After hands-on culinary training and a lot of trial (and a little error), he realized that real cooking isn’t about perfection, it’s about connection.
At Pan and Oven, Marcus crafts recipes that are easy to follow, packed with flavor, and built for real kitchens.