
Dreamy Caramel Cheesecake Squares Recipe: Sweet Bliss in Every Bite
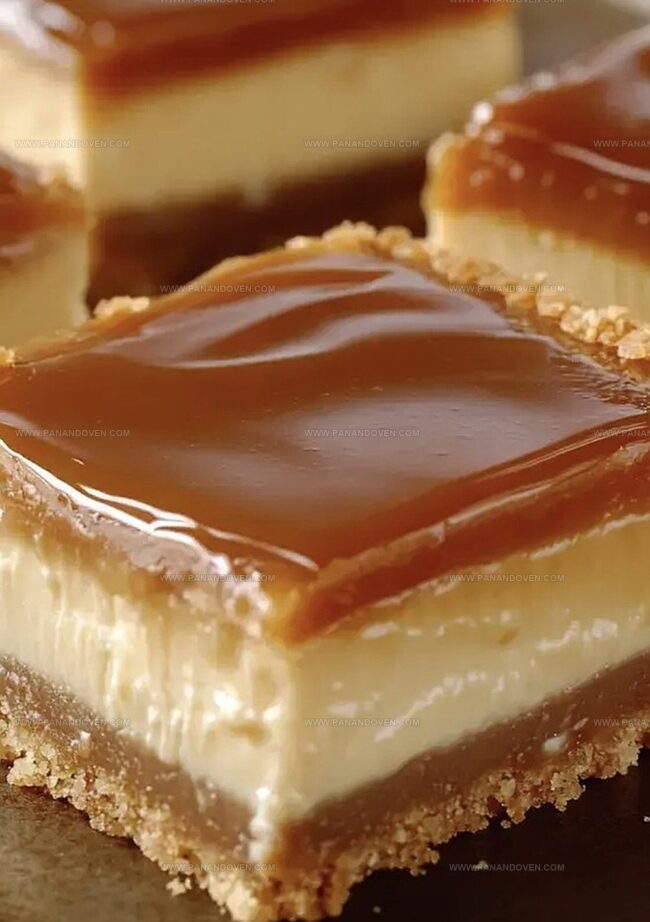
Sweet, creamy, and utterly irresistible, these caramel cheesecake squares melt hearts with every decadent bite.
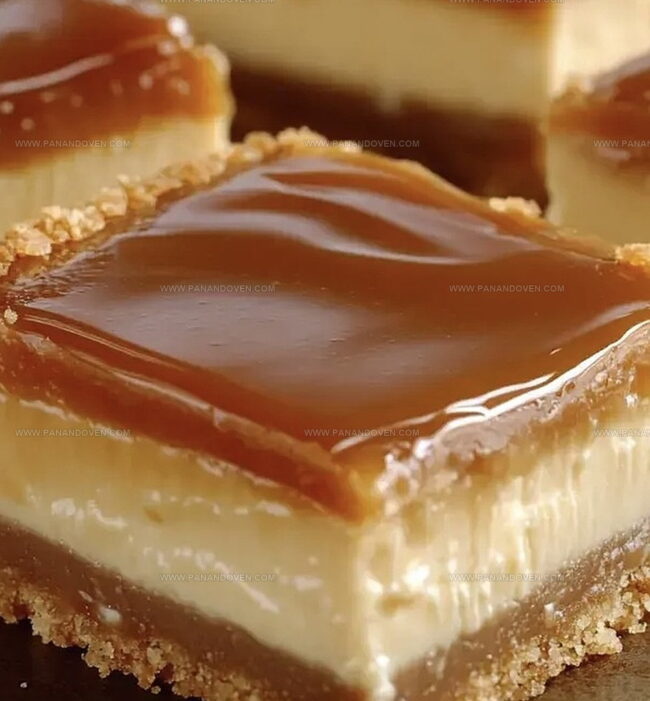
The velvety smooth texture perfectly balances rich caramel notes dancing across a buttery graham cracker crust.
Luxurious cream cheese creates a silky foundation that transforms an ordinary dessert into something extraordinary.
Each square promises a delightful harmony of sweet and tangy flavors that will have everyone asking for seconds.
No fancy culinary skills needed – just simple ingredients and a passion for delectable treats.
The magic happens when simple components come together to create pure dessert bliss.
Prepare to be the star of any gathering with these crowd-pleasing squares that disappear faster than you can slice them.
Creamy Caramel Cheesecake Squares—Sweetness in Every Bite
What’s Needed for Caramel Cheesecake Squares
Crust:Filling:Topping:Tools for Baking Creamy Cheesecake Squares
Steps to Caramel Cheesecake Square Bliss
Step 1: Warm Up the Oven
Get your oven ready by setting it to 325F.
Grab a 9×13-inch baking dish and line it with parchment paper, making sure some paper hangs over the edges so you can easily lift out your delicious creation later.
Step 2: Craft the Crunchy Base
Combine graham cracker crumbs, sugar, and melted butter in a mixing bowl.
Press this mixture firmly into the bottom of the prepared pan, creating a solid and delicious foundation for your cheesecake squares.
Step 3: Whip Up the Creamy Filling
In a separate bowl, beat cream cheese and sugar until they become smooth and dreamy.
Add eggs one at a time, mixing thoroughly after each addition.
Gently fold in sour cream and vanilla extract, creating a silky-smooth mixture that will make your taste buds dance.
Step 4: Layer the Filling
Carefully pour the cream cheese mixture over the crust, spreading it evenly to ensure every bite will be perfectly creamy.
Step 5: Create the Caramel Swirl
In a small saucepan, blend dulce de leche and heavy cream over low heat.
Stir until the mixture becomes smooth and glossy.
Drizzle this caramel goodness over the cream cheese layer, then use a knife to create beautiful swirling patterns.
Step 6: Bake to Perfection
Slide the pan into the preheated oven and bake for 35-40 minutes.
You’ll know it’s ready when the top looks set but the center still has a slight jiggle when you gently shake the pan.
Step 7: Chill and Set
Let the cheesecake cool completely at room temperature.
Then, pop it in the refrigerator and let it chill for at least 4 hours or overnight.
This helps the flavors meld and the texture become perfectly smooth.
Step 8: Slice and Serve
Once fully chilled, use the parchment paper overhang to lift the cheesecake out of the pan.
Slice into squares and get ready to enjoy a decadent treat that’ll impress everyone!
Cheesecake Square Tips for Success
Caramel Cheesecake Variations to Try
Serving Caramel Cheesecake Squares
Storing Cheesecake Squares Safely
FAQs
The key ingredients include graham cracker crumbs, cream cheese, dulce de leche, eggs, sour cream, butter, sugar, heavy cream, and vanilla extract.
This recipe is relatively easy for intermediate bakers. The steps are straightforward, and the technique of swirling caramel is simple to execute with basic kitchen skills.
The top should be set but the center will still have a slight jiggle when gently shaken. This indicates the cheesecake is perfectly cooked and will set during chilling.
Print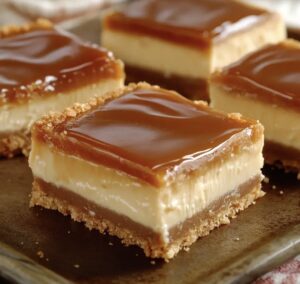
Caramel Cheesecake Squares Recipe
- Total Time: 1 hour 10 minutes
- Yield: 16 1x
Description
Irresistible caramel cheesecake squares blend creamy philadelphia cream cheese with rich dulce de leche for a luxurious dessert. Sweet layers of graham cracker crust and silky caramel create a memorable treat you won’t want to miss.
Ingredients
Main Ingredients:
- 16 oz (454 g) cream cheese, softened
- 2 large eggs
- 1 cup dulce de leche
- 1 1/2 cups graham cracker crumbs
Crust and Binding Ingredients:
- 1/2 cup (113 g) unsalted butter, melted
- 1/4 cup (50 g) granulated sugar
Flavoring and Finishing Ingredients:
- 1/2 cup (100 g) granulated sugar
- 1/2 cup (120 ml) sour cream
- 1 teaspoon vanilla extract
- 1/4 cup (60 ml) heavy cream
Instructions
- Prepare the oven by heating to 325F (163C) and line a 9×13-inch baking dish with parchment paper, ensuring overhanging edges for easy removal.
- Combine graham cracker crumbs, sugar, and melted butter in a mixing bowl. Press the mixture firmly and evenly into the prepared pan, creating a compact crust foundation.
- Whip cream cheese and sugar in a separate bowl until silky smooth. Incorporate eggs individually, blending thoroughly after each addition. Gently fold in sour cream and vanilla extract until well integrated.
- Carefully distribute the cream cheese mixture over the prepared crust, ensuring an even and level surface.
- Create the caramel topping by gently warming dulce de leche and heavy cream in a saucepan, stirring until achieving a seamless consistency. Artfully drizzle the mixture across the cream cheese layer, using a knife to create delicate swirling patterns.
- Place the pan in the preheated oven and bake for 35-40 minutes. The surface should appear set while maintaining a subtle jiggle in the center.
- Remove from oven and allow complete cooling at room temperature. Refrigerate for a minimum of 4 hours or ideally overnight to achieve optimal texture and flavor melding.
- Utilize the parchment paper overhang to lift the cheesecake from the pan. Slice into precise, uniform squares using a sharp knife.
Notes
- Ensure cream cheese is at room temperature for smooth, lump-free mixing to achieve a silky cheesecake texture.
- Avoid overmixing the batter to prevent air bubbles that can cause cracking during baking.
- Use a water bath method by placing the baking dish in a larger pan filled with hot water to create even, gentle heat and prevent surface cracking.
- For a gluten-free version, substitute graham cracker crumbs with almond flour or gluten-free cookie crumbs to accommodate dietary restrictions.
- Prep Time: 30 minutes
- Cook Time: 40 minutes
- Category: Desserts
- Method: Baking
- Cuisine: American
Nutrition
- Serving Size: 16
- Calories: 300
- Sugar: 21 g
- Sodium: 200 mg
- Fat: 20 g
- Saturated Fat: 10 g
- Unsaturated Fat: 9 g
- Trans Fat: 0 g
- Carbohydrates: 29 g
- Fiber: 1 g
- Protein: 4 g
- Cholesterol: 70 mg
Marcus Reed
Founder & Food Content Creator
Expertise
Single-recipe development, Seasonal and local ingredient utilization, Food photography and styling, Culinary writing and content creation
Education
Culinary Arts Certificate, Blue Ridge Community and Technical College, WV
Focus: Fundamentals of culinary techniques, emphasizing hands-on experience in small-scale kitchen settings.
Marcus’s story begins in Asheville, where good food and family kitchens shaped his earliest memories. After hands-on culinary training and a lot of trial (and a little error), he realized that real cooking isn’t about perfection, it’s about connection.
At Pan and Oven, Marcus crafts recipes that are easy to follow, packed with flavor, and built for real kitchens.