
Quick Butterfinger Reese’s Fudge Recipe: Sweet Candy Magic
Chocolate and peanut butter create a magical combination that sends taste buds into pure bliss.
This butterfinger Reese’s fudge recipe promises an indulgent treat that melts in your mouth with decadent layers of sweetness.
Every bite delivers a rich, creamy texture packed with crunchy candy pieces.
Sweet tooths will go wild for this simple yet irresistible dessert that comes together in minutes.
The blend of smooth chocolate and crispy butterfinger pieces creates a symphony of flavors that dance across your palate.
Candy lovers will find this fudge impossible to resist, with its perfect balance of crunch and cream.
Prepare to fall in love with a dessert that elevates snack time to a gourmet experience.
Butterfinger Reeses Fudge: A Candy Lover’s Dream
All The Sweets Needed For Butterfinger Reeses Fudge
Main Ingredients:
Chocolate Base:Candy Mix-Ins:Binding Ingredient:Preparation Ingredients:Candy Fudge Tools For Silky, Rich Squares
Making Butterfinger Reeses Fudge The Easy Way
Step 1: Prep The Baking Vessel
Line an 8×8-inch baking pan with aluminum foil or parchment paper, creating generous overhangs on the sides to help you easily lift out the fudge later.
Step 2: Create Chocolate Base
In a medium saucepan, gently melt:Stir continuously over low to medium heat until the mixture transforms into a smooth, glossy liquid.
Step 3: Transform Vanilla Frosting
Remove the metal lid from the vanilla frosting container and microwave for 30 seconds.
Stir thoroughly to ensure even heating.
Step 4: Blend Chocolate And Frosting
Pour the warm frosting into the melted chocolate-butter mixture.
Whisk consistently until the combination becomes silky and uniform.
Step 5: Allow Gentle Cooling
Let the fudge mixture rest for 5-10 minutes, stirring occasionally to prevent rapid setting and maintain a creamy texture.
Step 6: Introduce Candy Crunch
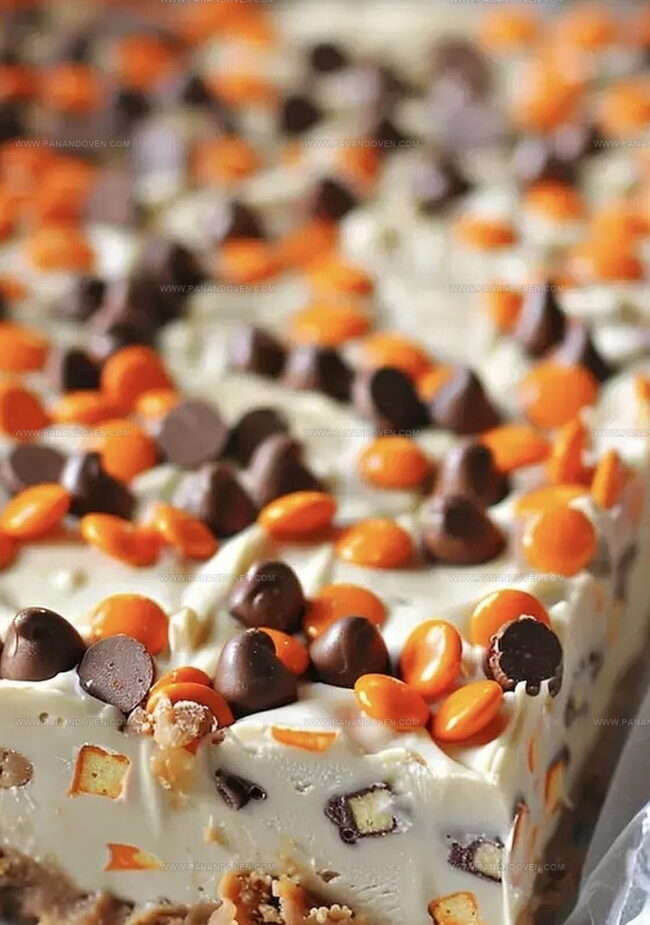
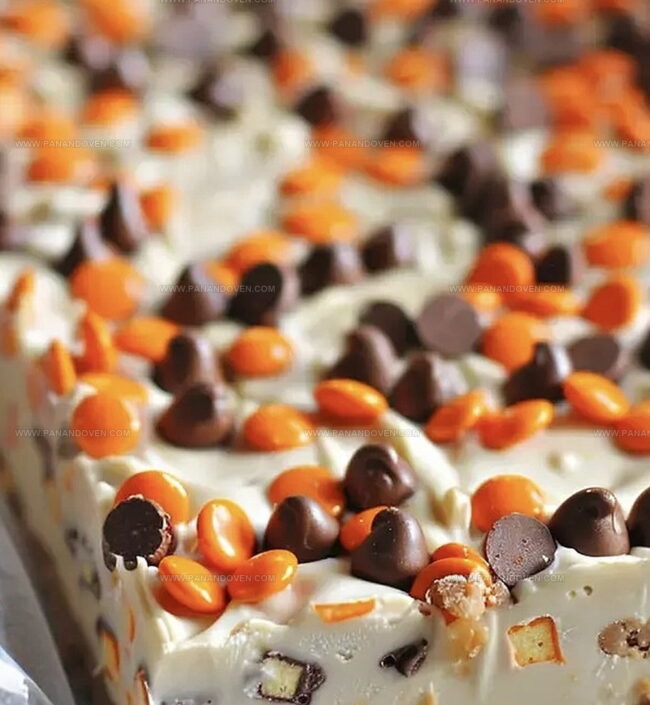
Fold in:Mix swiftly to distribute the candy throughout the fudge.
Step 7: Fill And Garnish
Transfer the mixture into the prepared pan, spreading evenly.
Sprinkle additional Butterfinger bits and Reeses Pieces across the surface, gently pressing them into the fudge.
Step 8: Set And Solidify
Allow the fudge to cool completely at room temperature or refrigerate until firm and set.
Step 9: Slice And Preserve
Using the foil overhangs, lift the fudge from the pan.
Slice into 36 delectable squares.
Store in an airtight container to maintain freshness.
Pro Tips For Perfectly Set, Decadent Fudge
Fudge Variations With Butterfinger Or Reeses Flair
Serving Fudge Bites For Dessert Or Gifting
Storing Fudge For That Just-Made Taste
FAQs
Yes, you can substitute white chocolate with milk or dark chocolate, but it will change the flavor and color of the fudge.
Stir continuously while melting and avoid overheating. Use low to medium heat and remove from heat as soon as ingredients are smooth.
Baking bits are pre-crushed and designed specifically for baking, making them easier to mix into recipes compared to whole candy bars.
Yes, you can warm the frosting in a saucepan over low heat, stirring frequently to prevent burning.
Print
Butterfinger Reese’s Fudge Recipe
- Total Time: 2 hours 15 minutes
- Yield: 16 1x
Description
Creamy Butterfinger Reese’s fudge blends chocolate, peanut butter, and crushed candy bars into a rich dessert sensation. Sweet layers create a memorable treat you’ll want to share with friends and family.
Ingredients
Main Ingredients:
- 2 cups white chocolate chips
- 1 (16 ounces / 454 grams) container vanilla frosting
Candy Mix-ins:
- 1 cup Butterfinger baking bits
- 1 cup mini Reeses Pieces
Additional Ingredients:
- 2 tablespoons butter
Instructions
- Prepare an 8×8-inch pan by lining it with foil or parchment paper, ensuring extended edges for easy extraction.
- Combine white chocolate chips and butter in a saucepan, melting over low heat while stirring constantly until smooth and uniform.
- Remove metal lid from vanilla frosting and microwave for 30 seconds, stirring to create a pourable consistency.
- Incorporate warmed frosting into the melted chocolate mixture, blending thoroughly until achieving a silky texture.
- Allow the mixture to cool for 5-7 minutes, periodically stirring to prevent premature solidification.
- Fold in Butterfinger baking bits and mini Reeses Pieces, distributing evenly throughout the fudge base.
- Transfer the mixture into the prepared pan, smoothing the surface with a spatula and gently pressing additional candy pieces on top.
- Let the fudge set completely at room temperature or refrigerate for faster solidification, approximately 1-2 hours.
- Once fully cooled, lift the fudge using foil edges and slice into 36 uniform squares for serving.
- Store the fudge in an airtight container at room temperature or refrigerate to maintain optimal texture.
Notes
- Prep Hack Ensure the foil or parchment paper covers the entire pan surface smoothly to prevent any uneven fudge texture.
- Melting Magic Use low heat and stir constantly to prevent chocolate from burning or becoming grainy, creating a silky smooth consistency.
- Flavor Boost Experiment with different candy combinations like crushed Oreos or caramel chips to customize the fudge’s taste and texture.
- Storage Tip Keep fudge in an airtight container at room temperature for up to a week, or refrigerate for extended freshness without compromising its creamy texture.
- Prep Time: 15 minutes
- Cook Time: 2 hours
- Category: Desserts, Snacks
- Method: Melting
- Cuisine: American
Nutrition
- Serving Size: 16
- Calories: 162
- Sugar: 14 g
- Sodium: 70 mg
- Fat: 7 g
- Saturated Fat: 4 g
- Unsaturated Fat: 3 g
- Trans Fat: 0 g
- Carbohydrates: 24 g
- Fiber: 0 g
- Protein: 1 g
- Cholesterol: 10 mg
Marcus Reed
Founder & Food Content Creator
Expertise
Single-recipe development, Seasonal and local ingredient utilization, Food photography and styling, Culinary writing and content creation
Education
Culinary Arts Certificate, Blue Ridge Community and Technical College, WV
Focus: Fundamentals of culinary techniques, emphasizing hands-on experience in small-scale kitchen settings.
Marcus’s story begins in Asheville, where good food and family kitchens shaped his earliest memories. After hands-on culinary training and a lot of trial (and a little error), he realized that real cooking isn’t about perfection, it’s about connection.
At Pan and Oven, Marcus crafts recipes that are easy to follow, packed with flavor, and built for real kitchens.