
Irresistible Buckeye Bars Recipe: Peanut Butter Bliss Squares
Chocolate and peanut butter create pure magic in these decadent buckeye bars that dance between sweet indulgence and nostalgic comfort.
Creamy peanut butter layers meld seamlessly with rich chocolate in a dessert guaranteed to stop conversations.
Ohio’s beloved treat brings unexpected joy to every single bite.
Smooth peanut butter blends with chocolate in ways that make taste buds sing with delight.
These no-bake bars require minimal effort but deliver maximum satisfaction.
Each square promises a moment of blissful escape from ordinary desserts.
Prepare to fall in love with a classic combination that never disappoints.
No-Bake Peanut Butter Buckeye Bars Why You’ll Crave These Bars
Ingredients for Quick Peanut Butter Buckeye Bars
Base Ingredients:Chocolate Layer:Optional Garnish:Kitchen Essentials for Making Buckeye Bars
How to Prepare No-Bake Peanut Butter Buckeye Bars
Step 1: Whip Up Creamy Peanut Butter Base
Grab a spacious mixing bowl and toss in softened butter, creamy peanut butter, powdered sugar, and vanilla extract.
Grab an electric mixer or whisk and blend everything until the mixture transforms into a silky-smooth consistency that looks like a dreamy cloud of deliciousness.
Step 2: Create The Perfect Crust
Grab a 9×13-inch pan and line it with parchment paper, letting the edges hang over for easy removal later.
Take your luscious peanut butter mixture and press it firmly into the bottom of the pan, creating an even, smooth layer that will serve as the foundation of your decadent treat.
Step 3: Melt Chocolate Magic
Find a microwave-safe bowl and combine chocolate chips with a small pat of butter.
Place the bowl in the microwave and zap in quick 30-second bursts, stirring between each interval.
Keep going until the chocolate turns into a glossy, velvety river of pure indulgence.
Step 4: Drench In Chocolate Goodness
Pour the molten chocolate over the peanut butter layer, using a spatula to spread it evenly across the surface.
Make sure every inch is covered in chocolatey magnificence.
Step 5: Let The Bars Set
Allow the bars to chill at room temperature for 30 to 60 minutes.
If you’re feeling impatient, pop the pan in the refrigerator to speed up the setting process.
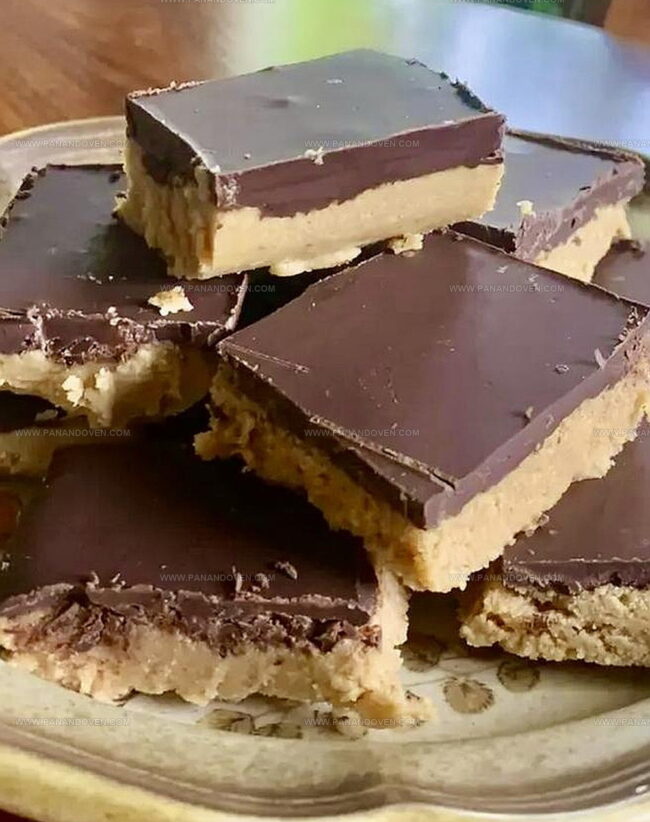
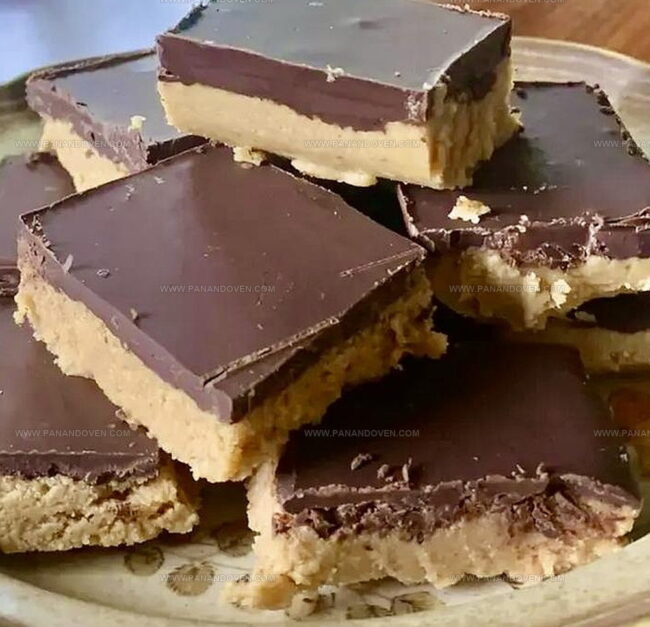
Step 6: Slice And Serve
Once the bars are completely set, lift them out of the pan using the parchment paper edges.
Slice into squares or rectangles, creating perfect bite-sized pieces of heaven.
Step 7: Chill For Maximum Flavor
For the most incredible texture and taste, refrigerate the bars for at least an hour before serving.
This helps the layers firm up and intensifies the flavor combination.
Tricks for Perfect Buckeye Bars Every Time
Peanut Butter Buckeye Bar Flavor Swaps
Ways to Plate and Enjoy Buckeye Bars
Best Methods to Store Peanut Butter Buckeye Bars
FAQs
No, these bars are super easy and require no baking. You just need to mix ingredients, layer them, and let them set. Perfect for beginner bakers or anyone wanting a quick dessert.
You only need a large mixing bowl, microwave-safe bowl, 9×13-inch pan, and parchment paper. Most home kitchens already have these basic tools.
Yes! Creamy peanut butter works best, but you can use natural or crunchy varieties. Just ensure it’s smooth enough to mix well with other ingredients.
Print
Buckeye Bars Recipe
- Total Time: 15 minutes
- Yield: 12 1x
Description
Classic buckeye bars merge peanut butter and chocolate in a delightful Ohio-inspired dessert. Chocolate and peanut butter layers create a rich, nostalgic treat you will crave after one memorable bite.
Ingredients
Chocolate Ingredients:
- 2 cups (340g / 12 ounces) chocolate chips or chunks
- 1 tablespoon (14g / 0.5 ounces) butter
Peanut Butter Base Ingredients:
- 2 cups (480g / 16 ounces) creamy peanut butter
- 3 1/2 cups (420g / 14.8 ounces) powdered sugar
- 1/2 cup (113g / 4 ounces) softened butter
Flavoring Ingredient:
- 1 1/2 teaspoons (7.5ml / 0.25 fluid ounces) vanilla extract
Instructions
- Create a silky, homogeneous mixture by thoroughly blending softened butter, creamy peanut butter, powdered sugar, and vanilla extract until perfectly smooth.
- Prepare a 9×13-inch pan by lining it with parchment paper, then firmly press the peanut butter mixture into an even, compact base layer.
- Melt chocolate chips with a small amount of butter in a microwave-safe bowl, heating in short 30-second intervals and stirring between each interval until completely liquefied and glossy.
- Gently cascade the molten chocolate over the peanut butter foundation, using a spatula to distribute the chocolate in a uniform, seamless layer.
- Allow the bars to stabilize at ambient temperature for 30-60 minutes, or expedite the setting process by placing them in the refrigerator.
- Once fully set, carefully elevate the entire dessert using the parchment paper edges, then slice into precise, rectangular segments.
- Enhance the texture and flavor by chilling the bars in the refrigerator for a minimum of one hour before serving, ensuring a delightfully firm and rich consistency.
Notes
- Smooth Mixing Technique: Use an electric mixer to ensure the peanut butter, butter, powdered sugar, and vanilla blend completely without lumps for a creamy, consistent texture.
- Chocolate Melting Hack: Stir chocolate chips gently during microwaving to prevent burning and achieve a silky smooth chocolate layer that spreads evenly.
- Chilling Shortcut: Refrigerate bars for faster setting and a firmer texture, which helps create clean, precise cuts when slicing.
- Dietary Modifications: Swap regular chocolate chips for dairy-free alternatives and use gluten-free powdered sugar to make the recipe suitable for various dietary needs.
- Prep Time: 15 minutes
- Cook Time: 0 minutes
- Category: Desserts, Snacks
- Method: None
- Cuisine: American
Nutrition
- Serving Size: 12
- Calories: 327
- Sugar: 28g
- Sodium: 55mg
- Fat: 20g
- Saturated Fat: 9g
- Unsaturated Fat: 10g
- Trans Fat: 0g
- Carbohydrates: 32g
- Fiber: 1g
- Protein: 5g
- Cholesterol: 18mg
Marcus Reed
Founder & Food Content Creator
Expertise
Single-recipe development, Seasonal and local ingredient utilization, Food photography and styling, Culinary writing and content creation
Education
Culinary Arts Certificate, Blue Ridge Community and Technical College, WV
Focus: Fundamentals of culinary techniques, emphasizing hands-on experience in small-scale kitchen settings.
Marcus’s story begins in Asheville, where good food and family kitchens shaped his earliest memories. After hands-on culinary training and a lot of trial (and a little error), he realized that real cooking isn’t about perfection, it’s about connection.
At Pan and Oven, Marcus crafts recipes that are easy to follow, packed with flavor, and built for real kitchens.