
Sweet Bubblegum Cloud Fudge Recipe: A Dreamy Homemade Treat
Sweet dreams come alive with this magical bubblegum cloud fudge that dances between childhood nostalgia and gourmet delight.
Soft pink swirls melt into creamy textures that promise pure indulgence.
Pastel-colored treats rarely look this stunning or taste this incredible.
Each bite delivers a whimsical burst of sugary memories.
The recipe combines simple ingredients with playful charm.
Candy lovers and dessert enthusiasts will adore this delightful confection that transforms ordinary moments into extraordinary celebrations.
Prepare to unleash a treat that sparks joy and delights every sweet tooth.
Bubblegum Cloud Fudge Brings the Joy
Ingredient List for Bubblegum Fudge Magic
Main Ingredients:Flavor Enhancers:Texture and Decoration:Tools for Whipping Up Cloud Fudge
Directions for Bubblegum Cloud Fudge Bliss
Step 1: Prep the Baking Vessel
Line a 9-inch square pan with parchment paper, allowing excess paper to hang over the sides for easy removal later.
This will help you lift out the fudge smoothly without any sticky situations.
Step 2: Craft the Molten Base
In a microwave-safe bowl, combine:Zap the mixture in short 40-second bursts, stirring between each interval.
Continue until the ingredients melt into a silky, glossy pool of deliciousness.
Step 3: Infuse Magical Flavors
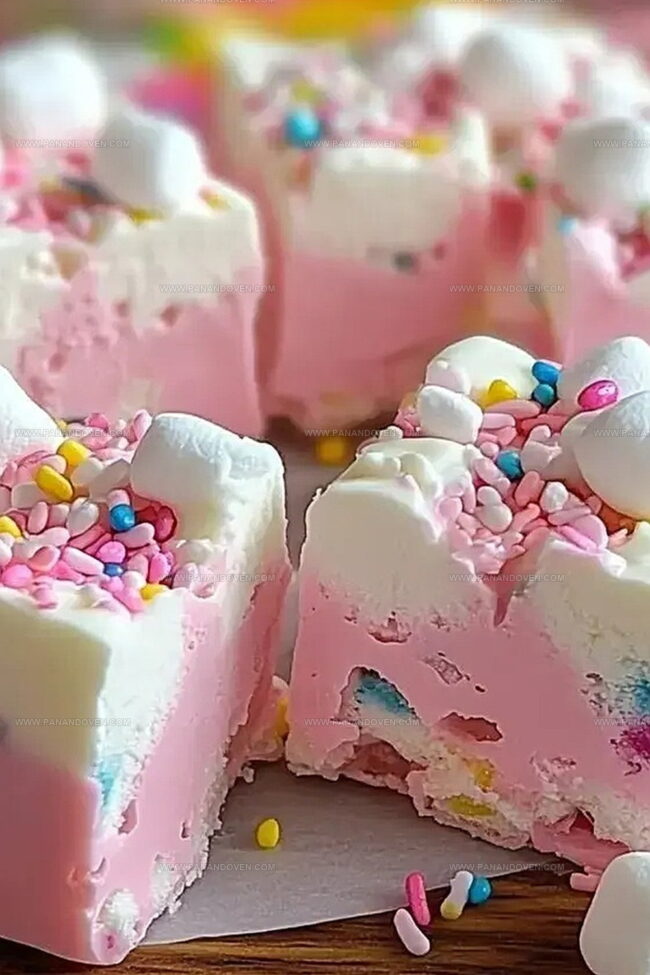
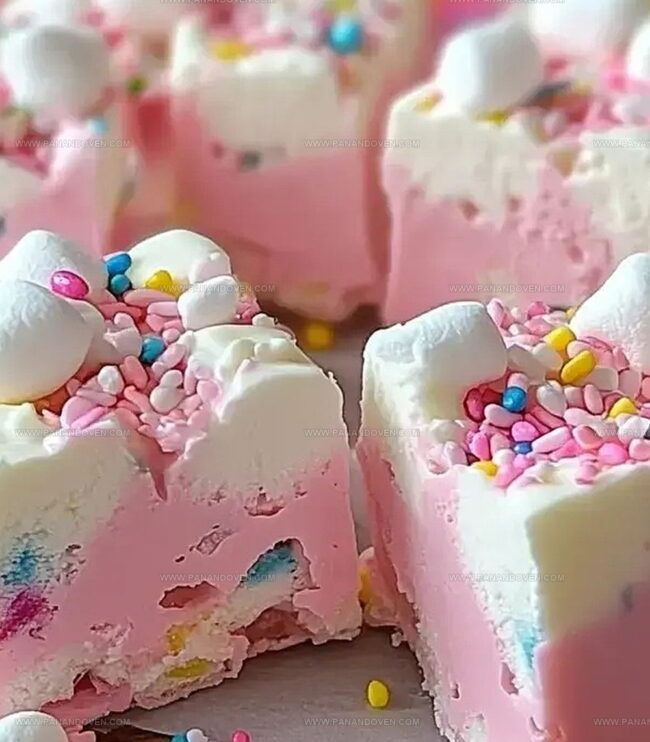
Stir in:Blend thoroughly until the mixture transforms into a uniform, dreamy pink hue that looks like cotton candy’s cooler cousin.
Step 4: Create Whimsical Layers
Pour one-third of the fudge mixture into the prepared pan.
Fold marshmallows into the remaining mixture, then gently spread this marshmallow-studded layer on top.
Sprinkle a constellation of colorful sprinkles across the surface for extra pizzazz.
Step 5: Chill and Transform
Refrigerate the fudge for 2-3 hours until it sets completely.
Once firm, lift out the parchment and slice into 16 delectable squares.
Your Bubblegum Cloud Fudge is ready to delight taste buds and spark joy!
Bubblegum Cloud Fudge Tricks for Great Texture
Playful Flavors for Bubblegum Cloud Fudge
Serving Bubblegum Cloud Fudge at Gatherings
Storing Bubblegum Cloud Fudge
FAQs
No, candy melts provide a specific texture and stability for this fudge. Substituting might change the consistency and setting process of the dessert.
The mixture should have a uniform pink color without streaks. Stir gently and thoroughly until the color is evenly distributed throughout the fudge.
You can substitute with a few drops of bubble gum extract or omit the flavor. The fudge will still be delicious, though the signature bubblegum taste will be less pronounced.
Print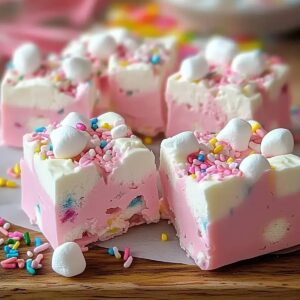
Bubblegum Cloud Fudge Recipe
- Total Time: 3 hours 15 minutes
- Yield: 16 1x
Description
Homemade bubblegum cloud fudge recipe delights sweet tooths with nostalgic candy flavor. Pastel pink squares melt smoothly, offering playful texture and whimsical taste sensation for dessert enthusiasts.
Ingredients
Main Ingredients:
- 24 ounces (680 grams) white candy melts
- 3/4 cup (180 milliliters) sweetened condensed milk
- 1/2 cup (113 grams) unsalted butter
- 1 cup (40 grams) miniature marshmallows
Flavor and Color Enhancers:
- 2 teaspoons (10 milliliters) vanilla extract
- 1 teaspoon (5 milliliters) bubblegum flavoring
- 4 drops pink food gel color
Decorative Topping:
- Pink sprinkles
Instructions
- Prepare a 9-inch square baking pan by lining it with parchment paper, ensuring excess paper hangs over the sides for easy removal.
- In a microwave-safe bowl, gently melt candy melts, milk, and butter in 40-second intervals, stirring thoroughly between each heating cycle until the mixture becomes completely smooth and glossy.
- Introduce vanilla extract and bubblegum flavoring to the melted base, then incorporate pink food coloring, stirring until the color is evenly distributed throughout the mixture.
- Pour approximately one-third of the fudge mixture into the prepared pan, creating an initial base layer. Fold marshmallows into the remaining mixture, then carefully spread this marshmallow-infused layer over the first layer.
- Generously sprinkle colorful confetti sprinkles across the surface of the fudge, ensuring even distribution for visual appeal and added texture.
- Refrigerate the pan for 2-3 hours, allowing the fudge to set completely and firm up. Once chilled, lift the fudge out using the parchment paper overhang and slice into 16 uniform squares.
Notes
- Customize Sweetness: Adjust the bubblegum flavor intensity by gradually adding the extract, tasting as you go to find your perfect balance.
- Marshmallow Magic: Gently fold marshmallows to prevent them from breaking, maintaining their fluffy texture throughout the fudge.
- Color Control: Use gel food coloring for a more vibrant pink hue without thinning the fudge mixture.
- Storage Savvy: Store in an airtight container in the refrigerator for up to a week, separating layers with parchment paper to prevent sticking.
- Prep Time: 15 minutes
- Cook Time: 3 hours
- Category: Desserts, Snacks
- Method: Blending
- Cuisine: American
Nutrition
- Serving Size: 16
- Calories: 220
- Sugar: 20g
- Sodium: 60mg
- Fat: 10g
- Saturated Fat: 6g
- Unsaturated Fat: 4g
- Trans Fat: 0g
- Carbohydrates: 30g
- Fiber: 0g
- Protein: 1g
- Cholesterol: 15mg
Clara Thompson
Recipe Developer & Food Educator
Expertise
Plant-based and vegetarian recipe development, Nutritional analysis and meal planning, Culinary education and workshop facilitation, Content writing with a focus on healthy living
Education
Diploma in Culinary Arts, Mt. San Jacinto College, CA
Focus: Comprehensive culinary training with an emphasis on sustainable cooking practices.
Certificate in Nutrition and Healthy Living, Cornell University (Online Program)
Focus: Understanding the principles of nutrition to create balanced and health-conscious recipes.
Clara lives where fresh ideas and fresh ingredients meet. She pairs her culinary know-how with her passion for healthy, planet-friendly cooking.
For Clara, good food should taste great, nourish your body, and feel easy to make. Her recipes highlight whole foods, colorful produce, and a deep respect for seasonal eating.