Easy Biscoff Lotus Cheesecake Recipe: A Dreamy Dessert Delight
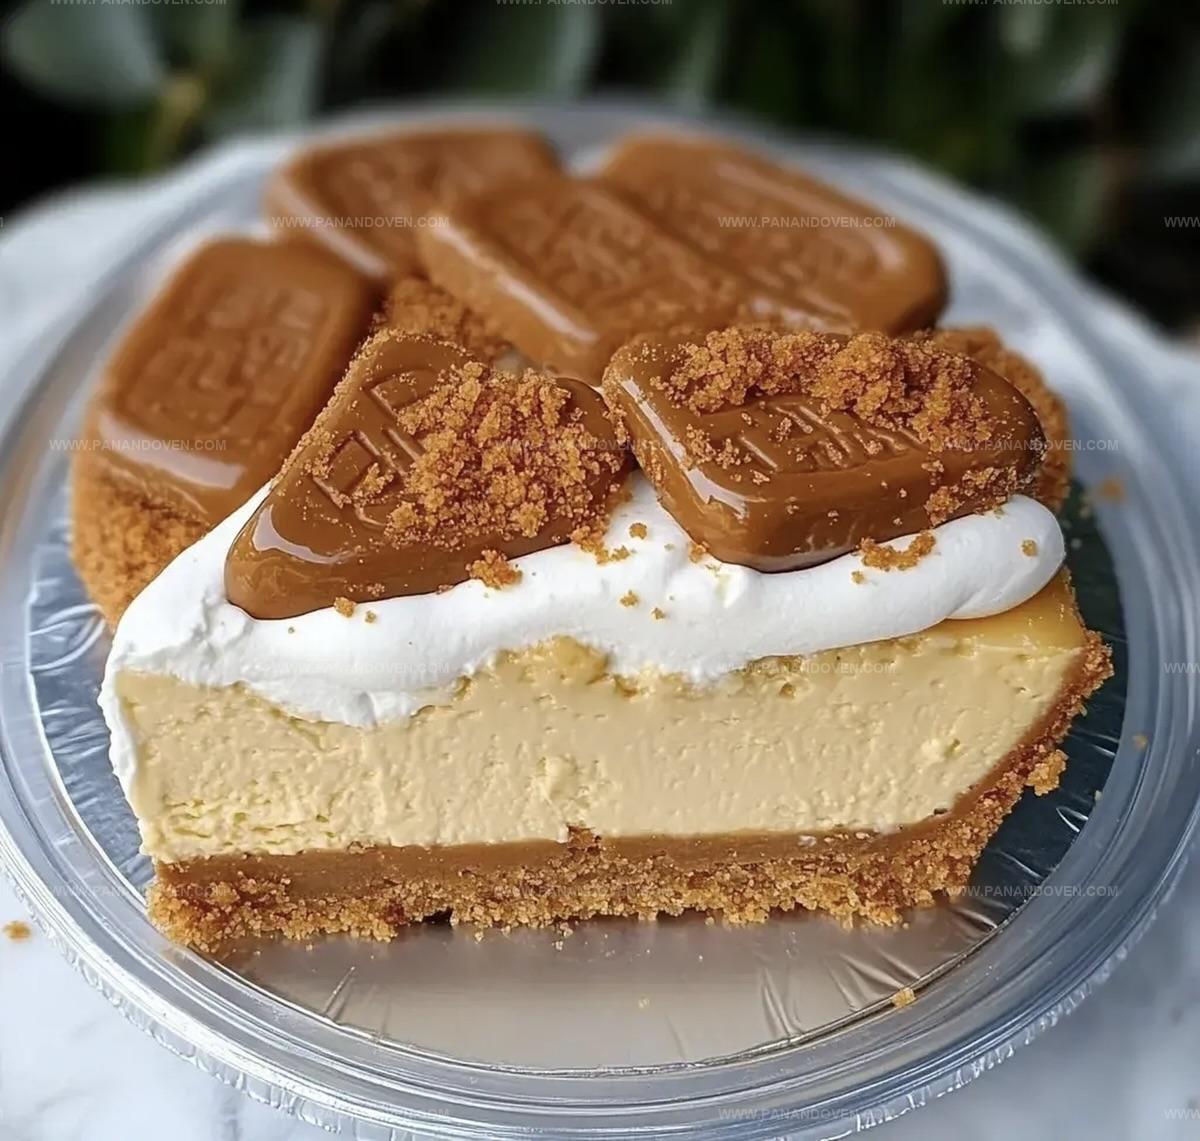
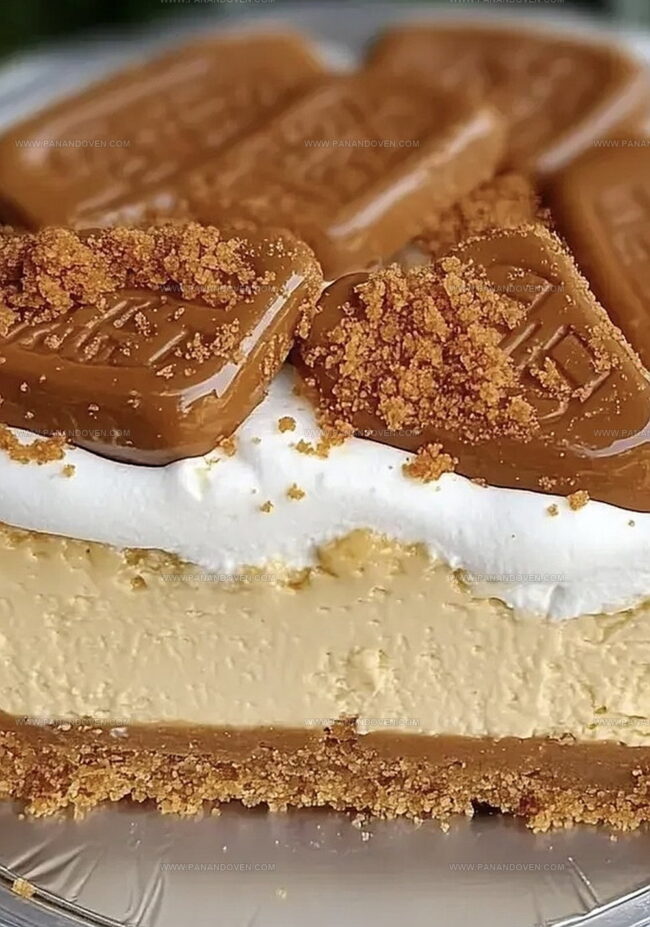
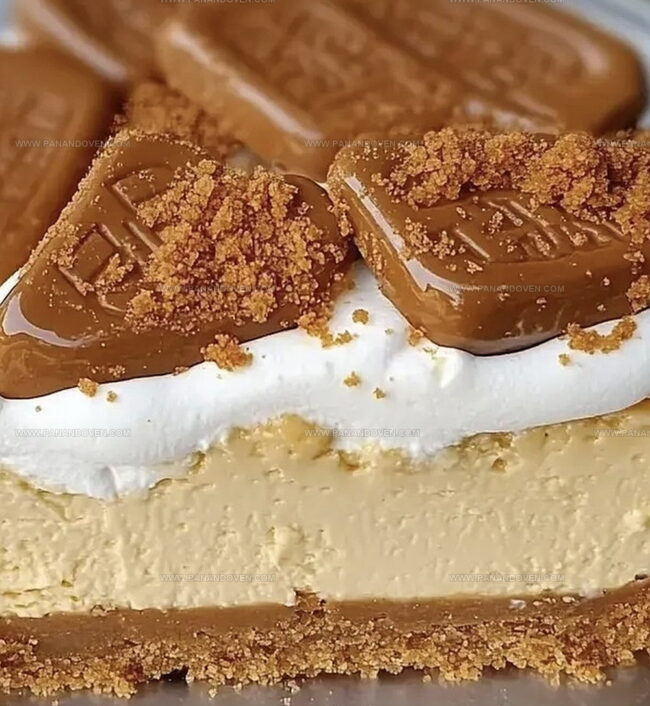
Decadent desserts often spark joy, and this creamy Lotus Biscoff cheesecake hits all the right notes of indulgence.
Smooth cream cheese blends perfectly with crushed Biscoff cookies, creating a heavenly texture that melts in your mouth.
The rich, caramelized flavor of Biscoff brings a unique twist to the classic cheesecake recipe.
Crumbly cookie base provides a delightful crunch that complements the silky filling.
Each slice promises a symphony of sweet, buttery goodness that will leave you wanting more.
No baking skills are required to create this show-stopping dessert that’s sure to impress.
Prepare to fall in love with every single bite of this irresistible treat.
Biscoff Lotus Cheesecake Why It’s a Crowd-Pleaser
Biscoff Cheesecake Ingredients for a Dreamy Treat
Crust Ingredients:Cheesecake Filling Ingredients:Garnish Ingredients:Cheesecake Tools for Baking Success
Steps to Bake Biscoff Lotus Cheesecake
Step 1: Prepare The Oven And Pan
Warm up your oven to 325F (163C).
Get a 9-inch springform pan ready by greasing it or lining with parchment paper for easy removal.
Step 2: Create The Crunchy Cookie Base
Grab a mixing bowl and combine:Press this mixture firmly into the pan’s bottom, creating an even layer.
Bake for 8-10 minutes until lightly golden, then set aside to cool down.
Step 3: Whip The Cream Cheese Mixture
In a large bowl, beat cream cheese until silky smooth.
Gradually add sugar and continue mixing until well blended.
Pour in sour cream and heavy cream, stirring until the mixture becomes luxuriously creamy.
Step 4: Incorporate Eggs And Flavors
Add eggs one at a time, mixing thoroughly after each addition.
Blend in Biscoff cookie spread and vanilla extract until fully combined and velvety.
Step 5: Create Delightful Swirls
Optional decorative step: Drop spoonfuls of warmed Biscoff spread across the cheesecake surface.
Use a knife to create beautiful marble-like swirls throughout the filling.
Step 6: Bake The Cheesecake
Pour the creamy filling over the cooled cookie crust.
Smooth the top with a spatula.
Bake for 55-65 minutes until the center is set but still slightly wobbly.
Step 7: Cool And Rest
Turn off the oven and crack the door open.
Let the cheesecake rest inside for one hour.
Remove and allow it to cool completely at room temperature.
Refrigerate for at least 4 hours or overnight for best results.
Step 8: Final Touches And Serving
Once chilled, decorate with:Slice and savor every delicious bite of your homemade Biscoff Lotus Cheesecake!
Tips for Smooth and Spiced Cheesecake Layers
Cheesecake Flavor Variations to Explore
Serving Biscoff Cheesecake in Style
Storing Biscoff Cheesecake
FAQs
Biscoff cookies are caramelized Belgian cookies with a distinctive cinnamon and brown sugar flavor, originally created by Lotus Bakeries. They’re popular as a crisp, sweet cookie often served with coffee.
No, Biscoff cookies are key to this recipe’s unique flavor profile. Substituting them will change the authentic taste and texture of the cheesecake.
Avoid overmixing the batter, bake at the correct temperature, and let the cheesecake cool gradually in the oven with the door cracked to prevent sudden temperature changes that cause cracking.
Print
Biscoff Lotus Cheesecake Recipe
- Total Time: 1 hour 25 minutes
- Yield: 12 1x
Description
Lotus Biscoff Cheesecake blends creamy indulgence with caramelized cookie crunch. Delicate layers of biscoff spread and smooth cream cheese create a rich dessert that transports taste buds to sweet bliss. You will savor each heavenly bite.
Ingredients
Crust Ingredients:
- 1 1/2 cups crushed Biscoff cookies (about 12 cookies)
- 1/4 cup granulated sugar
- 1/2 cup (113 grams) unsalted butter, melted
Cheesecake Filling Ingredients:
- 24 ounces (680 grams) cream cheese, softened
- 1 cup granulated sugar
- 3 large eggs
- 1 cup sour cream
- 1/2 cup (120 milliliters) heavy cream
- 1 cup Biscoff cookie spread (Lotus spread)
- 1 teaspoon vanilla extract
Topping Ingredients:
- 1/2 cup (120 grams) Biscoff cookie spread, warmed slightly
- Whipped cream
- Crushed Biscoff cookies
Instructions
- Prepare the oven by heating to 325F (163C) and ready a 9-inch springform pan with parchment paper or light greasing.
- Create a crumbly foundation by combining crushed Biscoff cookies with granulated sugar and melted butter. Press the mixture firmly and evenly across the pan’s bottom, creating a compact base. Bake for 8-10 minutes, then allow to cool completely.
- In a spacious mixing bowl, transform cream cheese into a silky smooth texture using an electric mixer. Gradually incorporate granulated sugar until thoroughly blended. Introduce sour cream and heavy cream, whisking until achieving a luxurious, creamy consistency.
- Integrate eggs individually, gently mixing after each addition to maintain a uniform texture. Fold in Biscoff cookie spread and vanilla extract, ensuring complete incorporation throughout the mixture.
- For an artistic touch, drizzle warm Biscoff cookie spread across the cheesecake surface. Use a knife to create elegant swirling patterns, generating a marbled visual effect.
- Carefully transfer the filling onto the cooled crust, smoothing the surface with a spatula. Position in the preheated oven and bake for 55-65 minutes until the center appears set but retains a gentle wobble.
- Once baking completes, switch off the oven and leave the door slightly ajar. Allow the cheesecake to gradually cool inside for one hour. Remove and let it reach room temperature before transferring to the refrigerator for a minimum of 4 hours or overnight.
- After chilling, embellish with dollops of whipped cream, scattered crushed Biscoff cookies, and optional drizzles of additional Biscoff spread. Slice and serve this decadent dessert.
Notes
- Crush Biscoff cookies thoroughly to create a uniform, compact crust that holds together perfectly without crumbling.
- Soften cream cheese at room temperature for at least 30 minutes to ensure smooth, lump-free mixing and a creamy texture.
- Use a water bath technique to prevent cracks and ensure even baking by placing the springform pan in a larger pan filled with hot water.
- Gluten-free alternative can be achieved by using gluten-free cookie crumbs for the base, making the cheesecake accessible to those with gluten sensitivities.
- Prep Time: 20 minutes
- Cook Time: 1 hour 5 minutes
- Category: Desserts
- Method: Baking
- Cuisine: American
Nutrition
- Serving Size: 12
- Calories: 500
- Sugar: 34 g
- Sodium: 300 mg
- Fat: 36 g
- Saturated Fat: 22 g
- Unsaturated Fat: 12 g
- Trans Fat: 0 g
- Carbohydrates: 42 g
- Fiber: 1 g
- Protein: 7 g
- Cholesterol: 110 mg
Marcus Reed
Founder & Food Content Creator
Expertise
Single-recipe development, Seasonal and local ingredient utilization, Food photography and styling, Culinary writing and content creation
Education
Culinary Arts Certificate, Blue Ridge Community and Technical College, WV
Focus: Fundamentals of culinary techniques, emphasizing hands-on experience in small-scale kitchen settings.
Marcus’s story begins in Asheville, where good food and family kitchens shaped his earliest memories. After hands-on culinary training and a lot of trial (and a little error), he realized that real cooking isn’t about perfection, it’s about connection.
At Pan and Oven, Marcus crafts recipes that are easy to follow, packed with flavor, and built for real kitchens.