The Best Pumpkin Scones Recipe: Cozy Fall Comfort in Every Bite
Autumn’s crisp breeze whispers promises of warm, delectable pumpkin scones that melt in your mouth.
These better pumpkin scones elevate your breakfast from ordinary to extraordinary with their rich, spiced flavor.
Each bite delivers a perfect balance of soft texture and seasonal warmth.
Bakery-style scones rarely compare to this homemade version bursting with pumpkin goodness.
The secret lies in using fresh ingredients and a precise mixing technique that ensures tender, flaky results.
Fragrant spices like cinnamon and nutmeg dance through the dough, creating an irresistible aroma.
Bakers of all skill levels can master these scones and impress everyone at the breakfast table.
Prepare to savor a slice of autumn magic that will have everyone asking for seconds.
Better Pumpkin Scones Why They’re a Morning Favorite
What You Need for Pumpkin Scone Perfection
Base Ingredients:Leavening and Binding Agents:Flavor Enhancers:Moisture and Richness Ingredients:Finishing Ingredients:Glaze Ingredients:Scone Baking Gear for Fluffy Pumpkin Treats
How to Prepare Pumpkin Scones Like a Pro
Step 1: Warm Up the Oven
Crank your oven to a toasty 375F.
Grab a baking sheet and line it with parchment paper for easy cleanup.
Step 2: Create Dry Magic
In a roomy mixing bowl, combine:Whisk these dry ingredients until they’re perfectly blended.
Step 3: Work the Butter
Take super-cold butter and cut it into the flour mixture.
Use a pastry cutter or your fingertips to break the butter into tiny, flaky pieces.
You want the texture to look like coarse breadcrumbs.
Step 4: Bring in the Moisture
In a separate bowl, whisk together:Pour this wet mixture into the dry ingredients and gently fold until just combined.
Step 5: Prepare the Dough
Dust your countertop with flour.
Transfer the dough and knead it gently 5-6 times.
Add a sprinkle of flour if it feels too sticky.
Step 6: Shape Your Scones
Pat the dough into a circular disk about 1-inch thick.
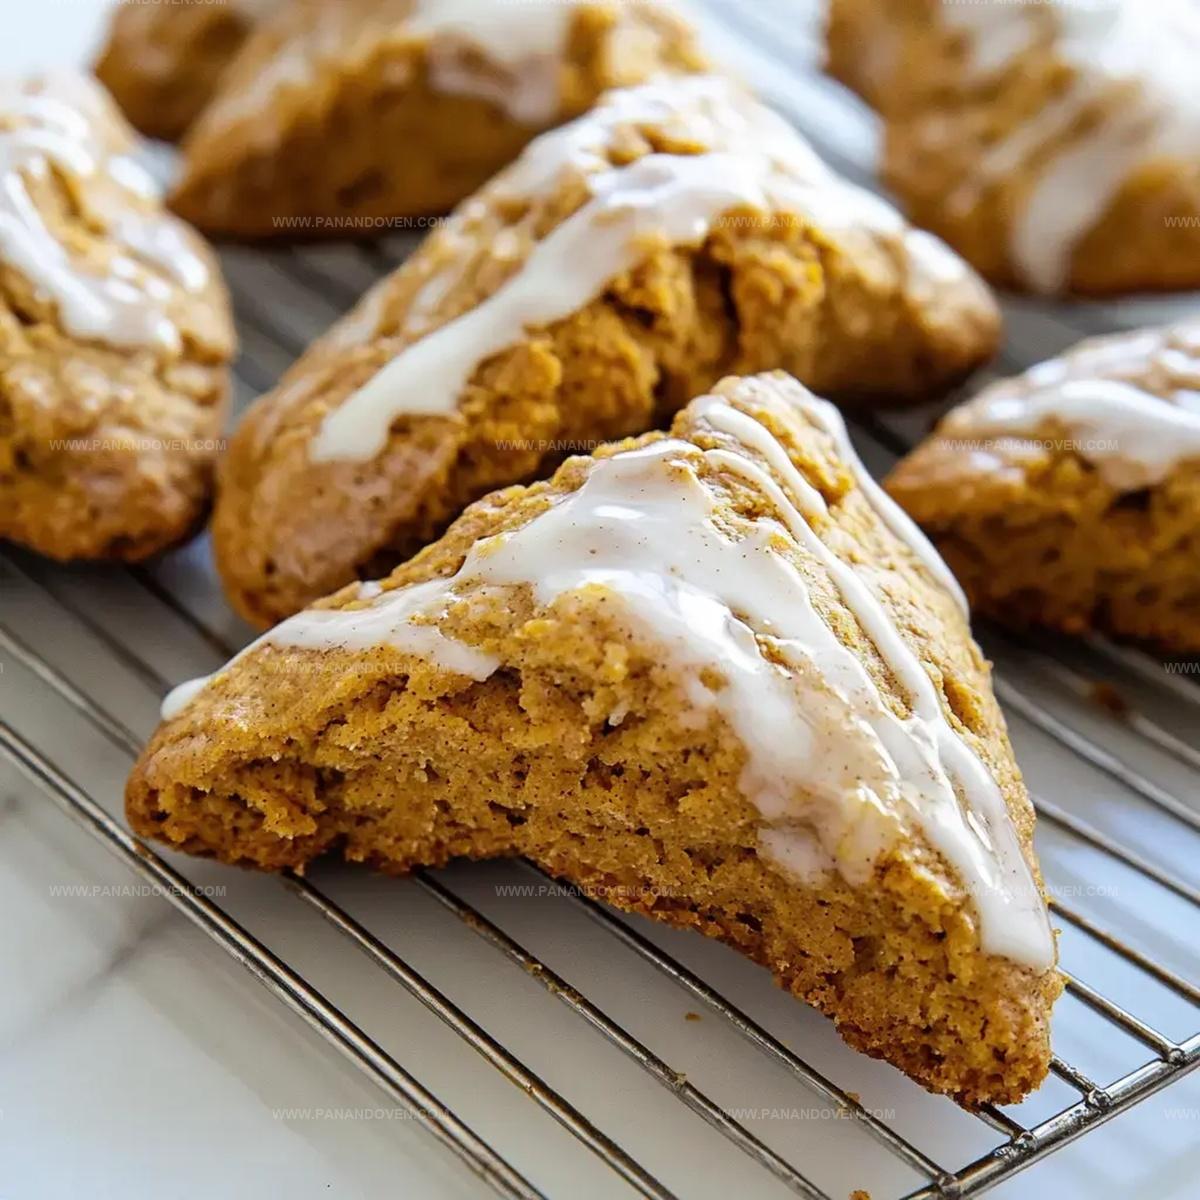
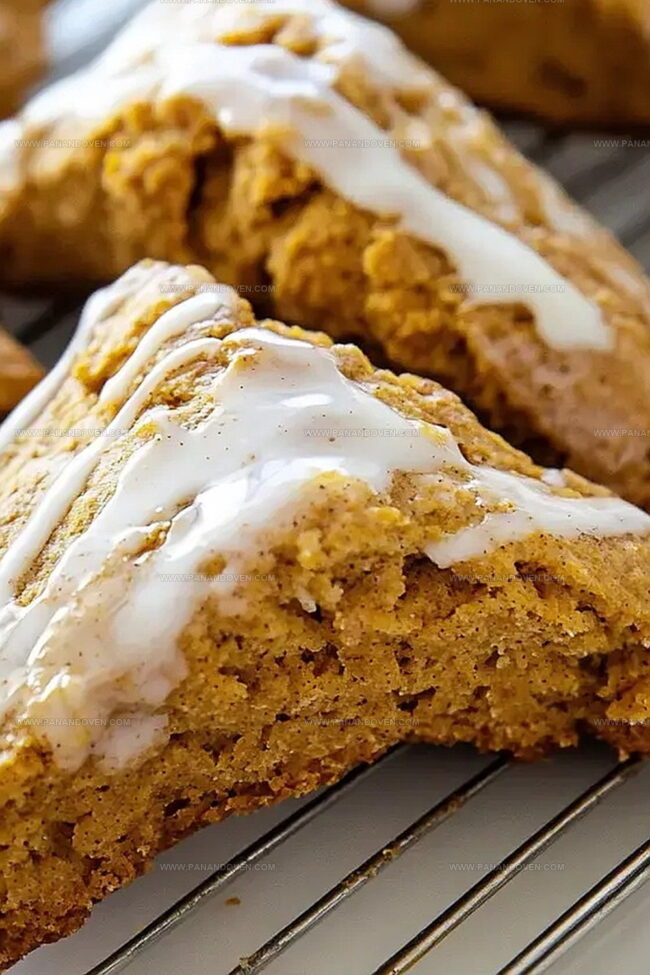
Using a sharp knife, slice the disk into 8 equal triangular wedges.
Step 7: Bake to Golden Perfection
Brush the top of each scone with a little milk.
Slide the baking sheet into the preheated oven and bake for 20-25 minutes.
Look for a beautiful golden-brown color.
Step 8: Add the Sweet Finish
Let the scones cool completely.
Whip up a simple glaze by mixing powdered sugar, milk, and a touch of vanilla.
Drizzle the glaze generously over the cooled scones.
Tips for Soft, Spiced Pumpkin Scones

Flavor Ideas for Pumpkin Scone Fans
Serving Pumpkin Scones with Toppings
Storage Tips for Pumpkin Scones
FAQs
These scones use a combination of fall spices like cinnamon and nutmeg, and incorporate real pumpkin puree for a rich, authentic flavor that elevates the classic scone recipe.
Yes, you can substitute the egg with 1/4 cup of additional pumpkin puree or use a commercial egg replacer to keep the scones moist and binding.
Look for golden brown edges and a firm center. When lightly pressed, the scones should spring back and not feel doughy or wet in the middle.
Print
Better Pumpkin Scones Recipe
- Total Time: 45 minutes
- Yield: 12 1x
Description
Starbucks-inspired better pumpkin scones bring autumn’s warmth to your kitchen with a perfect balance of spice and sweetness. Homemade scones offer a delightful treat you’ll savor with each delectable bite.
Ingredients
Dry Ingredients:
- 3 cups (360 grams) all-purpose flour
- 1 tablespoon (15 grams) baking powder
- 1/4 cup (50 grams) granulated sugar
- 1/4 cup (50 grams) dark brown sugar
- 1 1/2 teaspoons (3 grams) pumpkin pie spice
- 1/2 teaspoon (1 gram) ground cinnamon
- 1 teaspoon (6 grams) salt
Wet Ingredients:
- 3/4 cup (170 grams) cold unsalted butter, diced
- 1 large egg
- 1/2 teaspoon pure vanilla extract
- 3 ounces (90 milliliters) whole milk
- 3 ounces (90 milliliters) heavy cream
- 1/2 cup (120 grams) pumpkin puree
Glaze Ingredients:
- 1/4 cup (30 grams) confectioners’ sugar
- 4–5 teaspoons pure maple syrup
- 1/8 teaspoon vanilla extract
Instructions
- Preheat the oven to 375F and arrange a parchment-lined baking sheet, ensuring an even surface for optimal baking.
- In a spacious mixing bowl, thoroughly combine flour, baking powder, granulated and brown sugars, aromatic pumpkin pie spice, and a pinch of salt, creating a uniform dry foundation.
- Integrate cold, cubed butter into the flour mixture using a pastry cutter or fingertips, working until the texture resembles coarse, flattened crumbs with minimal butter chunks.
- Whisk together the egg, pure vanilla extract, whole milk, heavy cream, and smooth pumpkin puree in a separate vessel until completely homogeneous.
- Pour the liquid ingredients into the dry mixture, gently folding with a spatula until just incorporated, avoiding overmixing to maintain tender scones.
- Transfer the delicate dough onto a lightly floured surface, kneading gently 4-5 times to bring the mixture together without developing excessive gluten.
- Shape the dough into a compact 1-inch thick circular disk, then slice decisively into 8 elegant triangular portions using a sharp knife.
- Delicately brush the scone surfaces with additional milk to promote a golden, glossy finish.
- Bake in the preheated oven for 20-25 minutes, rotating halfway through, until edges turn a rich golden-brown and a toothpick emerges clean.
- Allow scones to cool completely on a wire rack, then elegantly drizzle with a complementary spiced glaze for a finishing touch of sweetness.
Notes
- Butter Temperature Matters: Keep butter extremely cold and work quickly to ensure flaky, tender scones with perfect layered texture.
- Flour Folding Technique: Gently fold dough 5-6 times to create delicate layers without overworking, which prevents tough scones.
- Customize Dietary Needs: Swap regular flour with gluten-free blend for celiac-friendly version, or use alternative milk for dairy-free adaptation.
- Spice Flexibility: Experiment with pumpkin pie spice blend or adjust individual spices like cinnamon, nutmeg, and ginger to personalize flavor profile.
- Prep Time: 20 minutes
- Cook Time: 25 minutes
- Category: Breakfast, Snacks, Desserts
- Method: Baking
- Cuisine: American
Nutrition
- Serving Size: 12
- Calories: 290
- Sugar: 10 g
- Sodium: 200 mg
- Fat: 16 g
- Saturated Fat: 10 g
- Unsaturated Fat: 5 g
- Trans Fat: 0 g
- Carbohydrates: 34 g
- Fiber: 1 g
- Protein: 3 g
- Cholesterol: 40 mg
Marcus Reed
Founder & Food Content Creator
Expertise
Single-recipe development, Seasonal and local ingredient utilization, Food photography and styling, Culinary writing and content creation
Education
Culinary Arts Certificate, Blue Ridge Community and Technical College, WV
Focus: Fundamentals of culinary techniques, emphasizing hands-on experience in small-scale kitchen settings.
Marcus’s story begins in Asheville, where good food and family kitchens shaped his earliest memories. After hands-on culinary training and a lot of trial (and a little error), he realized that real cooking isn’t about perfection, it’s about connection.
At Pan and Oven, Marcus crafts recipes that are easy to follow, packed with flavor, and built for real kitchens.