Irresistible Banana Split Milkshakes Recipe for Sweet Sippers
Cool summer days call for a creamy banana split milkshakes recipe that brings pure joy to your taste buds.
Sweet nostalgia swirls through every chilled sip of this classic dessert drink.
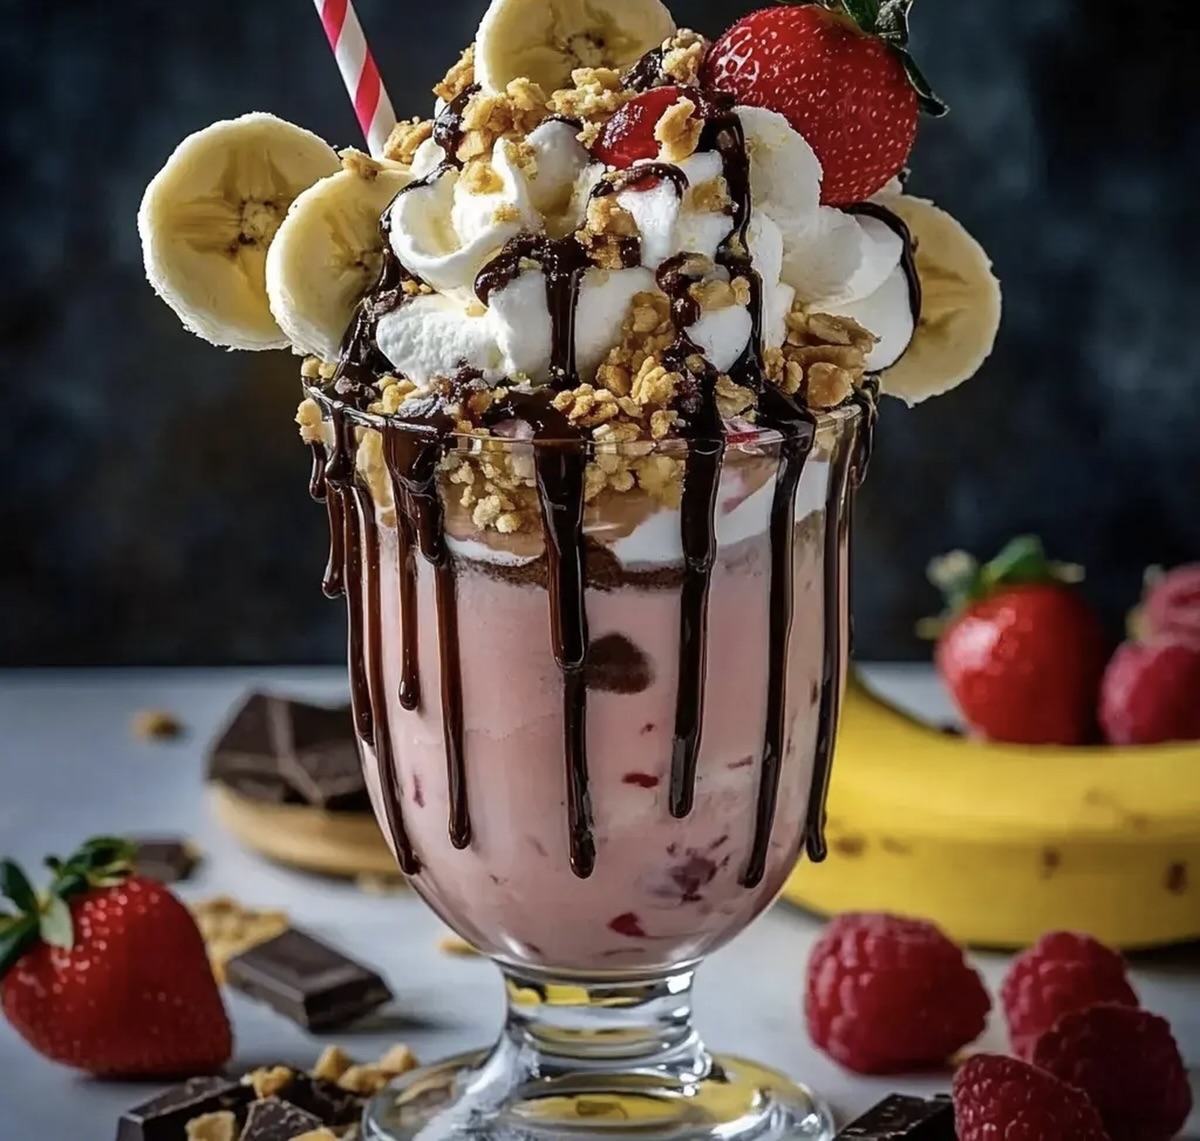
Blending ripe bananas with rich vanilla ice cream creates a dreamy base for this indulgent treat.
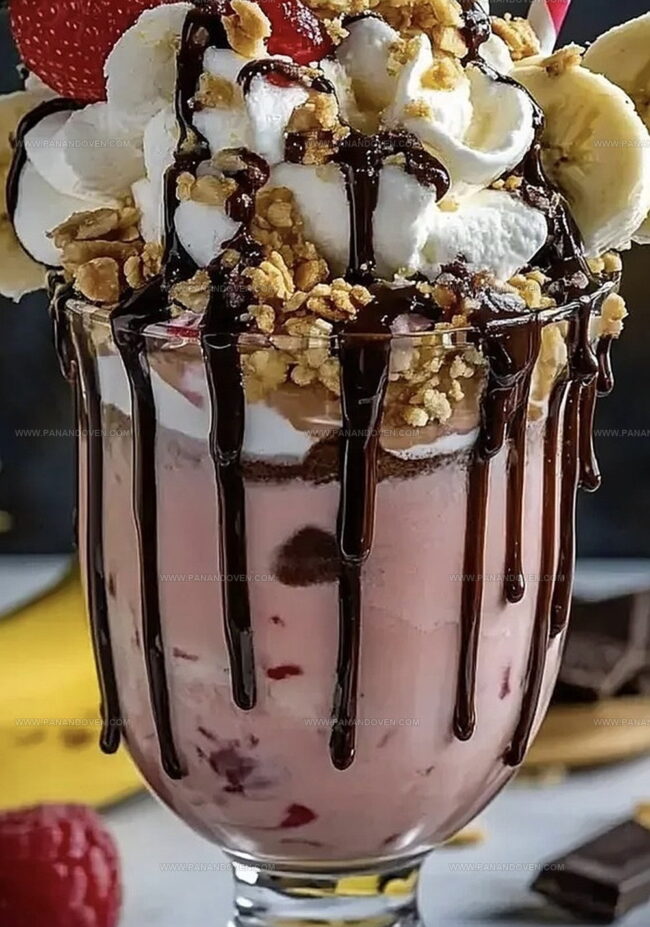
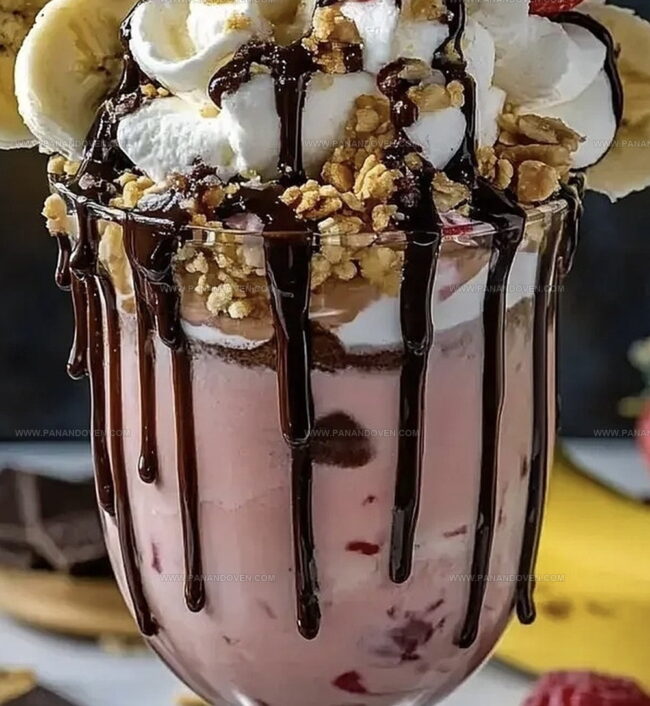
Chocolate syrup, whipped cream, and colorful sprinkles add playful layers of decadence.
Fresh strawberries and a maraschino cherry crown this milkshake with traditional banana split flair.
Each glass promises a delightful journey through childhood memories and sweet satisfaction.
Grab a straw and let this milkshake transport you to a world of delicious bliss.
Banana Split Milkshakes—Reasons to Make This Fun Classic
What Goes in Ultimate Banana Split Milkshakes
Ice Cream Base:Fresh Toppings and Garnishes:Decorative and Crunchy Elements:Blender and Tools for Thick Milkshakes
Steps to the Perfect Banana Split Milkshake
Step 1: Prepare Creamy Milkshake Base
In a powerful blender, combine ripe bananas, rich vanilla ice cream, luscious strawberry ice cream, decadent chocolate ice cream, and cold milk.
Blend everything until the mixture becomes velvety smooth and perfectly creamy, creating a dreamy foundation for your ultimate milkshake.
Step 2: Create Chocolate Glass Decoration
Take tall serving glasses and artfully drizzle chocolate syrup along the interior walls.
Allow the syrup to create elegant, cascading streaks that will make your milkshake look absolutely stunning and irresistible.
Step 3: Pour Silky Milkshake
Carefully transfer the blended milkshake mixture into the chocolate-drizzled glasses, filling them almost to the top with the luxurious, multi-flavor concoction.
Step 4: Crown With Fluffy Topping
Generously pile on thick, billowy whipped cream, creating a cloud-like peak that rises above the rim of each glass.
Step 5: Add Fruity Finishing Touch
Gently stream strawberry syrup over the whipped cream, allowing it to create beautiful, appetizing swirls.
Step 6: Garnish With Spectacular Toppings
Artfully arrange an exciting mix of toppings on each milkshake.
Milkshake Tips for Extra Creaminess
Flavor Twists on Banana Split Milkshakes
Serving Milkshakes for Dessert Fun
Milkshake Storage for Leftover Treats
FAQs
Yes, these milkshakes are kid-friendly and offer a fun, colorful dessert that children will love. The mix of fruit, ice cream, and toppings makes it an exciting treat.
You’ll need a blender to achieve the smooth, creamy consistency. If you don’t have one, use an immersion blender or mix ingredients vigorously by hand, though the texture won’t be as perfect.
Use low-fat or non-dairy ice cream, add more fresh fruits, and reduce syrup amounts. You can also substitute some ice cream with Greek yogurt for extra protein.
Print
Banana Split Milkshakes Recipe
- Total Time: 11 minutes
- Yield: 4 1x
Description
Creamy banana split milkshakes blend classic ice cream parlor flavors into a refreshing summer treat. Chocolate, strawberry, and vanilla notes combine with fresh bananas, whipped cream, and sprinkles for a nostalgic dessert you’ll savor.
Ingredients
Dairy and Ice Cream:
- 4 scoops vanilla ice cream
- 2 scoops strawberry ice cream
- 2 scoops chocolate ice cream
- 2 cups (480 milliliters) milk
Fruits:
- 2 ripe bananas, sliced
- Fresh strawberries
- Fresh raspberries
- Banana slices for topping
Sauces and Toppings:
- 1/4 cup (60 milliliters) chocolate syrup
- 1/4 cup (60 milliliters) strawberry syrup
- Whipped cream
- Chopped nuts (optional)
- Maraschino cherries (optional)
- Granola (optional)
- Chocolate wafers (optional)
Instructions
- In a high-powered blender, combine ripe bananas, vanilla, strawberry, and chocolate ice creams with cold milk, blending until ultra-smooth and creamy at medium-high speed for approximately 45-60 seconds.
- Select tall serving glasses and artfully coat interior sides with rich chocolate syrup, allowing elegant drips to form decorative patterns.
- Carefully transfer the velvety milkshake mixture into prepared glasses, ensuring even distribution and minimal splashing.
- Crown each milkshake with a voluminous cloud of freshly whipped cream, creating a luxurious peaked texture.
- Elegantly cascade strawberry syrup over the whipped cream, creating attractive crimson ribbons across the white surface.
- Meticulously arrange an eclectic garnish featuring vibrant fresh strawberries, ruby-red raspberries, delicate banana slices, crunchy chopped nuts, golden granola clusters, crisp chocolate wafers, and a classic maraschino cherry perched atop the creamy masterpiece.
Notes
- Use ripe, spotty bananas for maximum sweetness and deeper flavor profile in the milkshake.
- Chill glasses beforehand to keep milkshake cold and prevent rapid melting of whipped cream and ice cream.
- For dairy-free version, substitute regular milk and ice cream with almond, coconut, or oat milk alternatives.
- Experiment with homemade syrups or sugar-free options to customize sweetness and reduce calories.
- Prep Time: 10 minutes
- Cook Time: 1 minute
- Category: Breakfast, Desserts, Milkshake
- Method: Blending
- Cuisine: American
Nutrition
- Serving Size: 4
- Calories: 550
- Sugar: 60 g
- Sodium: 150 mg
- Fat: 22 g
- Saturated Fat: 14 g
- Unsaturated Fat: 8 g
- Trans Fat: 0 g
- Carbohydrates: 80 g
- Fiber: 2 g
- Protein: 10 g
- Cholesterol: 70 mg
Marcus Reed
Founder & Food Content Creator
Expertise
Single-recipe development, Seasonal and local ingredient utilization, Food photography and styling, Culinary writing and content creation
Education
Culinary Arts Certificate, Blue Ridge Community and Technical College, WV
Focus: Fundamentals of culinary techniques, emphasizing hands-on experience in small-scale kitchen settings.
Marcus’s story begins in Asheville, where good food and family kitchens shaped his earliest memories. After hands-on culinary training and a lot of trial (and a little error), he realized that real cooking isn’t about perfection, it’s about connection.
At Pan and Oven, Marcus crafts recipes that are easy to follow, packed with flavor, and built for real kitchens.