The Perfect Apple Crisp Cheesecake Recipe for Sweet Bliss
Dessert enthusiasts crave a delectable apple crisp cheesecake that blends creamy richness with classic autumn flavors.
Smooth cream cheese meets warm spiced apples in this irresistible treat.
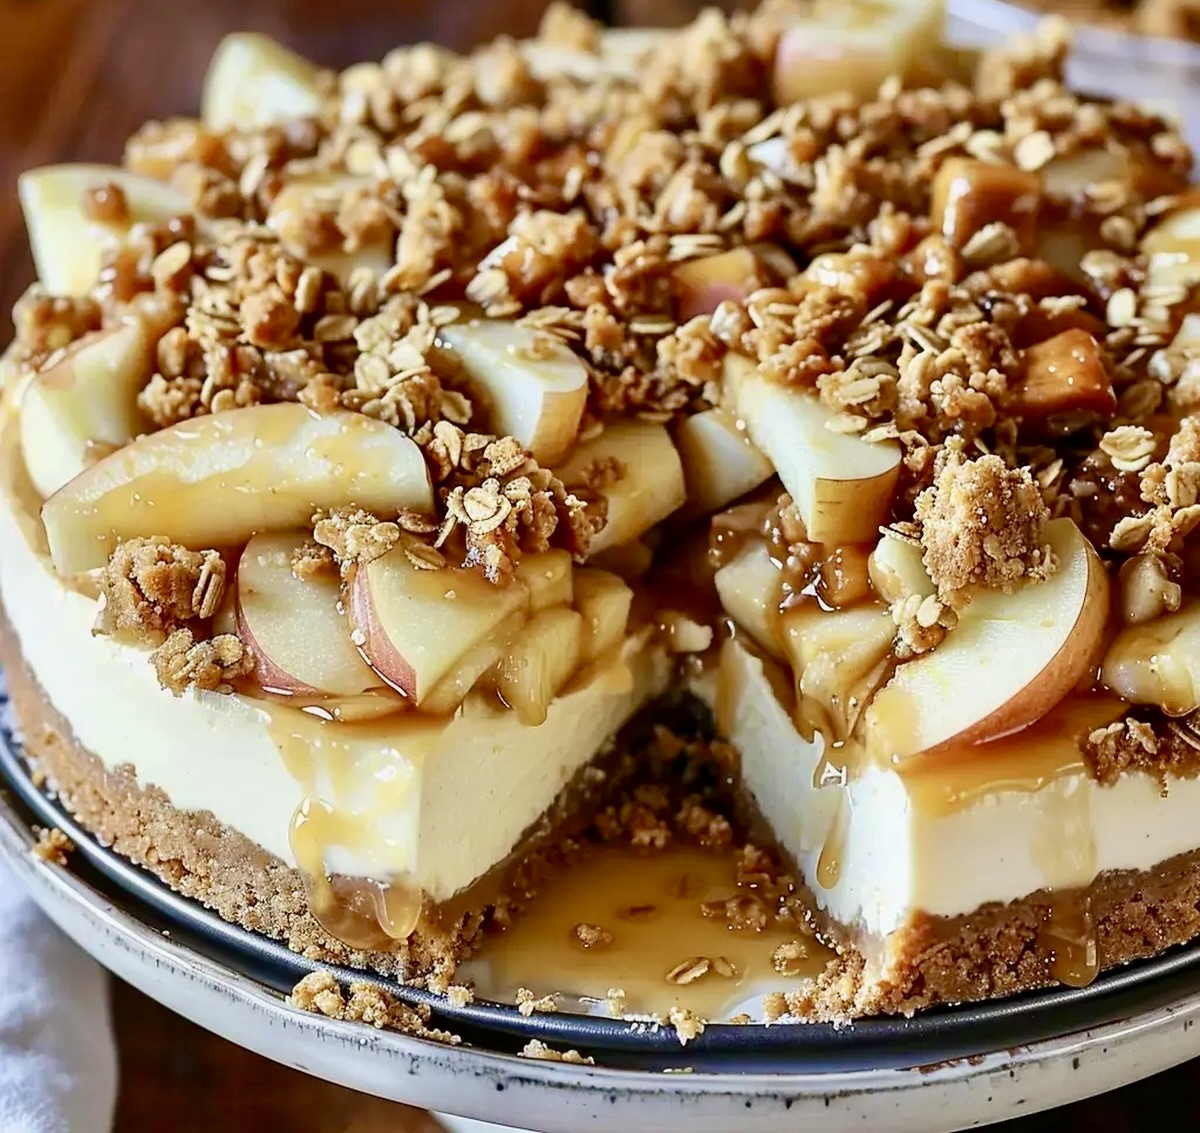
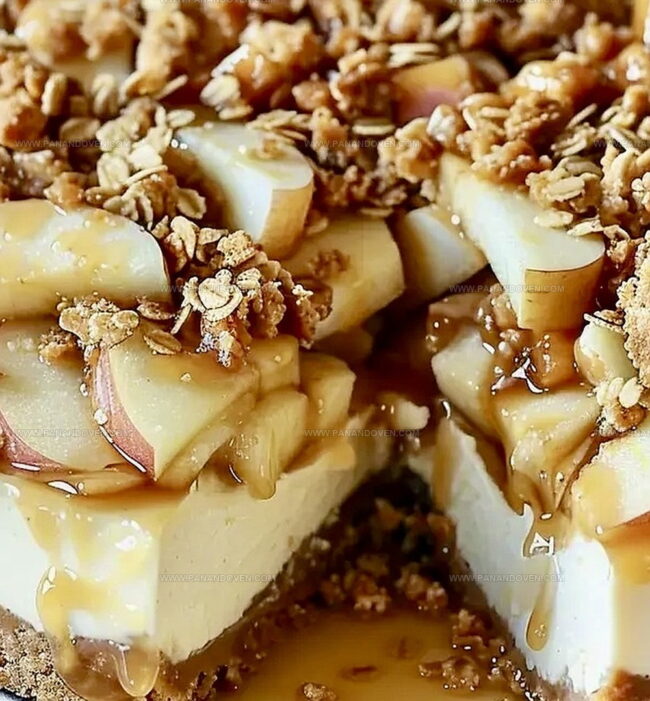
Layers of sweet, tangy goodness create a mouthwatering experience that beckons from the first glance.
Crumbly streusel topping adds a delightful crunch to the silky cheesecake base.
Every bite promises a perfect balance of textures and seasonal comfort.
Bakers of all skill levels can master this impressive dessert that will surely become a family favorite.
Prepare to wow your guests with this ultimate fall-inspired indulgence that transforms an ordinary dessert into an extraordinary culinary adventure.
Apple Crisp Cheesecake: Fall Dessert Fusion

Essentials For Apple Cheesecake Bliss
Crust:Cheesecake Filling:Apple Filling and Crisp Topping:Tools For Baking Creamy Cheesecake
Steps To The Perfect Apple Crisp Cheesecake
Step 1: Create The Crust
Warm up your oven to 350F.
Grab a mixing bowl and combine graham cracker crumbs, melted butter, and sugar.
Press this delicious mixture firmly into the bottom of a springform pan, creating a solid foundation for your cheesecake.
Use the back of a spoon or your fingers to pack it down evenly.
Step 2: Prepare The Apple Mixture
Heat a skillet over medium flame.
Melt butter and toss in:Stir and cook the apples until they become slightly tender and caramelized, which takes about 5-7 minutes.
Remove from heat and let the mixture cool completely.
Step 3: Whip Up The Cheesecake Filling
In a large mixing bowl, blend cream cheese, sugar, and vanilla extract until silky smooth.
Add eggs one at a time, mixing gently after each addition.
Pour half of this creamy filling over the prepared crust.
Spoon half of the cooled apple mixture on top.
Repeat the layering process for a beautiful marbled effect.
Step 4: Craft The Crispy Topping
In a separate bowl, mix together:Cut in cold butter until the mixture looks like rough, crumbly breadcrumbs.
Generously sprinkle this crunchy topping across the entire surface of the cheesecake.
Step 5: Bake And Chill
Slide the cheesecake into the preheated oven.
Bake for 50-60 minutes until the center is set but still slightly wobbly.
Remove and let it cool completely on a wire rack.
Refrigerate for at least 4 hours to allow the cheesecake to set and develop its full flavor profile.
Slice and serve chilled.
Tips For Crisp, Creamy Cheesecake Every Time
Dessert Swaps: Apple Crisp Styles
Serving Cheesecake Slices With Apples
Storing Cheesecake The Fresh Way
FAQs
Choose firm, tart apples like Granny Smith or Honeycrisp. These varieties hold their shape during cooking and provide a nice balance to the sweet cheesecake.
Yes, this cheesecake is perfect for making in advance. You can prepare it up to 2 days before serving and keep it refrigerated. The flavors actually improve as they sit.
Avoid overmixing the eggs and bake the cheesecake in a water bath. Also, let it cool gradually in the oven with the door slightly open to prevent sudden temperature changes that cause cracking.
Print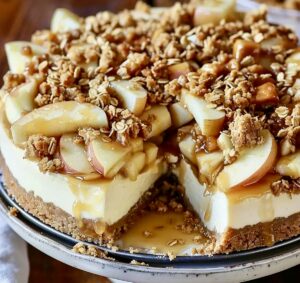
Apple Crisp Cheesecake Recipe
- Total Time: 1 hour 40 minutes
- Yield: 12 1x
Description
Creamy cheesecake meets classic apple crisp in this irresistible dessert fusion. Warm spices and buttery crumble complement the rich, tangy filling, creating a memorable sweet experience you’ll want to savor again and again.
Ingredients
Crust:
- 1.5 cups graham cracker crumbs
- 5 tablespoons (74 milliliters) unsalted butter, melted
- 0.25 cup (50 grams) granulated sugar
Apple Filling:
- 3 large apples, peeled, cored, and thinly sliced
- 2 tablespoons (30 milliliters) unsalted butter
- 0.5 cup (100 grams) brown sugar
- 1 teaspoon ground cinnamon
- 0.25 teaspoon ground nutmeg
Cheesecake and Topping:
- 3 packages (24 ounces/680 grams) cream cheese, softened
- 1 cup (200 grams) granulated sugar
- 1 teaspoon vanilla extract
- 3 large eggs
- 0.75 cup (90 grams) all-purpose flour
- 0.5 cup old fashioned oats
- 0.5 cup (100 grams) brown sugar
- 0.5 teaspoon ground cinnamon
- 0.25 cup (57 grams) unsalted butter, cold and cubed
Instructions
- Craft the graham cracker foundation by mixing crumbs with melted butter and sugar. Press firmly into a 9-inch springform pan, creating an even base. Refrigerate while preparing subsequent layers.
- Transform apples into a luscious filling by sautéing with butter, brown sugar, cinnamon, and nutmeg over medium heat. Cook approximately 5-7 minutes until apples soften slightly but retain textural integrity. Remove from heat and allow to cool completely.
- Whip cream cheese with sugar and vanilla until silky smooth. Incorporate eggs individually, mixing gently to maintain a luxurious texture. Carefully distribute half the cheesecake mixture over the crust.
- Artfully layer half the caramelized apple mixture atop the initial cheesecake layer. Repeat with remaining cheesecake and apple fillings, creating a marbled visual effect.
- Construct a rustic crisp topping by combining flour, oats, brown sugar, and cinnamon. Integrate cold butter until the mixture resembles coarse, crumbly terrain. Generously scatter the topping across the cheesecake’s surface.
- Position the assembled cheesecake in a preheated 350°F (175°C) oven. Bake for 50-60 minutes, watching for a center that sets but retains a subtle jiggle. Cool completely at room temperature, then refrigerate for minimum 4 hours to achieve optimal texture and flavor melding.
Notes
- Customize the graham cracker crust by using alternative cookies like gingersnaps or shortbread for a unique flavor profile.
- Prevent apple filling from becoming watery by using firmer apple varieties like Granny Smith or Honeycrisp, which hold their shape during cooking.
- Cool cheesecake slowly to prevent cracking by leaving it in the oven with the door slightly open after baking, allowing gradual temperature reduction.
- Make the dessert gluten-free by substituting graham cracker crumbs with almond flour or gluten-free cookie crumbs, ensuring everyone can enjoy this decadent treat.
- Prep Time: 40 minutes
- Cook Time: 1 hour
- Category: Desserts, Snacks
- Method: Baking
- Cuisine: American
Nutrition
- Serving Size: 12
- Calories: 403
- Sugar: 32 g
- Sodium: 250 mg
- Fat: 22 g
- Saturated Fat: 13 g
- Unsaturated Fat: 8 g
- Trans Fat: 0 g
- Carbohydrates: 44 g
- Fiber: 2 g
- Protein: 6 g
- Cholesterol: 82 mg
Marcus Reed
Founder & Food Content Creator
Expertise
Single-recipe development, Seasonal and local ingredient utilization, Food photography and styling, Culinary writing and content creation
Education
Culinary Arts Certificate, Blue Ridge Community and Technical College, WV
Focus: Fundamentals of culinary techniques, emphasizing hands-on experience in small-scale kitchen settings.
Marcus’s story begins in Asheville, where good food and family kitchens shaped his earliest memories. After hands-on culinary training and a lot of trial (and a little error), he realized that real cooking isn’t about perfection, it’s about connection.
At Pan and Oven, Marcus crafts recipes that are easy to follow, packed with flavor, and built for real kitchens.