The Ultimate Air-Fried Bologna Sandwich Recipe for Crispy Delight
The classic bologna sandwich takes an unexpected crispy twist with this air-fried bologna sandwich recipe that delivers maximum flavor and minimal effort.
Crunchy, golden-brown edges transform an everyday lunch staple into something extraordinary.
Southern home cooks have long cherished this simple yet satisfying meal that brings comfort in every bite.
The air fryer works its magic, turning plain bologna into a delightfully crisp centerpiece between soft bread slices.
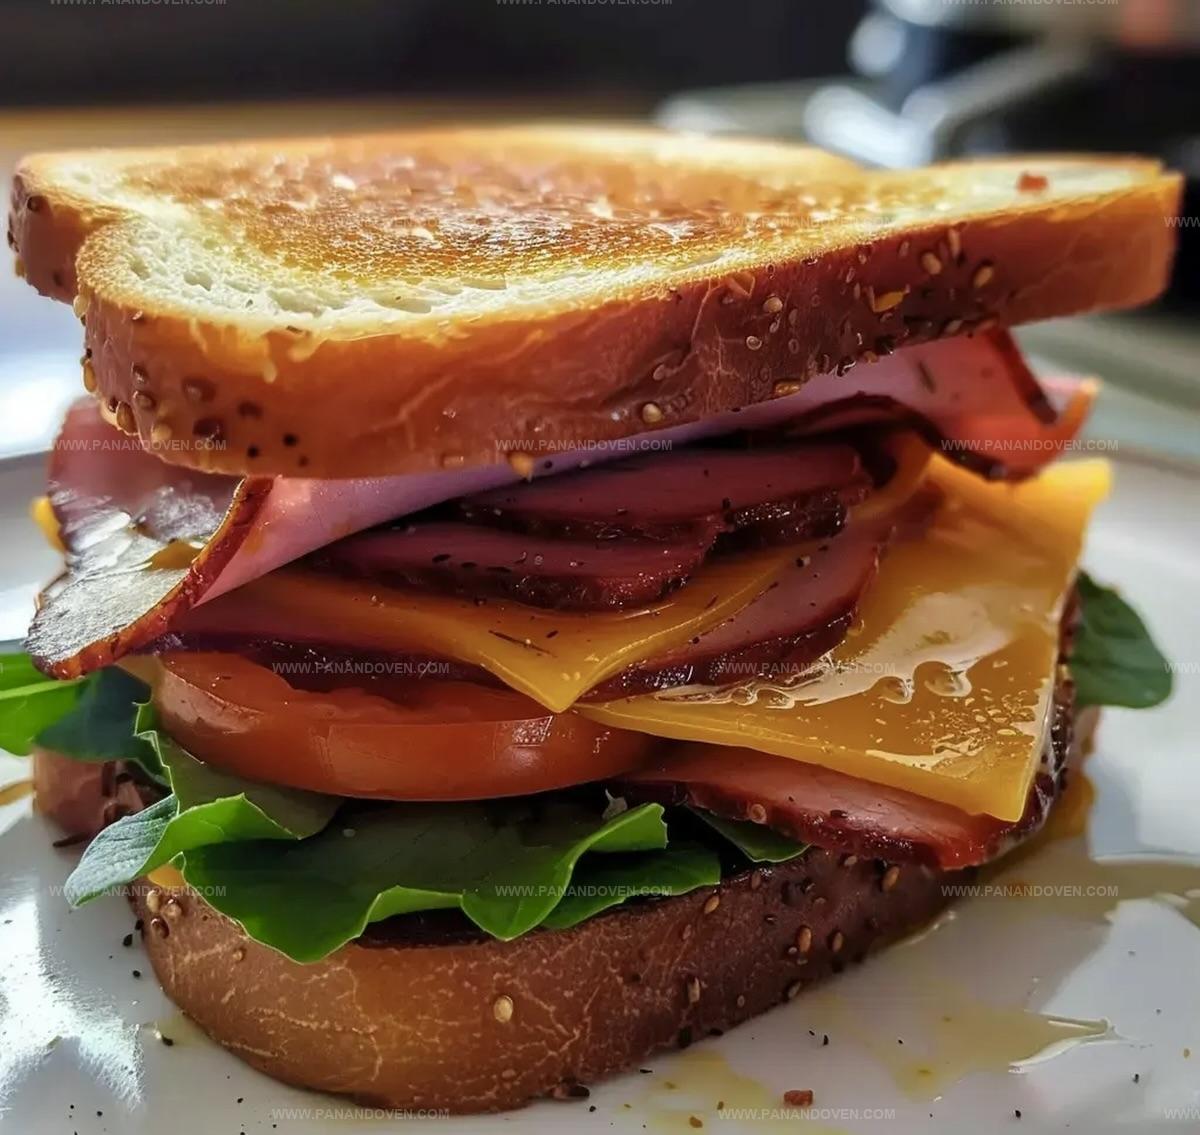
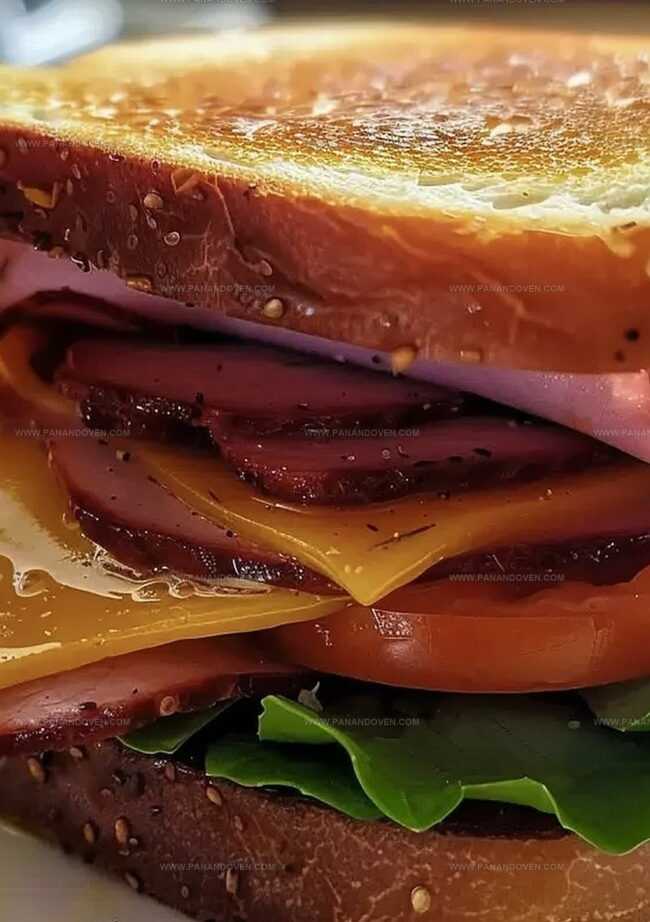
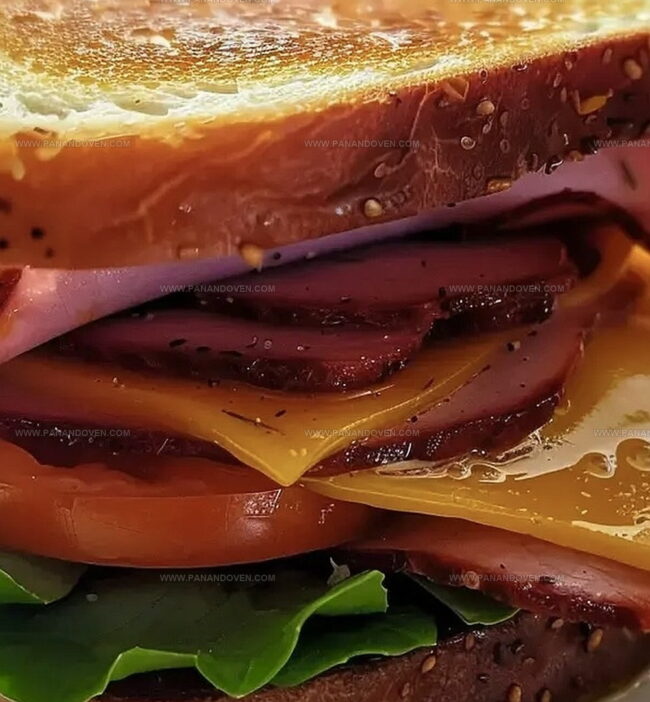
Melted cheese adds a luxurious layer of richness that complements the meat’s savory profile.
You’ll love how quickly this sandwich comes together with just a few pantry ingredients.
Each bite promises a nostalgic journey back to childhood lunch memories.
Prepare to elevate your sandwich game with this irresistible crispy creation.
Air-Fried Bologna Sandwich: Why It’s a Throwback Favorite
Ingredients for an Epic Air-Fried Bologna Sandwich
Main Ingredients:Condiments and Spreads:Fresh Ingredients:Optional Serving:Essential Tools for Sandwich Perfection
Steps to Make the Ultimate Air-Fried Bologna Sandwich
Step 1: Fire Up The Air Fryer
Crank your air fryer to a sizzling 400°F and let it warm up for a few minutes.
This will ensure your sandwich gets that perfect crispy edge.
Step 2: Transform The Bread
Slide each bread slice into the air fryer basket and toast for about 1 minute until golden and crunchy.
Transfer each slice to a waiting plate.
Step 3: Prep The Bologna
Gently remove the casing from the bologna.
Use a sharp knife to create 4 strategic cuts across the meat to prevent unwanted curling during cooking.
Place the bologna in the air fryer basket and let it crisp for 3 minutes.
Flip the meat and cook another 3 minutes until edges are slightly charred.
Step 4: Build Your Flavor Tower
Start with one toasted bread slice and spread a generous layer of creamy mayonnaise.
Layer your ingredients with delicious precision:Spread mustard on the second toasted bread slice and crown your sandwich.
Step 5: Plate And Enjoy
Slice diagonally and serve with your favorite potato chips for an extra crunch.
Dive into your perfectly air-fried bologna sandwich!
Tips for Crispy, Flavorful Air-Fried Bologna
Creative Variations on the Classic Bologna Sandwich
Sides to Pair with Air-Fried Bologna Sandwiches
Best Storage for Air-Fried Bologna Sandwiches
FAQs
The slits cut into the bologna before air frying help prevent curling and allow the meat to crisp evenly, creating a deliciously crunchy texture that traditional pan-frying can’t achieve.
Yes, you can use various bologna styles like beef, pork, or even vegetarian bologna. Just ensure you adjust cooking time slightly based on the thickness of the meat.
Removing the casing helps the bologna cook more evenly and prevents it from sticking or becoming tough during the air frying process. It also allows the edges to crisp up nicely.
Print
Air-fried Bologna Sandwich Recipe
- Total Time: 12 minutes
- Yield: 1 1x
Description
Crispy air-fried bologna sandwich provides a nostalgic twist on classic comfort food. Midwestern deli memories come alive with golden-brown edges and melted cheese, promising a quick and satisfying meal you’ll savor.
Ingredients
Main Ingredients:
- 1 slice bologna, beef
- 1 slice Cheddar cheese
- 2 slices white sandwich bread
Vegetables and Condiments:
- 1 slice tomato
- 1 leaf lettuce
- 1 teaspoon (5 ml) mayonnaise
- 1 teaspoon (5 ml) Dijon mustard
Instructions
- Arrange air fryer rack at 400°F to ensure optimal heating for crispy preparation.
- Quickly toast bread slices in air fryer basket for approximately 1 minute each, creating golden-brown surfaces.
- Carefully remove protective casing from bologna slice and make strategic cuts to prevent unwanted curling during cooking.
- Position bologna in air fryer basket, cooking for 3 minutes, then carefully flip for an additional 3 minutes until edges become slightly crisp and edges curl slightly.
- Select one toasted bread slice and generously apply mayonnaise across entire surface for smooth, creamy texture.
- Layer prepared ingredients systematically: first cheese slice, followed by hot crispy bologna, fresh tomato slices, and crisp lettuce leaves.
- Spread tangy mustard on remaining toasted bread slice, creating a complementary flavor profile.
- Gently press sandwich halves together, ensuring ingredients remain securely positioned.
- Slice diagonally for elegant presentation and serve immediately with optional potato chips for added crunch.
Notes
- Prevent Curling: Make four strategic cuts in the bologna before air frying to ensure even cooking and prevent unwanted bubbling or uneven heating.
- Bread Texture Tip: Watch bread closely during toasting to achieve perfect golden-brown crispness without burning, as air fryers can heat quickly.
- Cheese Melting Hack: Let hot bologna sit directly on cheese for a minute after cooking to create a naturally melted, gooey texture without additional heating.
- Dietary Adaptation: Swap regular bologna for turkey or chicken bologna to reduce fat content, and use whole grain bread for added nutritional value and fiber.
- Prep Time: 5 minutes
- Cook Time: 7 minutes
- Category: Lunch, Snacks
- Method: Air Frying
- Cuisine: American
Nutrition
- Serving Size: 1
- Calories: 320
- Sugar: 3 g
- Sodium: 800 mg
- Fat: 15 g
- Saturated Fat: 6 g
- Unsaturated Fat: 8 g
- Trans Fat: 0 g
- Carbohydrates: 30 g
- Fiber: 2 g
- Protein: 14 g
- Cholesterol: 30 mg
Marcus Reed
Founder & Food Content Creator
Expertise
Single-recipe development, Seasonal and local ingredient utilization, Food photography and styling, Culinary writing and content creation
Education
Culinary Arts Certificate, Blue Ridge Community and Technical College, WV
Focus: Fundamentals of culinary techniques, emphasizing hands-on experience in small-scale kitchen settings.
Marcus’s story begins in Asheville, where good food and family kitchens shaped his earliest memories. After hands-on culinary training and a lot of trial (and a little error), he realized that real cooking isn’t about perfection, it’s about connection.
At Pan and Oven, Marcus crafts recipes that are easy to follow, packed with flavor, and built for real kitchens.